Prerequisites
To complete this guide, you will need an OpenAPI key which will be used for authentication. If you don’t have an OpenAI account, you can sign up for one here. You also need to have created an assistant in OpenAI. You can follow the guide on how to do it here. We recommend using the playground if you’re not quite familiar with the API yet. Take note of yourassistant_id as you will need it later.
We will guide you in creating a simple flow that will answer questions from your customers with a handoff condition to send the conversation to a human agent if the question is too complex for the AI to answer.
Basic Flow Structure
A Support GPT flow will have a specific structure. Here’s an example of how to set it up:
Step-by-Step Guide to Creating a Support GPT
Step 1: Create a New Flow
-
Navigate to Flows:
- Go to Flows in your Hilos account.
- Click on
+ Flow Editorto create a new flow.
-
Name Your Flow:
- Give your flow a name that reflects its purpose, such as “Support GPT Chatbot”.
-
Select the Channel and Type:
- Choose the appropriate channel (e.g., WhatsApp).
- Select “Inbound” as the flow type.
Step 2: Set Up the Initial Trigger
- Configure the Trigger:
- In the first step of the flow editor, set the flow type to incoming message. When publishing the flow set the trigger to Any Incoming Message, this ensures that the flow starts whenever a user sends a message to your support number.
Step 3: Add a Question Step
-
Add a Question Step:
- Click on the
+button to add a new step. - Select “Question” from the list of step types.
- Click on the
-
Configure the Question Step:
- Ask the user for their query. For example: Hi there! How can I assist you today?
Step 4: Save the User’s Response
-
Add an Update Contact Step:
- Click on the
+button after the question step. - Select “Update Contact” from the list of step types.
- Click on the
-
Configure the Update Contact Step:
- Save the user’s response inside a custom contact attribute called
gpt_response(or any name you prefer).
- Save the user’s response inside a custom contact attribute called
Step 5: Integrate GPT for Answering Questions
-
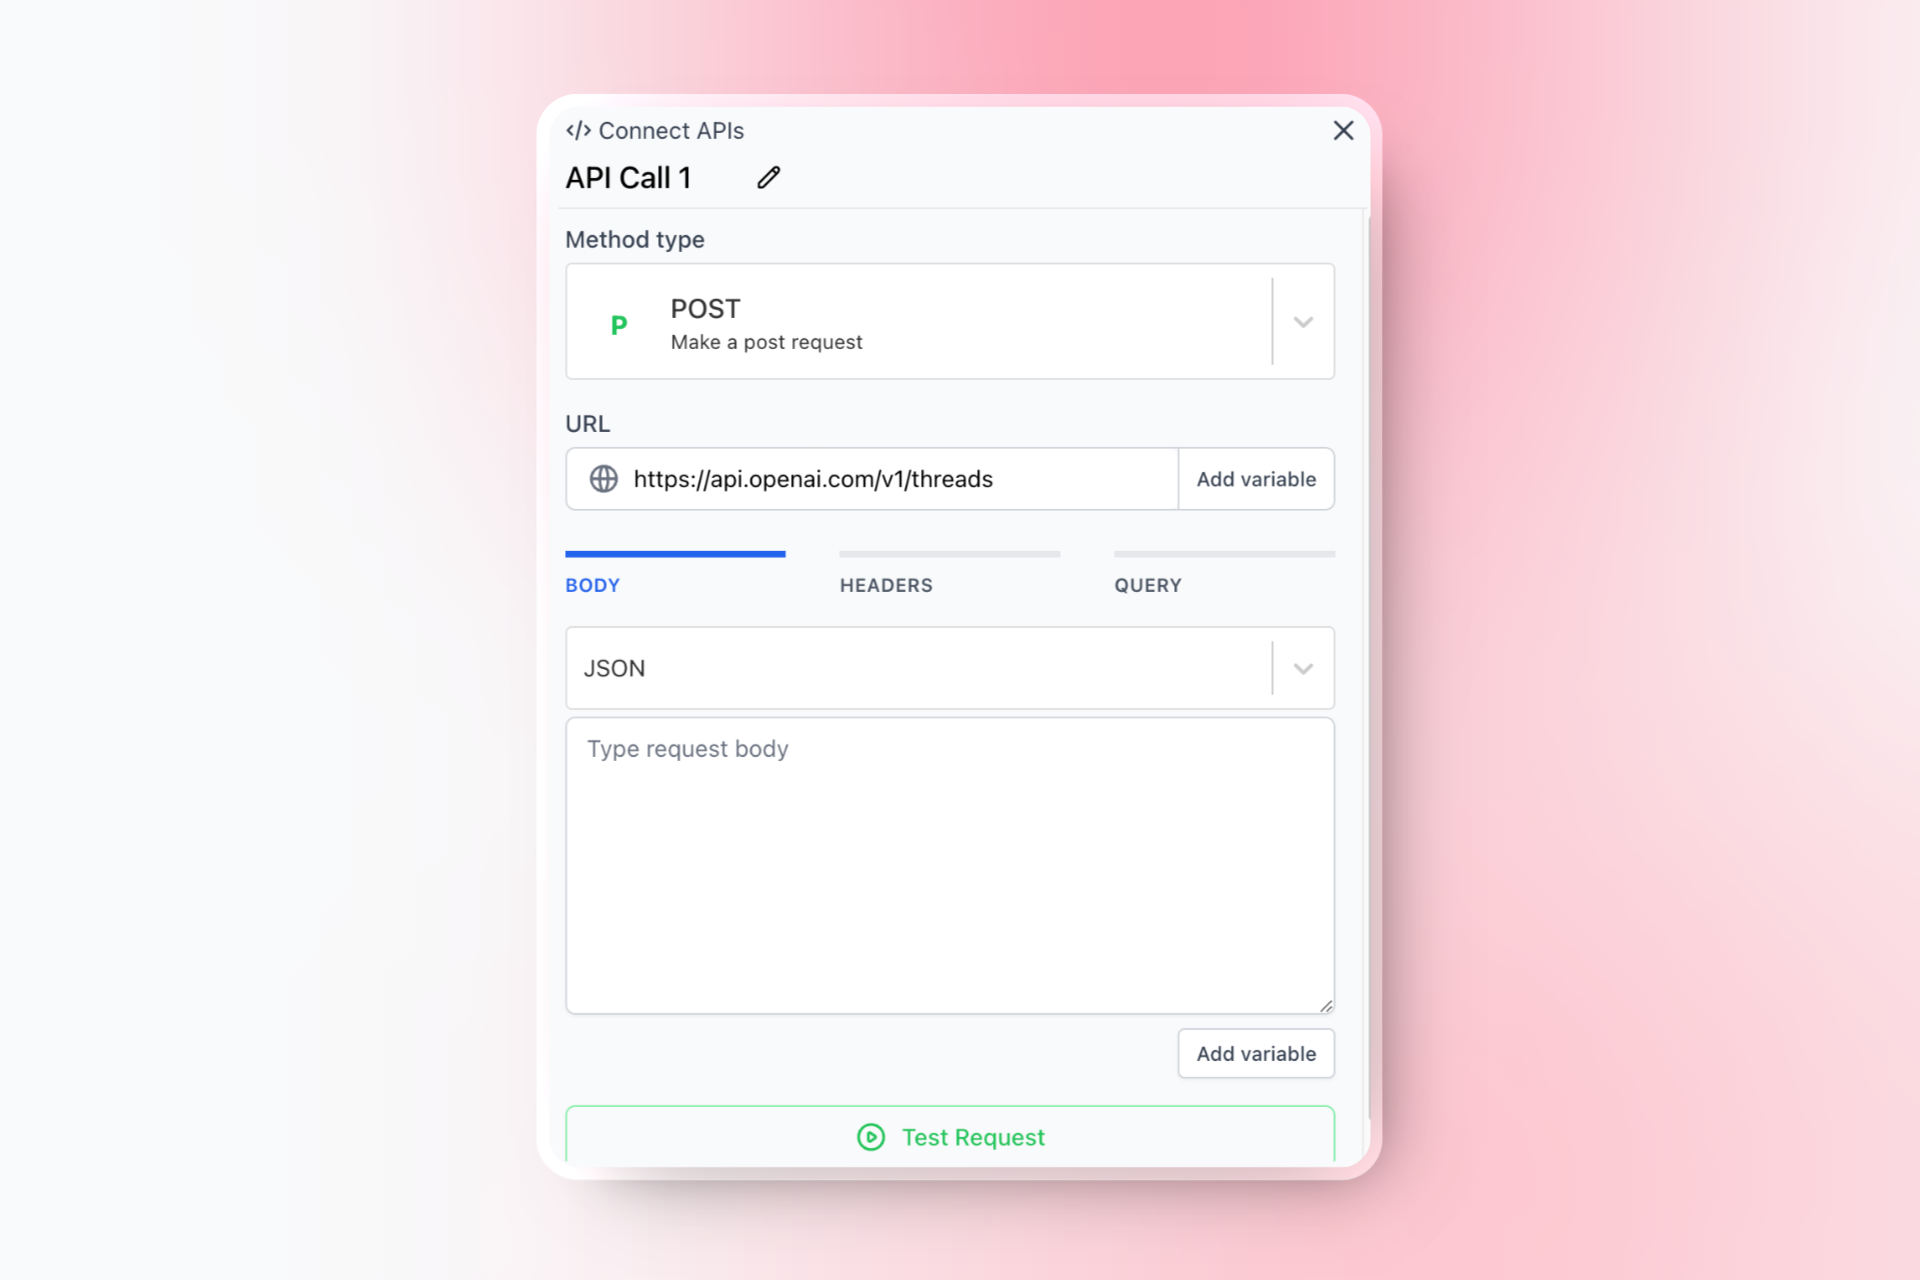
Add an API Step to Start the GPT Thread:
- Click on the
+button to add a new step. - Select “Connect API” from the list of step types.
- Set the method to
POST. - Enter the URL
https://api.openai.com/v1/threads. - Set the content type to
JSON. - Add an empty JSON object in the body.
- Click on the
-
Configure the Headers:
- Add the following headers:

- Add the following headers:
-
Handle the API Response:
- OpenAI will respond with a JSON object containing the
thread_id. Save this ID for future API calls.
- OpenAI will respond with a JSON object containing the
Step 6: Send the User’s Query to GPT
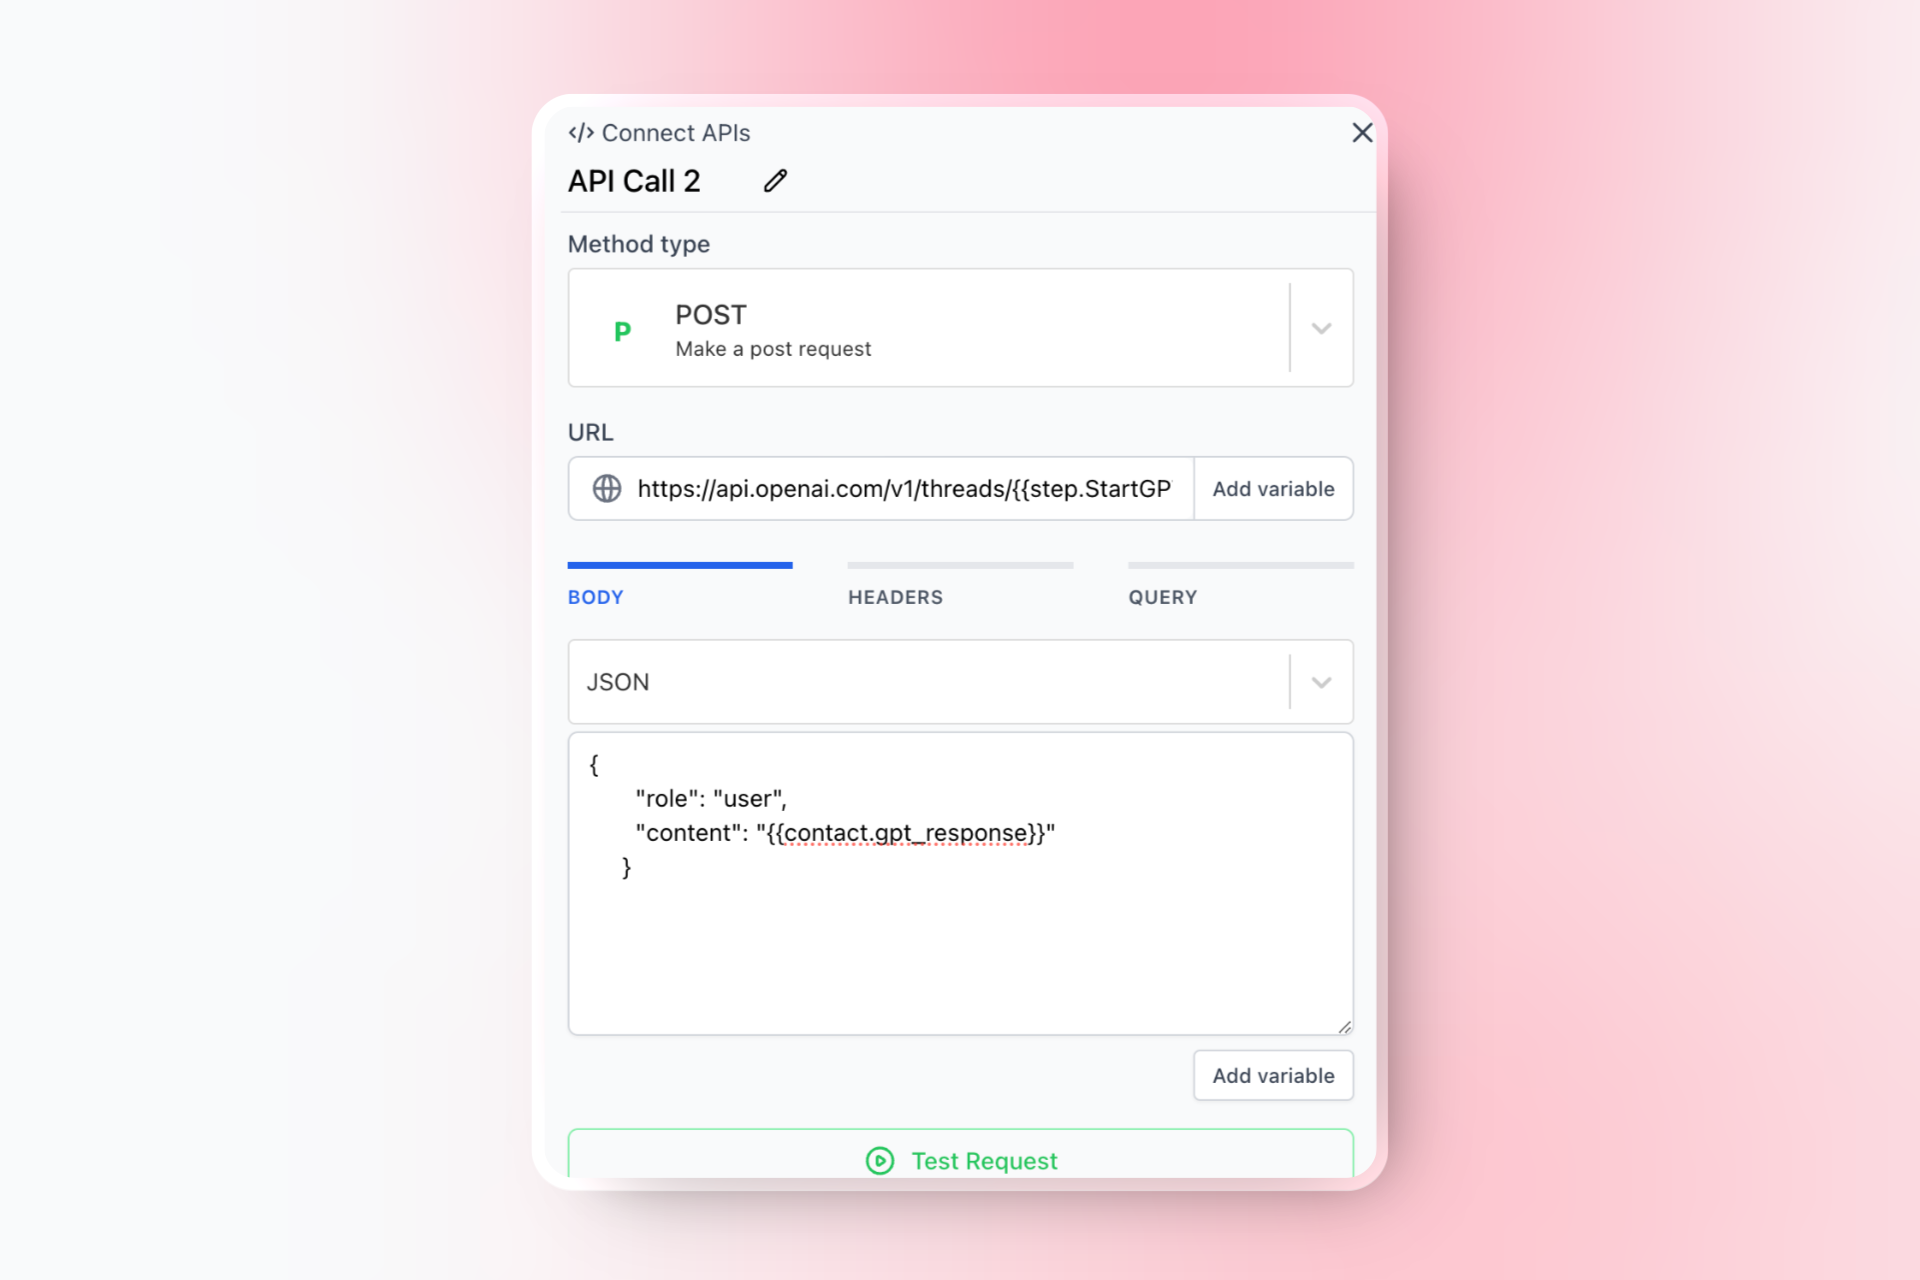
- Add an API Step to Send the Message:
- Click on the
+button to add a new step. - Select “Connect API” from the list of step types.
- Set the method to
POST. - Enter the URL
https://api.openai.com/v1/threads/{{step.StartGPTThread.response.id}}/messages. - Set the content type to
JSON. - Add the following JSON object in the body:
- Click on the
Step 7: Run the GPT Assistant
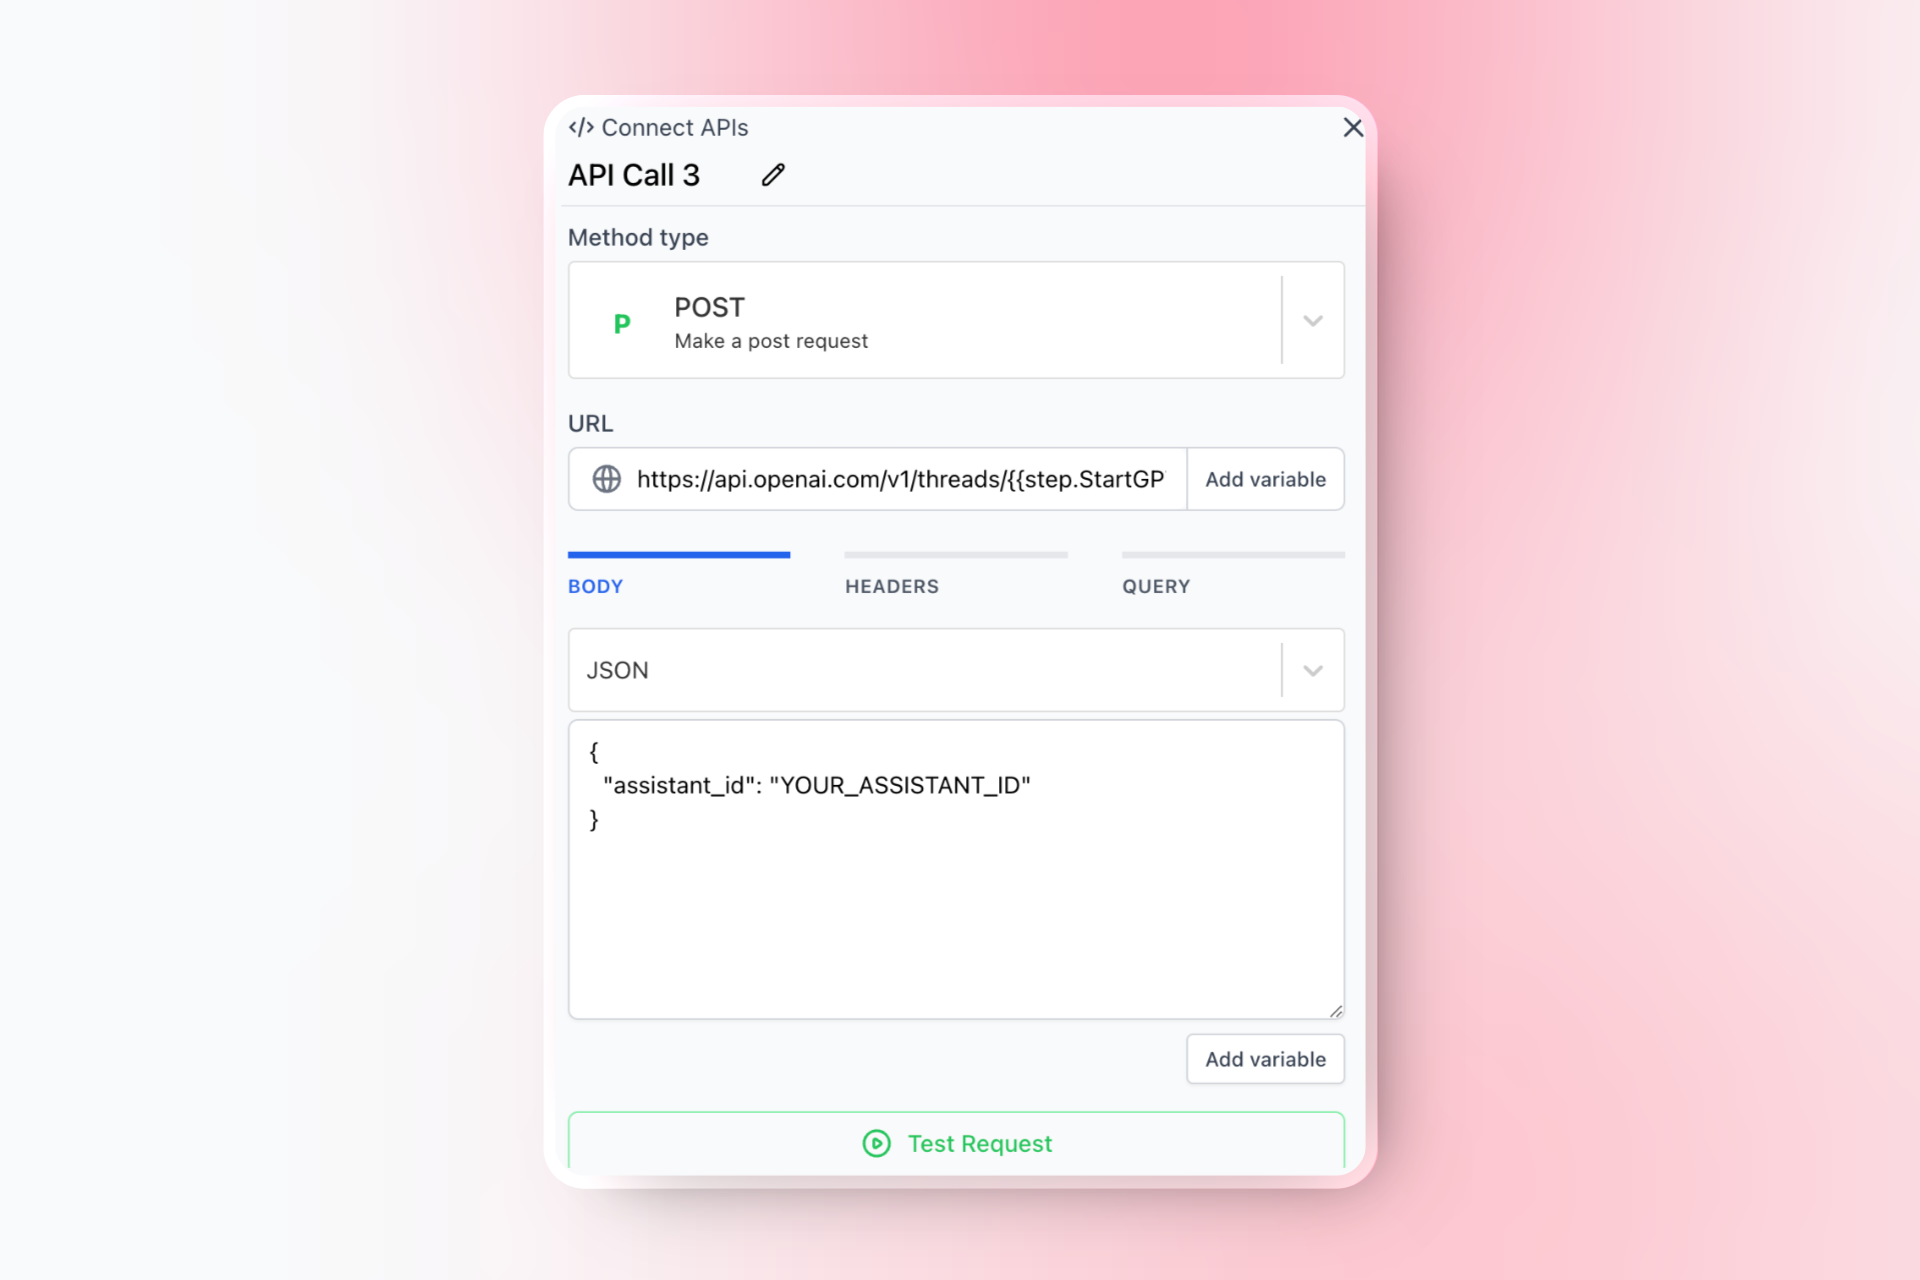
- Add an API Step to Run the Assistant:
- Click on the
+button to add a new step. - Select “Connect API” from the list of step types.
- Set the method to
POST. - Enter the URL
https://api.openai.com/v1/threads/{{step.StartGPTThread.response.id}}/runs. - Set the content type to
JSON. - Add the following JSON object in the body:
- Click on the
Step 8: Check for GPT Response
-
Add an API Step to Check for Response:
- Click on the
+button to add a new step. - Select “Connect API” from the list of step types.
- Set the method to
GET. - Enter the URL
https://api.openai.com/v1/threads/{{step.StartGPTThread.response.id}}/messages. - Set the content type to
JSON.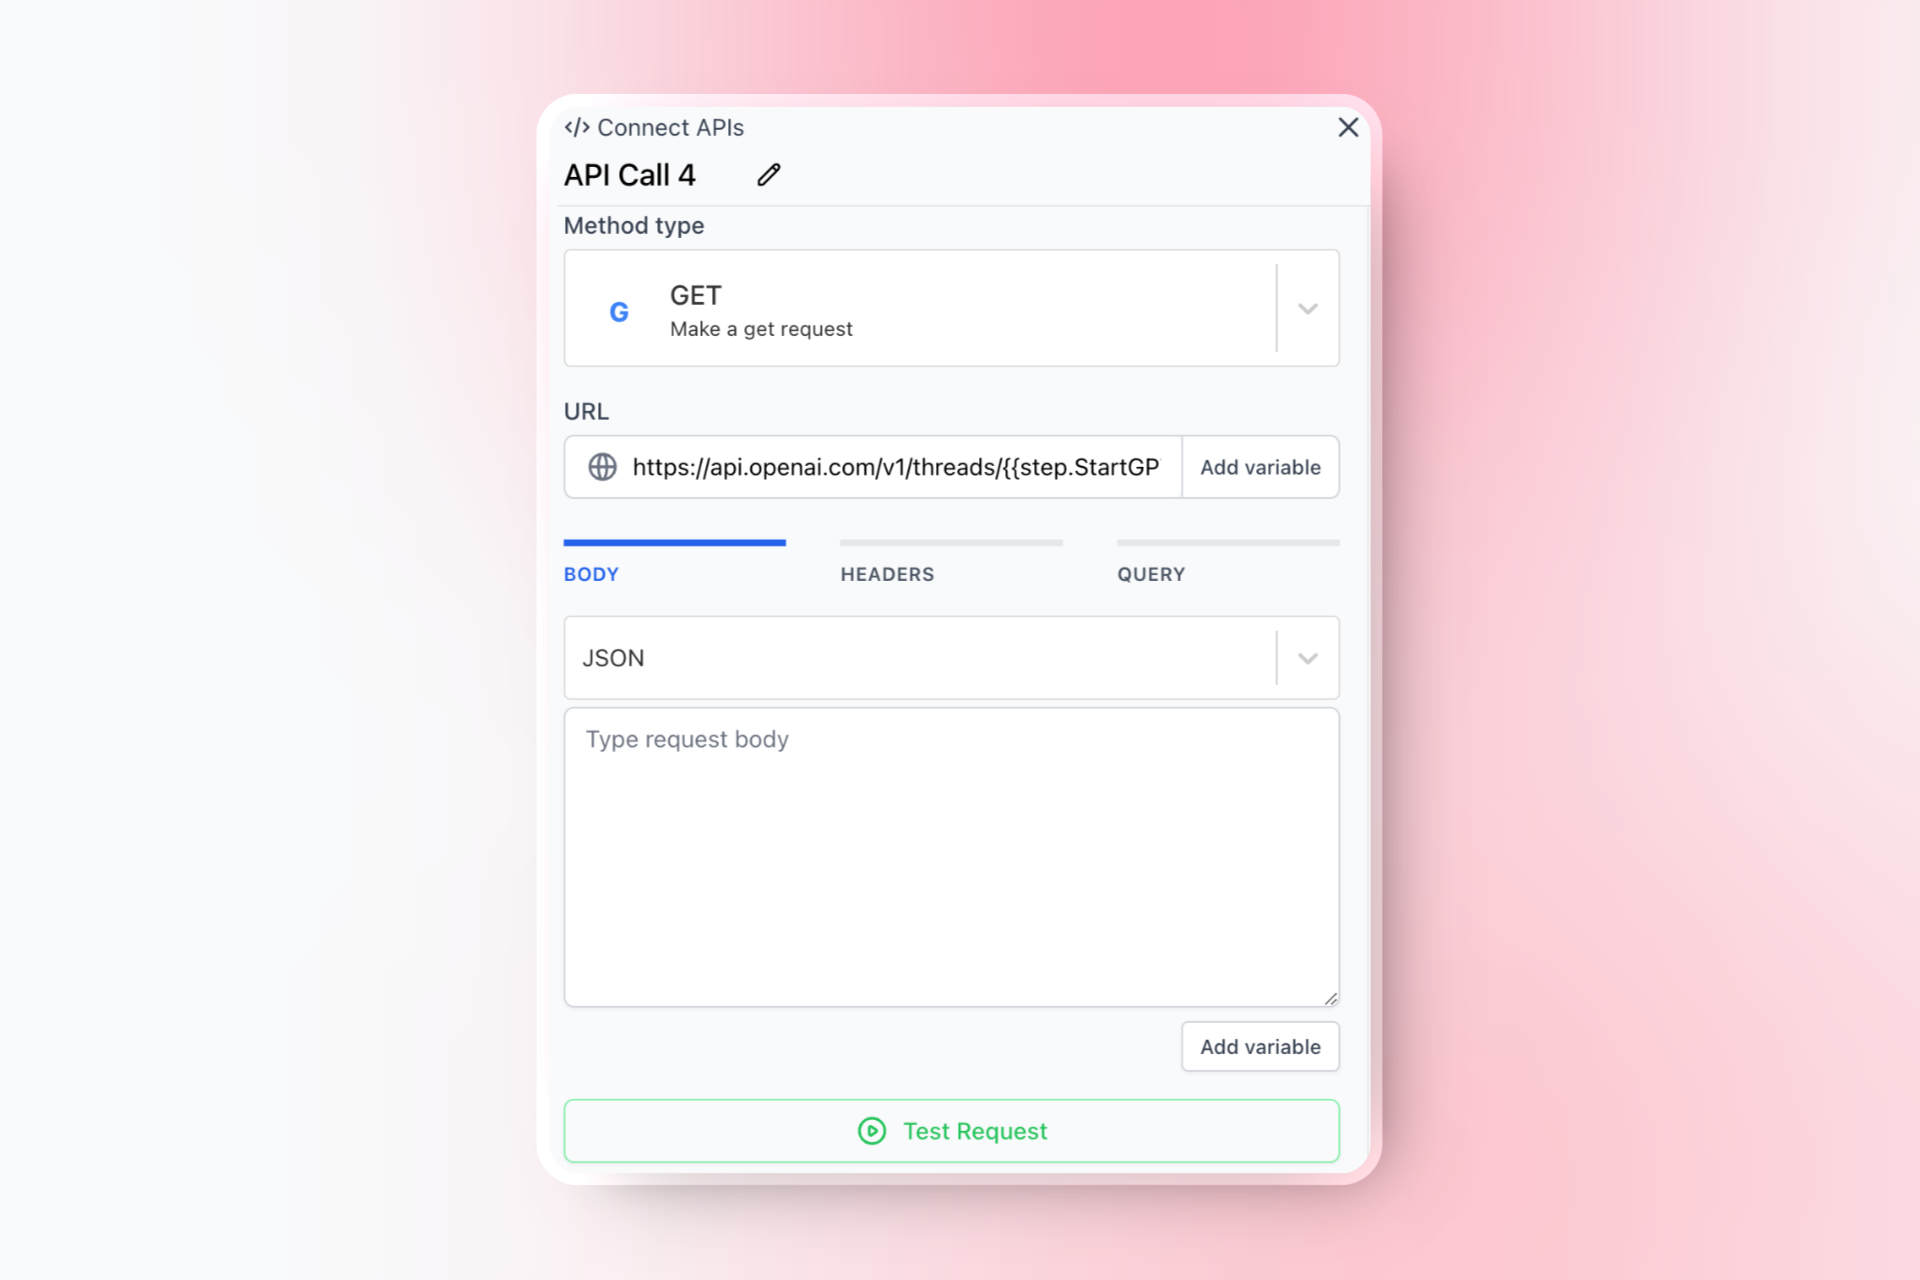
- Click on the
-
Add a Conditional Step:
- Click on the
+button to add a new step. - Select “Conditional” from the list of step types.
- Set the condition to check if the GPT response is available.
- Click on the
-
Configure the False Branch:
- Add a delay step of 10 seconds.
- Add a go-to step to loop back to the API step that checks for the GPT response.
-
Configure the True Branch:
- Check if the response from GPT indicates the need for human intervention.
Step 9: Handle Handoff to Human Agent
-
Add a Conditional Step:
- Click on the
+button to add a new step. - Select “Conditional” from the list of step types.
- Set the condition to check for specific keywords or phrases in the GPT response that indicate the need for human intervention.
- Click on the
-
Configure the True Branch:
- Add a message step to inform the user that their query is being handed off to an agent. For example:
- Add a message step to inform the user that their query is being handed off to an agent. For example:
-
Add an Assign Team Step:
- Click on the
+button after the message step. - Select “Assign Team” from the list of step types.
- Choose the support team to which you want to assign the conversation.
- Click on the
-
Configure the False Branch:
- Add a message step to send the GPT response to the user if no human intervention is needed.
- Add a new question step to ask another question and keep the conversation flowing.
- Add an update contact step to save the new user response to the same custom contact attribute.
- Use a go-to step to loop back to Step 6: Send the User’s Query to GPT.
Step 10: Save and Publish the Flow
Publish the Flow:- Click on the “Publish” button to make the flow active.
Example Flow Structure
Your flow should now have the following structure:- Trigger: Any incoming message.
- Question Step: Ask the user for their query.
- Update Contact Step: Save the user’s response.
- API Step: Start the GPT thread.
- API Step: Send the user’s query to GPT.
- API Step: Run the GPT assistant.
- API Step: Check for GPT response.
- Conditional Step: Check if the GPT response is available.
- False Branch:
- Delay Step: Wait for 10 seconds.
- Go To Step: Loop back to check for GPT response.
- True Branch:
- Conditional Step: Check if human intervention is needed.
- True Branch:
- Message Step: Inform the user about the handoff.
- Assign Team Step: Assign the conversation to the support team.
- False Branch:
- Message Step: Send the GPT response to the user.
- Question Step: Ask another question to keep the conversation flowing.
- Update Contact Step: Save the new user response.
- Go To Step: Loop back to Step 6: Send the User’s Query to GPT.
- True Branch:
- Conditional Step: Check if human intervention is needed.
- False Branch:
Final Steps
- Test the Flow and Optimize:
- Send a test message to your support number to ensure the flow triggers correctly and the GPT responses are accurate. Also take into account the real conversation your users might have and adjust the GPT prompt and knowledge base accordingly to improve the responses.