Why It’s Useful
For support agents, having detailed customer information readily available can streamline the resolution process and enhance the customer experience. By keeping contact and conversation details organized and up-to-date, agents can quickly understand the context of an issue, personalize interactions, and offer more efficient support. This not only improves customer satisfaction but also boosts agent productivity.Benefits of Using the Sidebar
Step by Step
1
Navigate to the Inbox
Open the Hilos app and navigate to the Inbox where you can see all your ongoing conversations.
2
Select a Conversation
Click on the conversation with the customer whose information you want to add or update.
3
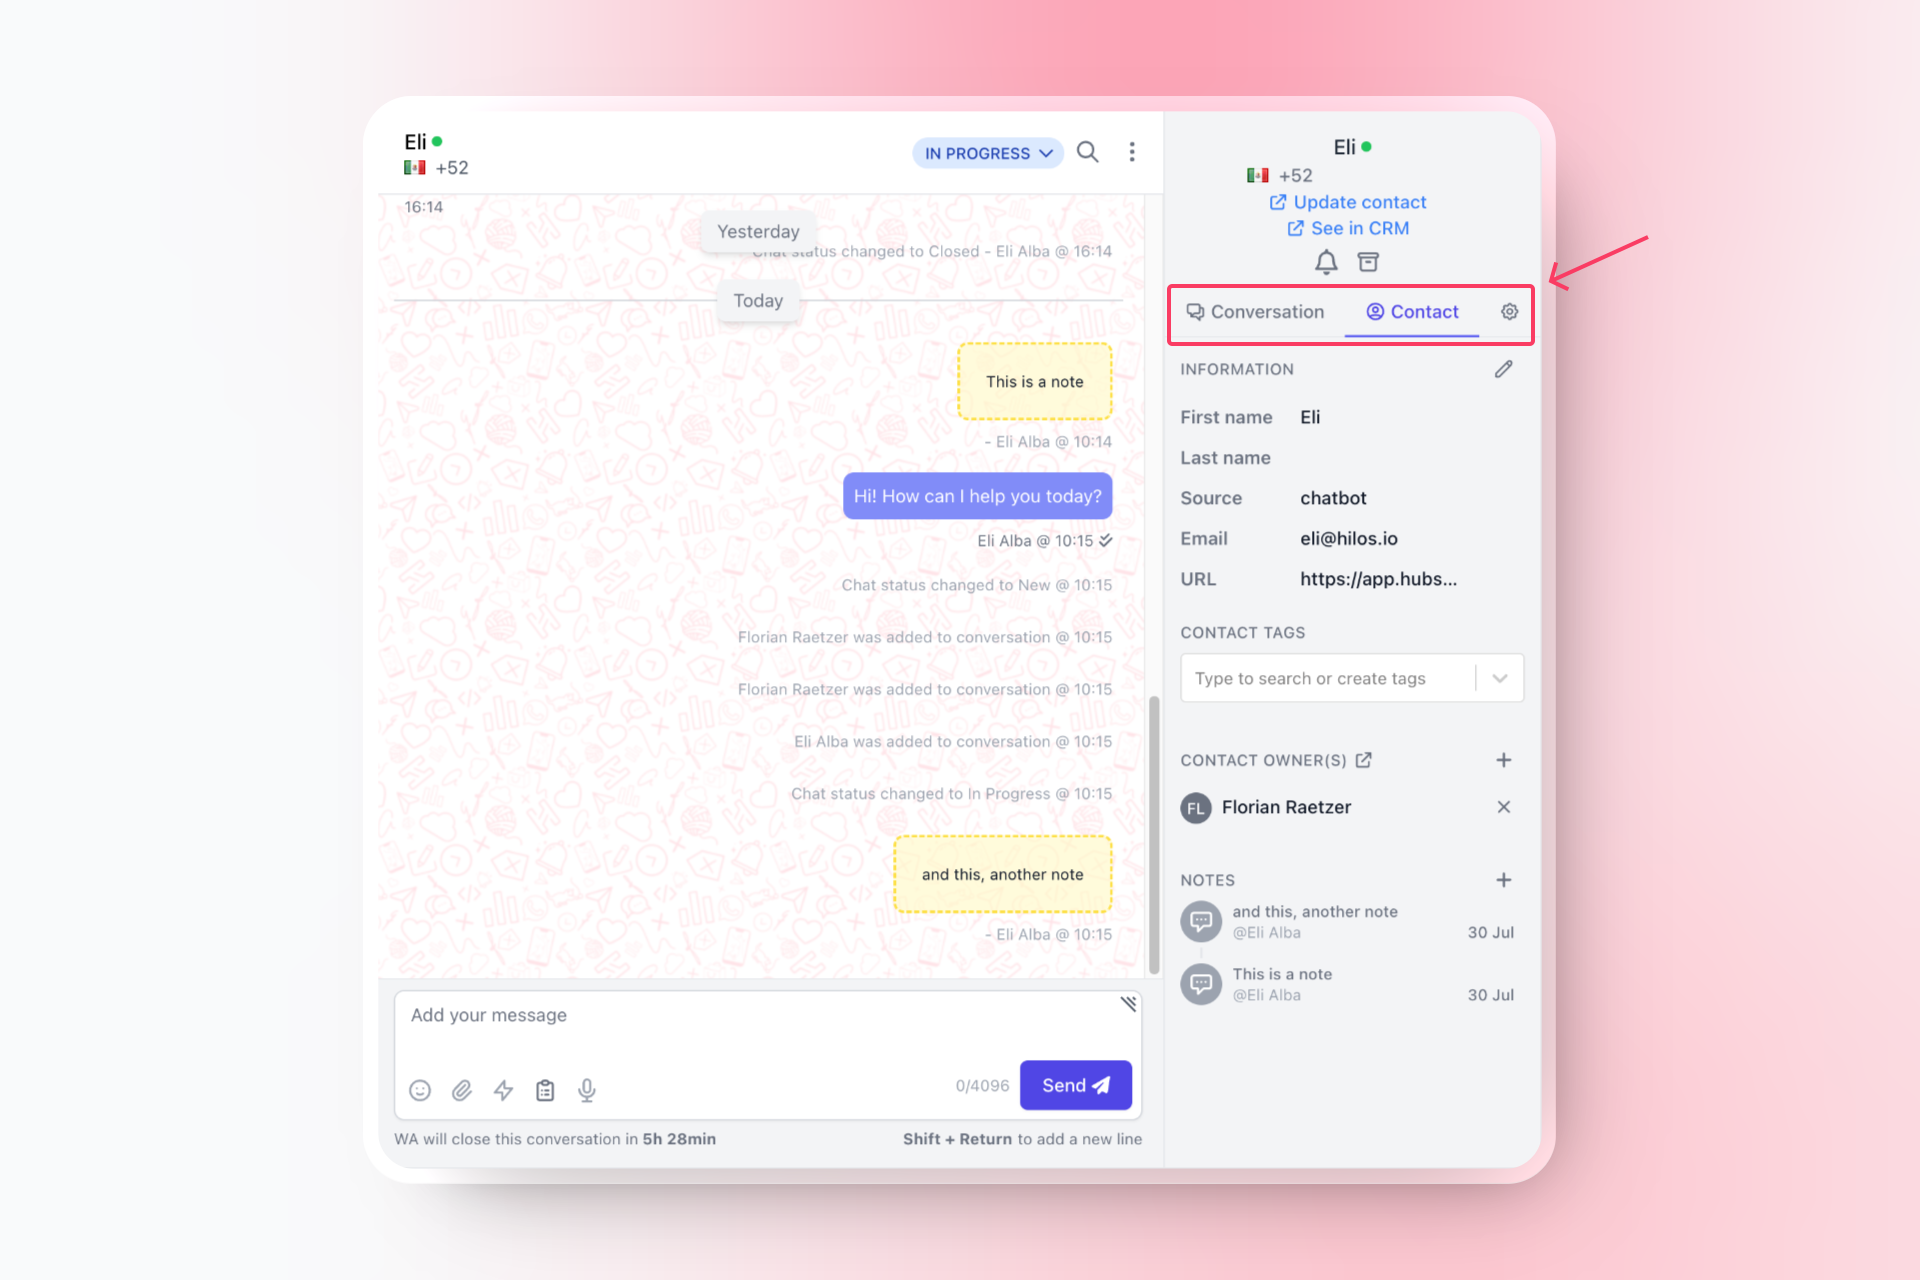
Open the Sidebar
On the right side of the conversation window, you will see a sidebar with two main tabs: Contact and Conversation.
4
Contact Tab
- Contact Information: Here, you can view and edit the customer’s basic information such as their name, email, and phone number. Click on the pencil icon to edit these fields.
- Contact Tags: Add or remove tags to categorize the contact. Click on the plus icon to add a new tag or the x icon to remove an existing tag.
- Default Assignees: Assign specific team members to handle all future conversations with this contact. Click on the plus icon to add an assignee.
- Contact Notes: Add notes about the contact that will be visible to all team members. Click on the plus icon to add a new note.
5
Conversation Tab
- Conversation Tags: Add or remove tags specific to the current conversation. Click on the plus icon to add a new tag or the x icon to remove an existing tag.
- Conversation Assignee: Assign the current conversation to a specific team member. Click on the plus icon to add an assignee.
- Conversation History: View the history of all past conversations with this contact. This section shows the assignee, date, tags, and initial message of each conversation.
6
Save Changes
After making the necessary updates in either the Contact or Conversation tab, make sure to save your changes by clicking the “Save” button.
 Imagine a customer named Jane who has contacted your support team multiple times about different issues. By using the sidebar, you can quickly add tags to her contact profile, such as “VIP Customer” and “Frequent Inquirer.” You can also add notes about her preferences and past issues, ensuring that any agent who interacts with Jane can provide personalized and efficient support. When Jane contacts your team again, the assigned agent can immediately see her history and provide a tailored response, improving Jane’s overall experience with your company.
By effectively utilizing the sidebar to manage customer information, support agents can enhance their efficiency, improve customer satisfaction, and foster better team collaboration. Start using these features today to take your customer support to the next level!
Imagine a customer named Jane who has contacted your support team multiple times about different issues. By using the sidebar, you can quickly add tags to her contact profile, such as “VIP Customer” and “Frequent Inquirer.” You can also add notes about her preferences and past issues, ensuring that any agent who interacts with Jane can provide personalized and efficient support. When Jane contacts your team again, the assigned agent can immediately see her history and provide a tailored response, improving Jane’s overall experience with your company.
By effectively utilizing the sidebar to manage customer information, support agents can enhance their efficiency, improve customer satisfaction, and foster better team collaboration. Start using these features today to take your customer support to the next level!