Hilos’ integration with HubSpot allows you to efficiently manage your new leads by leveraging powerful automation tools. By combining Hilos’ Flows, contact owner sync, and HubSpot Workflows, you can streamline your lead management process and ensure that leads are nurtured effectively through their lifecycle stages.Documentation Index
Fetch the complete documentation index at: https://hilos-40.mintlify.app/llms.txt
Use this file to discover all available pages before exploring further.
Why Use Hilos’ HubSpot Integration?
Integrating Hilos with HubSpot provides several benefits:- Automated lead management: Use Hilos’ Flows to automate initial interactions with new leads.
- Seamless contact owner sync: Ensure that leads are assigned to the appropriate contact owners in HubSpot.
- Advanced automation: Utilize HubSpot Workflows to manage different automations based on the lifecycle stages of the lead.
Setting Up the HubSpot Integration
To begin, you’ll need to set up the HubSpot integration in your Hilos account. Follow these steps:1. Connect HubSpot to Hilos
- Visit Hilos External Apps.
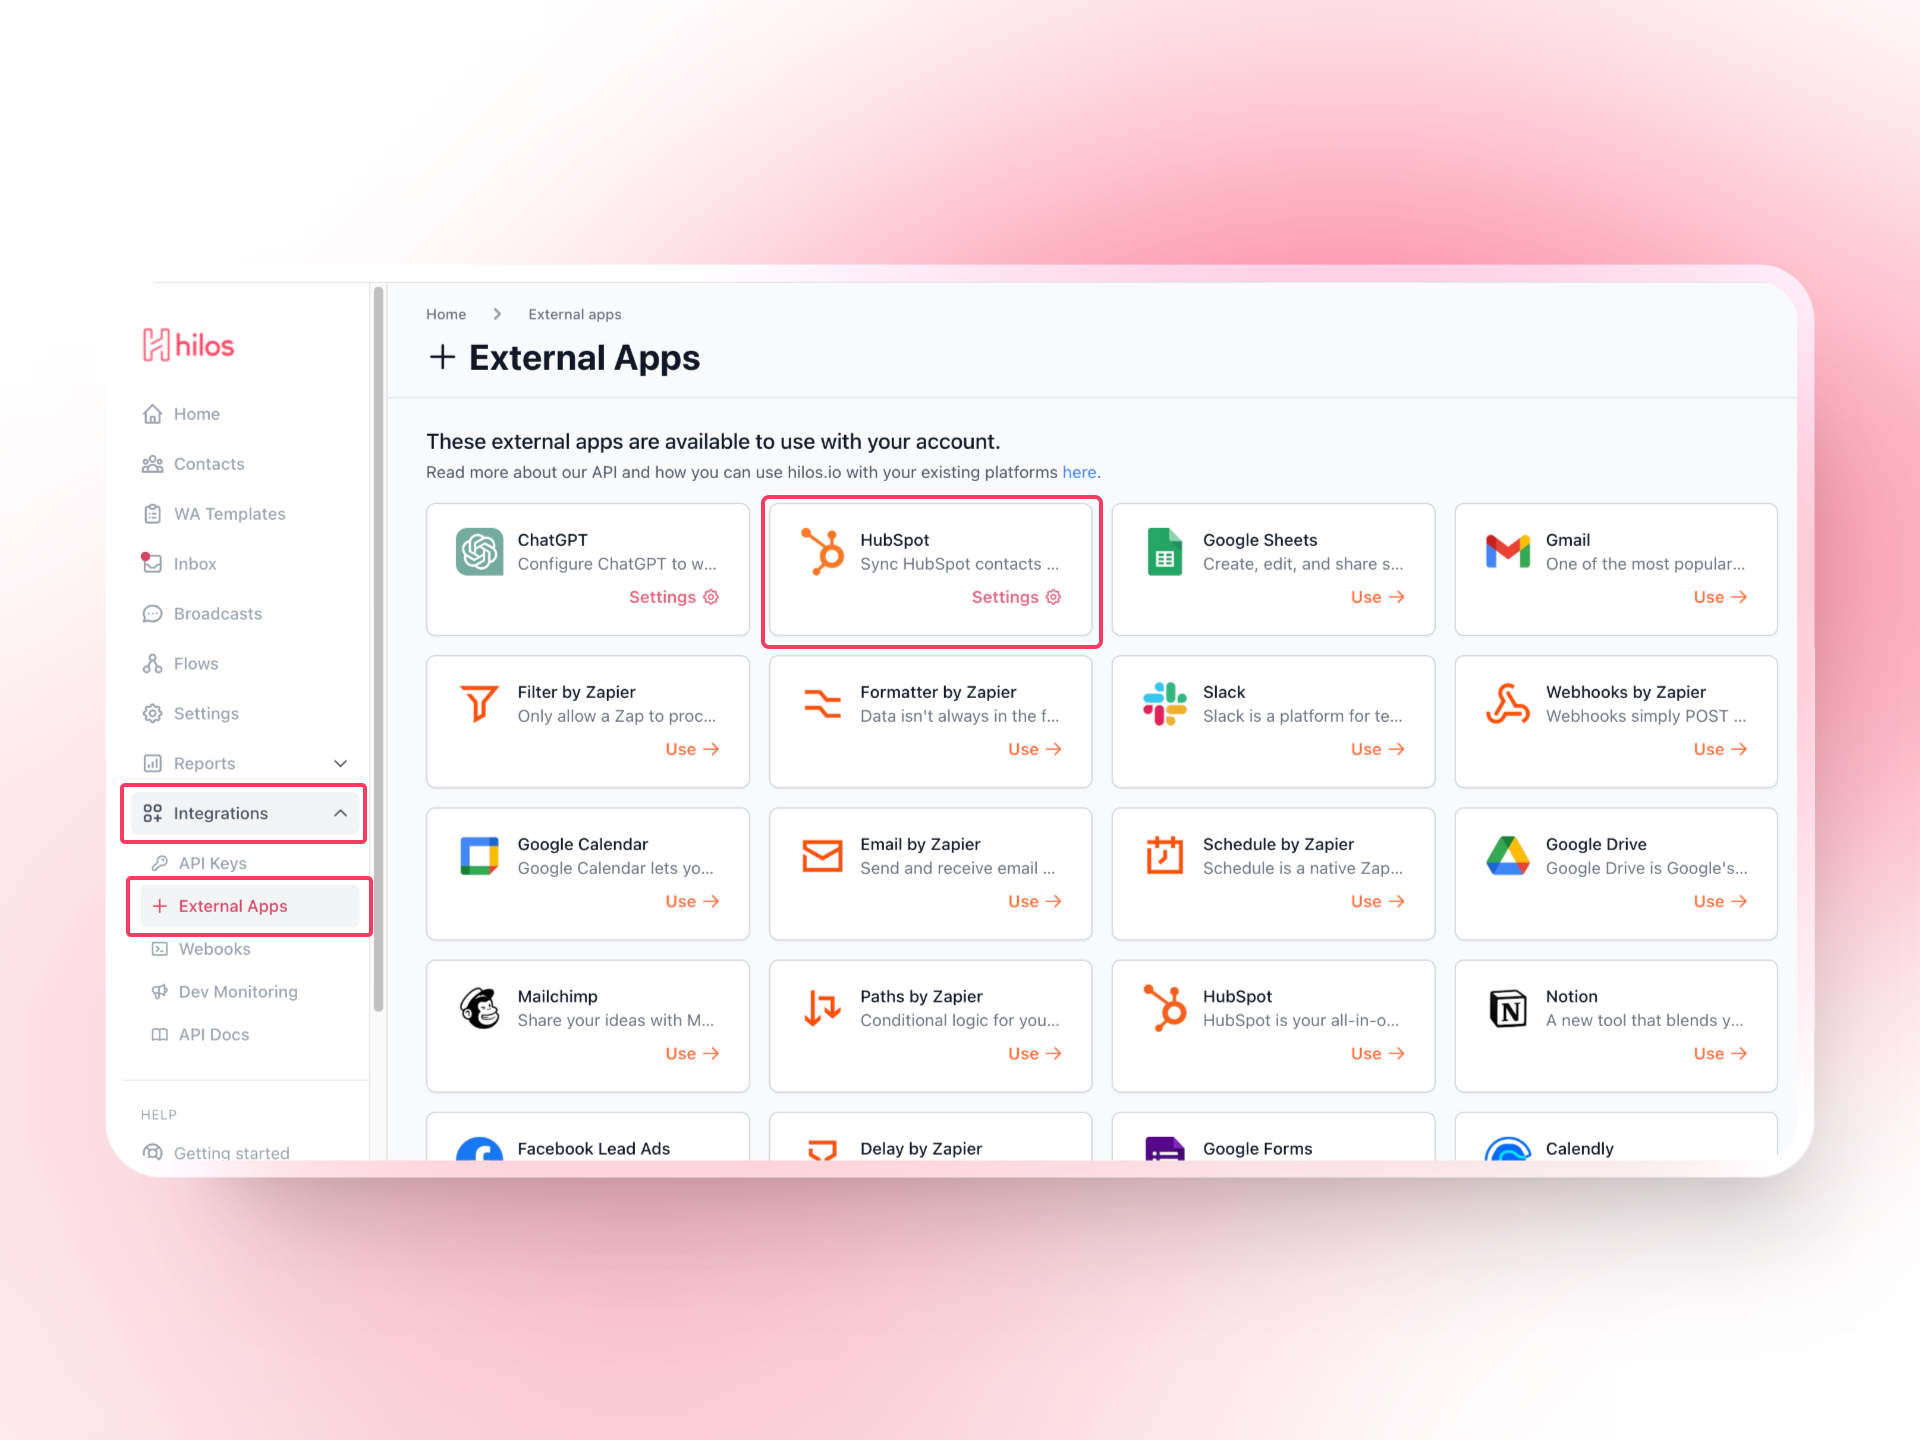
- Click on Connect App next to HubSpot.
- Accept the permissions to allow Hilos to access your HubSpot account.
- Once redirected to Hilos, click on Initial sync to sync your HubSpot contacts.
The initial sync can take a while based on the number of contacts in your HubSpot account.
Using Hilos’ Flows to Manage New Leads
Hilos’ Flows can help you automate the initial interactions with new leads. Here’s how to set it up:1. Create a Flow
Navigate to Flows in your Hilos account and click+ Flow Editor to create a new flow. Give your flow a name, select the channel, and type.
2. Design the Flow
Use the flow editor to design your lead management flow. You can add various steps to automate interactions:- Template Step: Send prewritten messages to greet new leads and provide initial information. Learn when you need to use templates.
- Question Step: Ask qualifying questions to gather information about the lead, learn more about question step.
- Conditional Step: Branch the flow based on lead responses, learn more about conditional step.
- Contact Update Step: Update lead information in HubSpot based on their responses,learn more about contact update step.
- Assignation Step: Assign leads to the appropriate contact owners,learn more about assignation steps.
HubSpot Flow Steps
Create or Update contacts in HubSpot Send to HubSpot the most relevant data from the conversation and assign it to your contact’s basic or custom properties.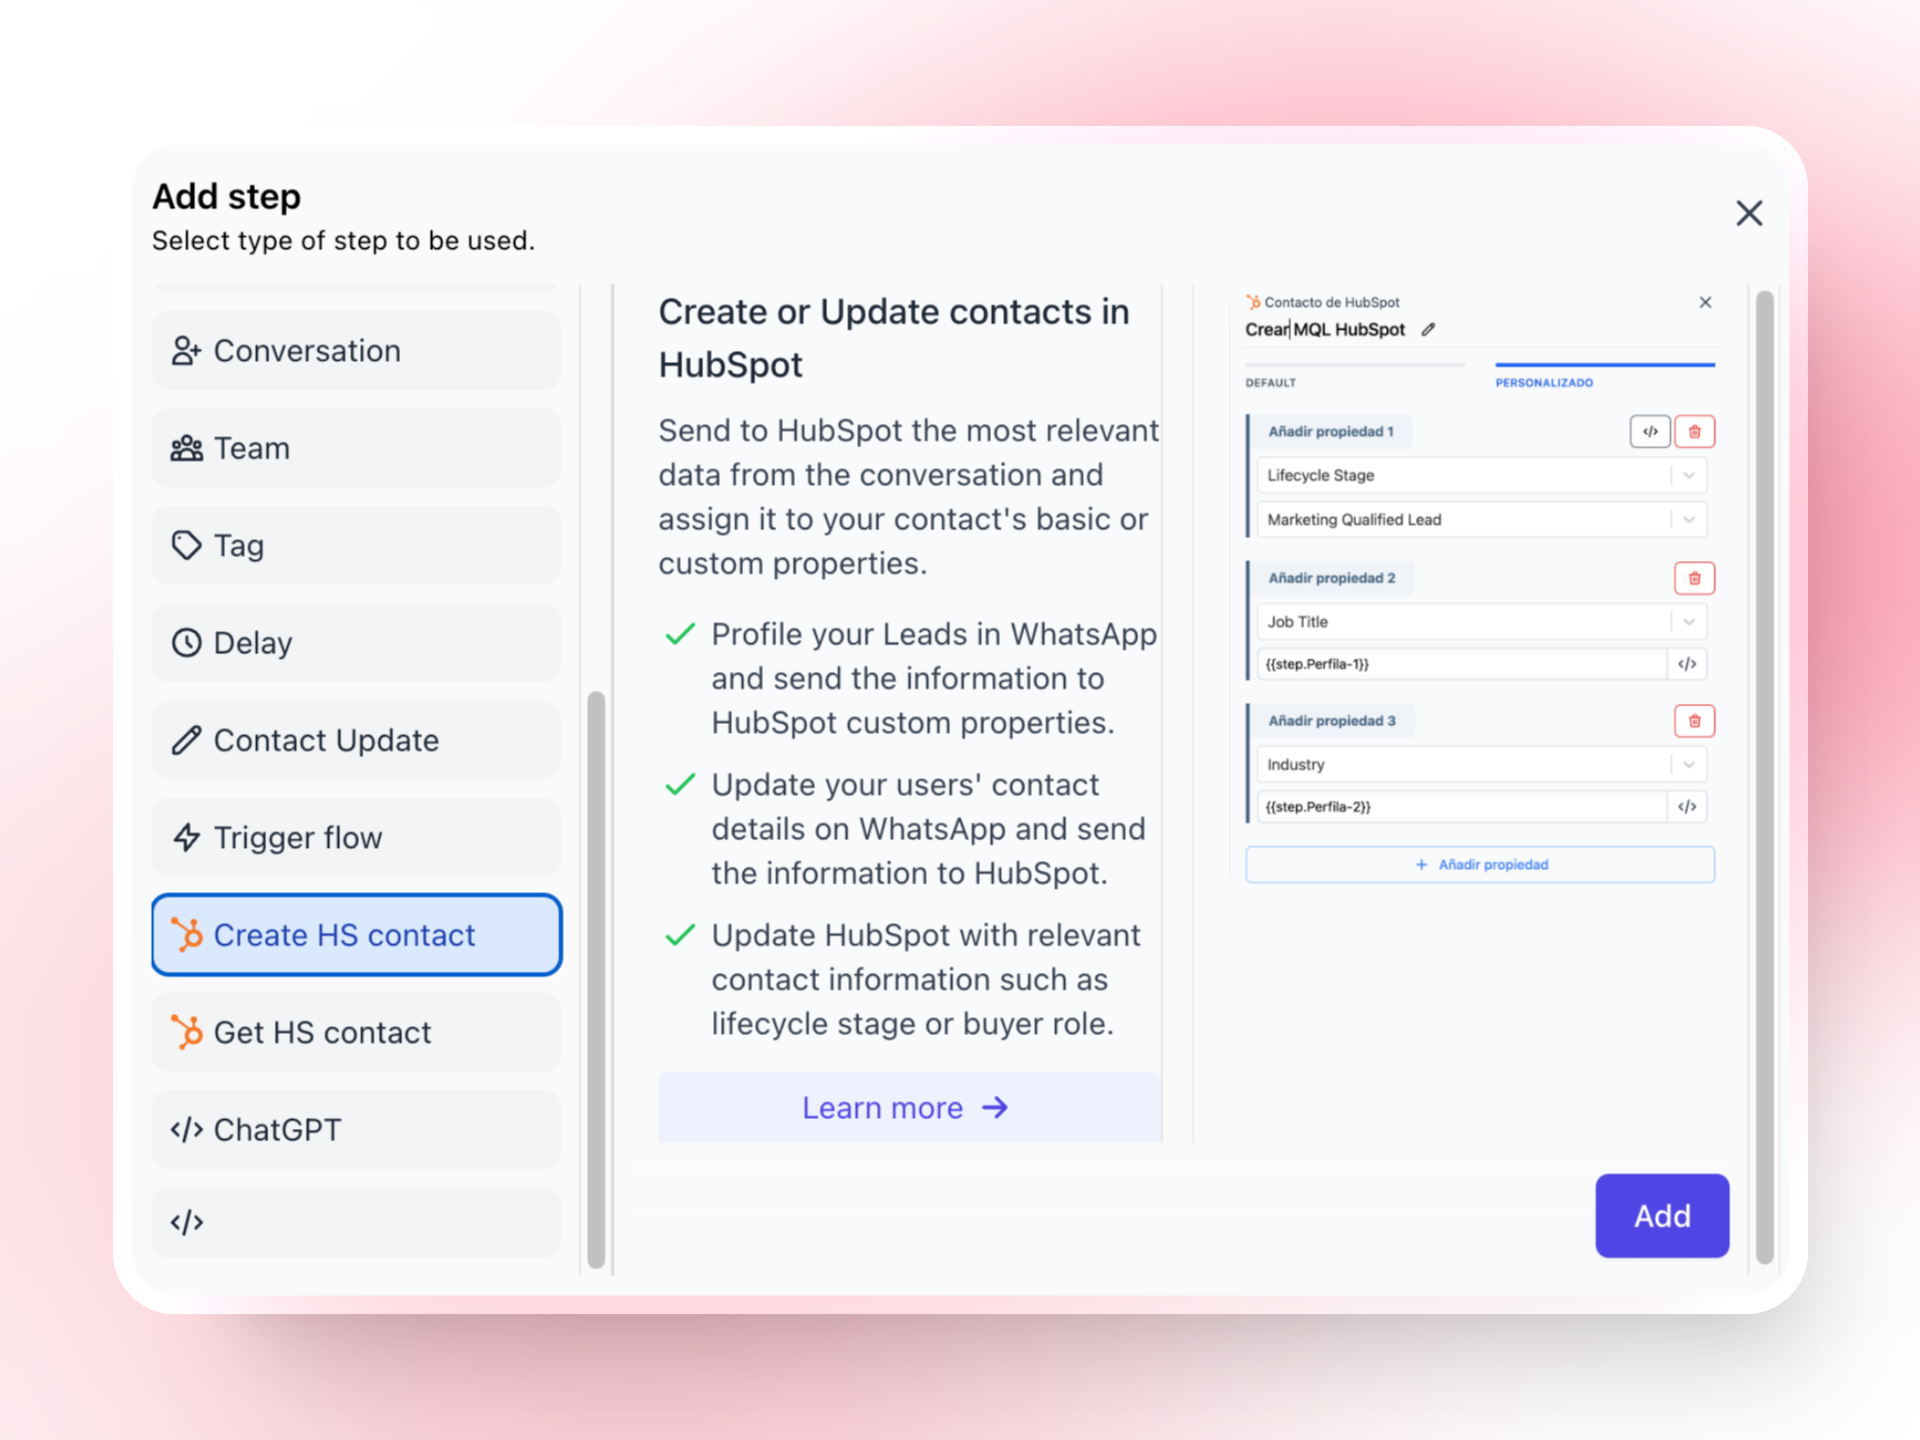 Get HubSpot Contact Information
Get relevant contact properties in HubSpot to use in your replies in WhatsApp.
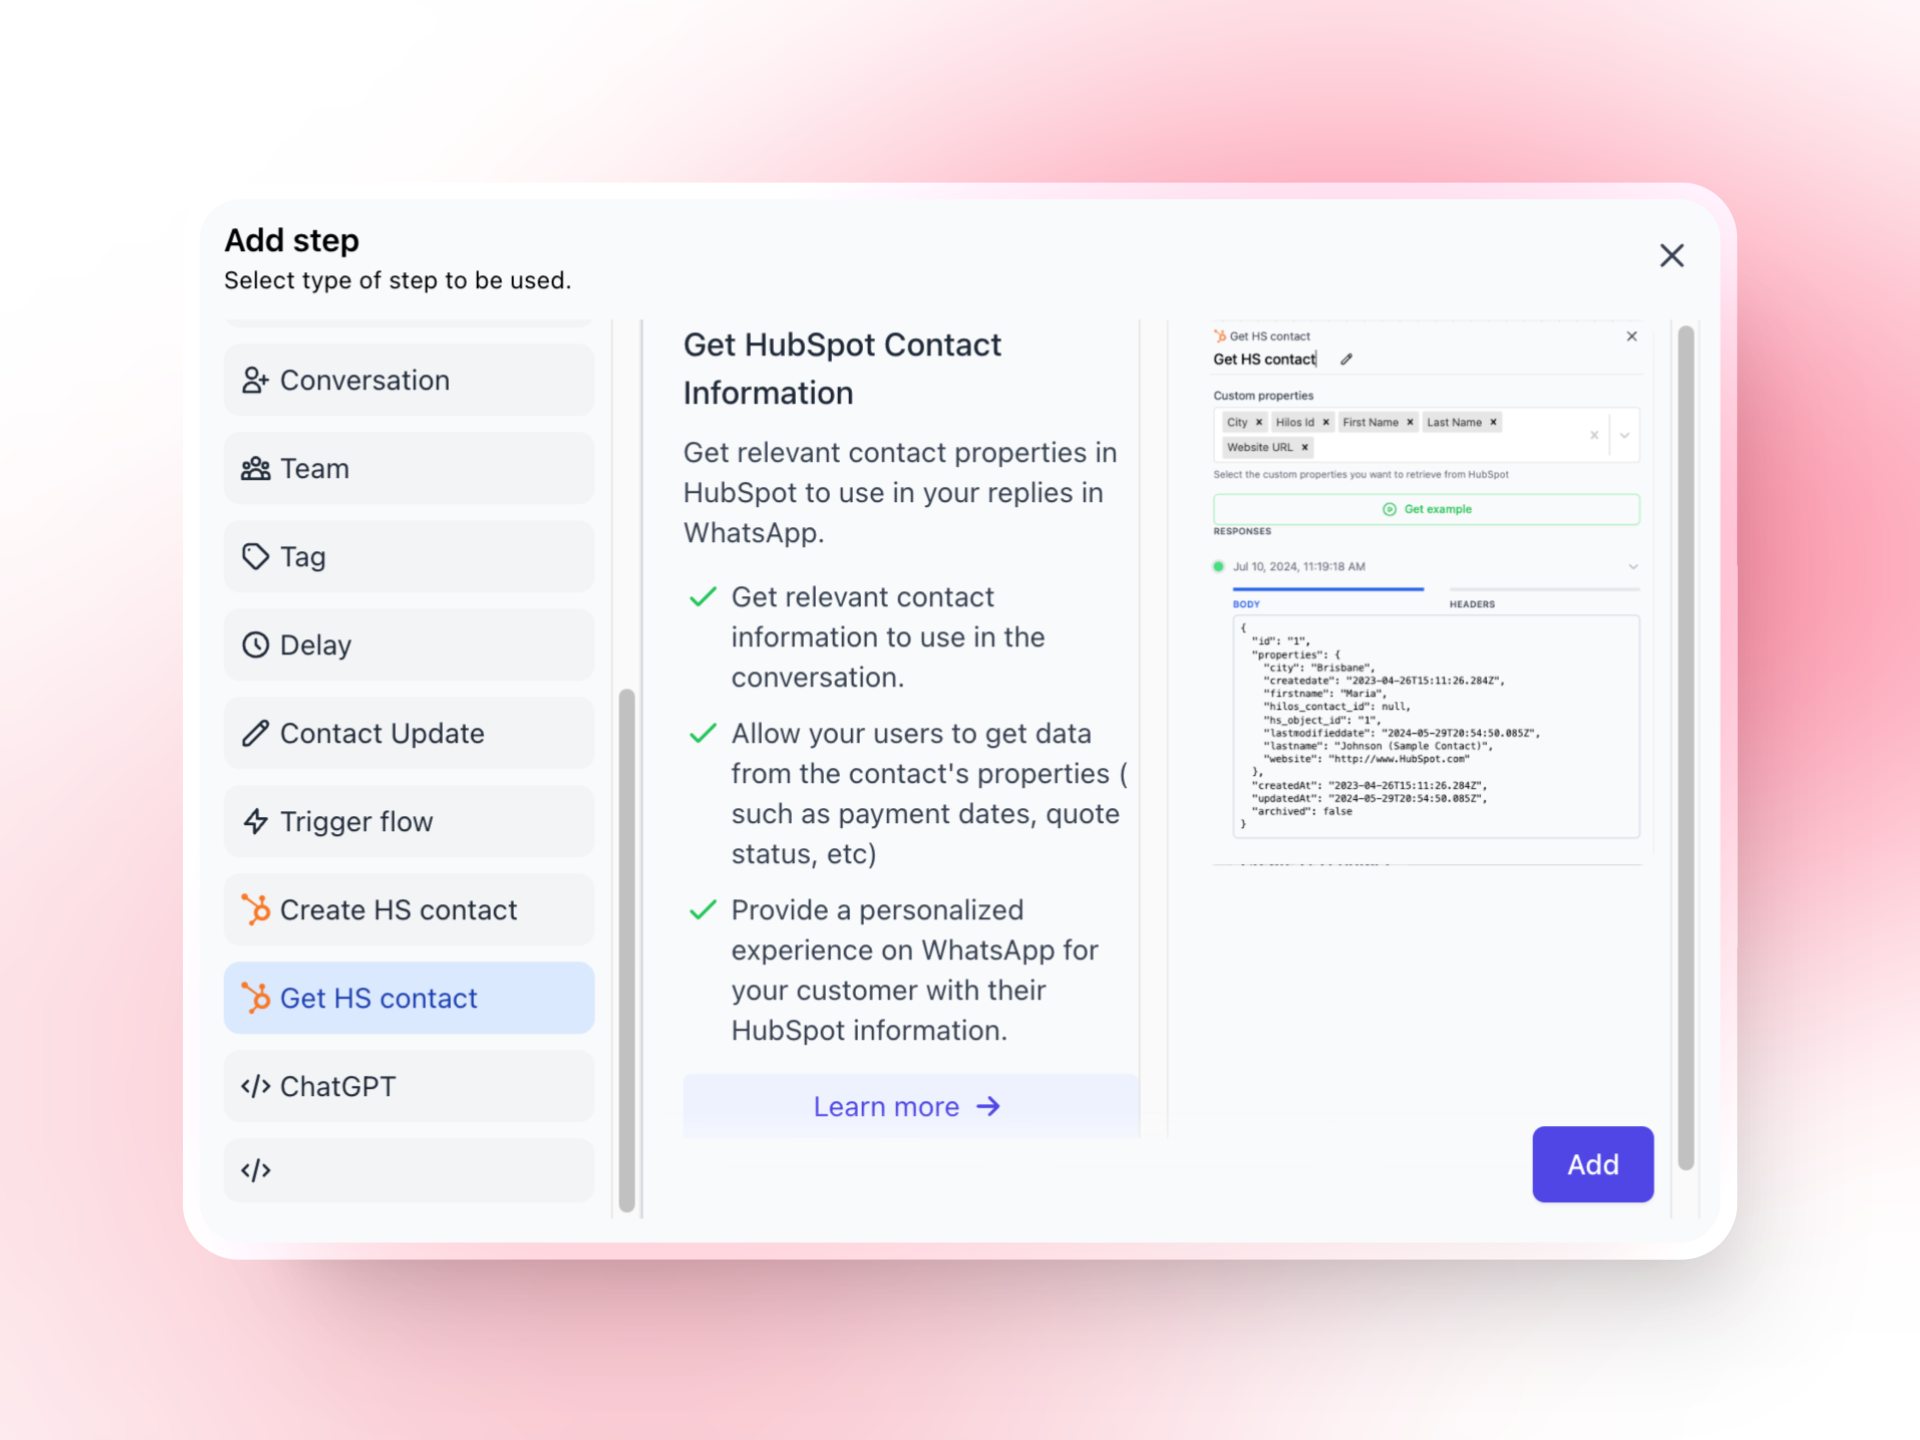
Get HubSpot Contact Information
Get relevant contact properties in HubSpot to use in your replies in WhatsApp.
3. Automate Lead Qualification
Set up automated responses for qualifying questions using the question and conditional steps. This ensures that leads are qualified efficiently and receive relevant information based on their responses.4. Sync Contact Owners
We use the hubspot_owner_id field to determine who to assign in Hilos. If your agents exits in both platforms with the same email, we can sync the owner of a contact in HubSpot as the default assigne in Hilos. This ensures that leads are assigned to the appropriate contact owners in HubSpot, facilitating smooth handoffs and follow-ups.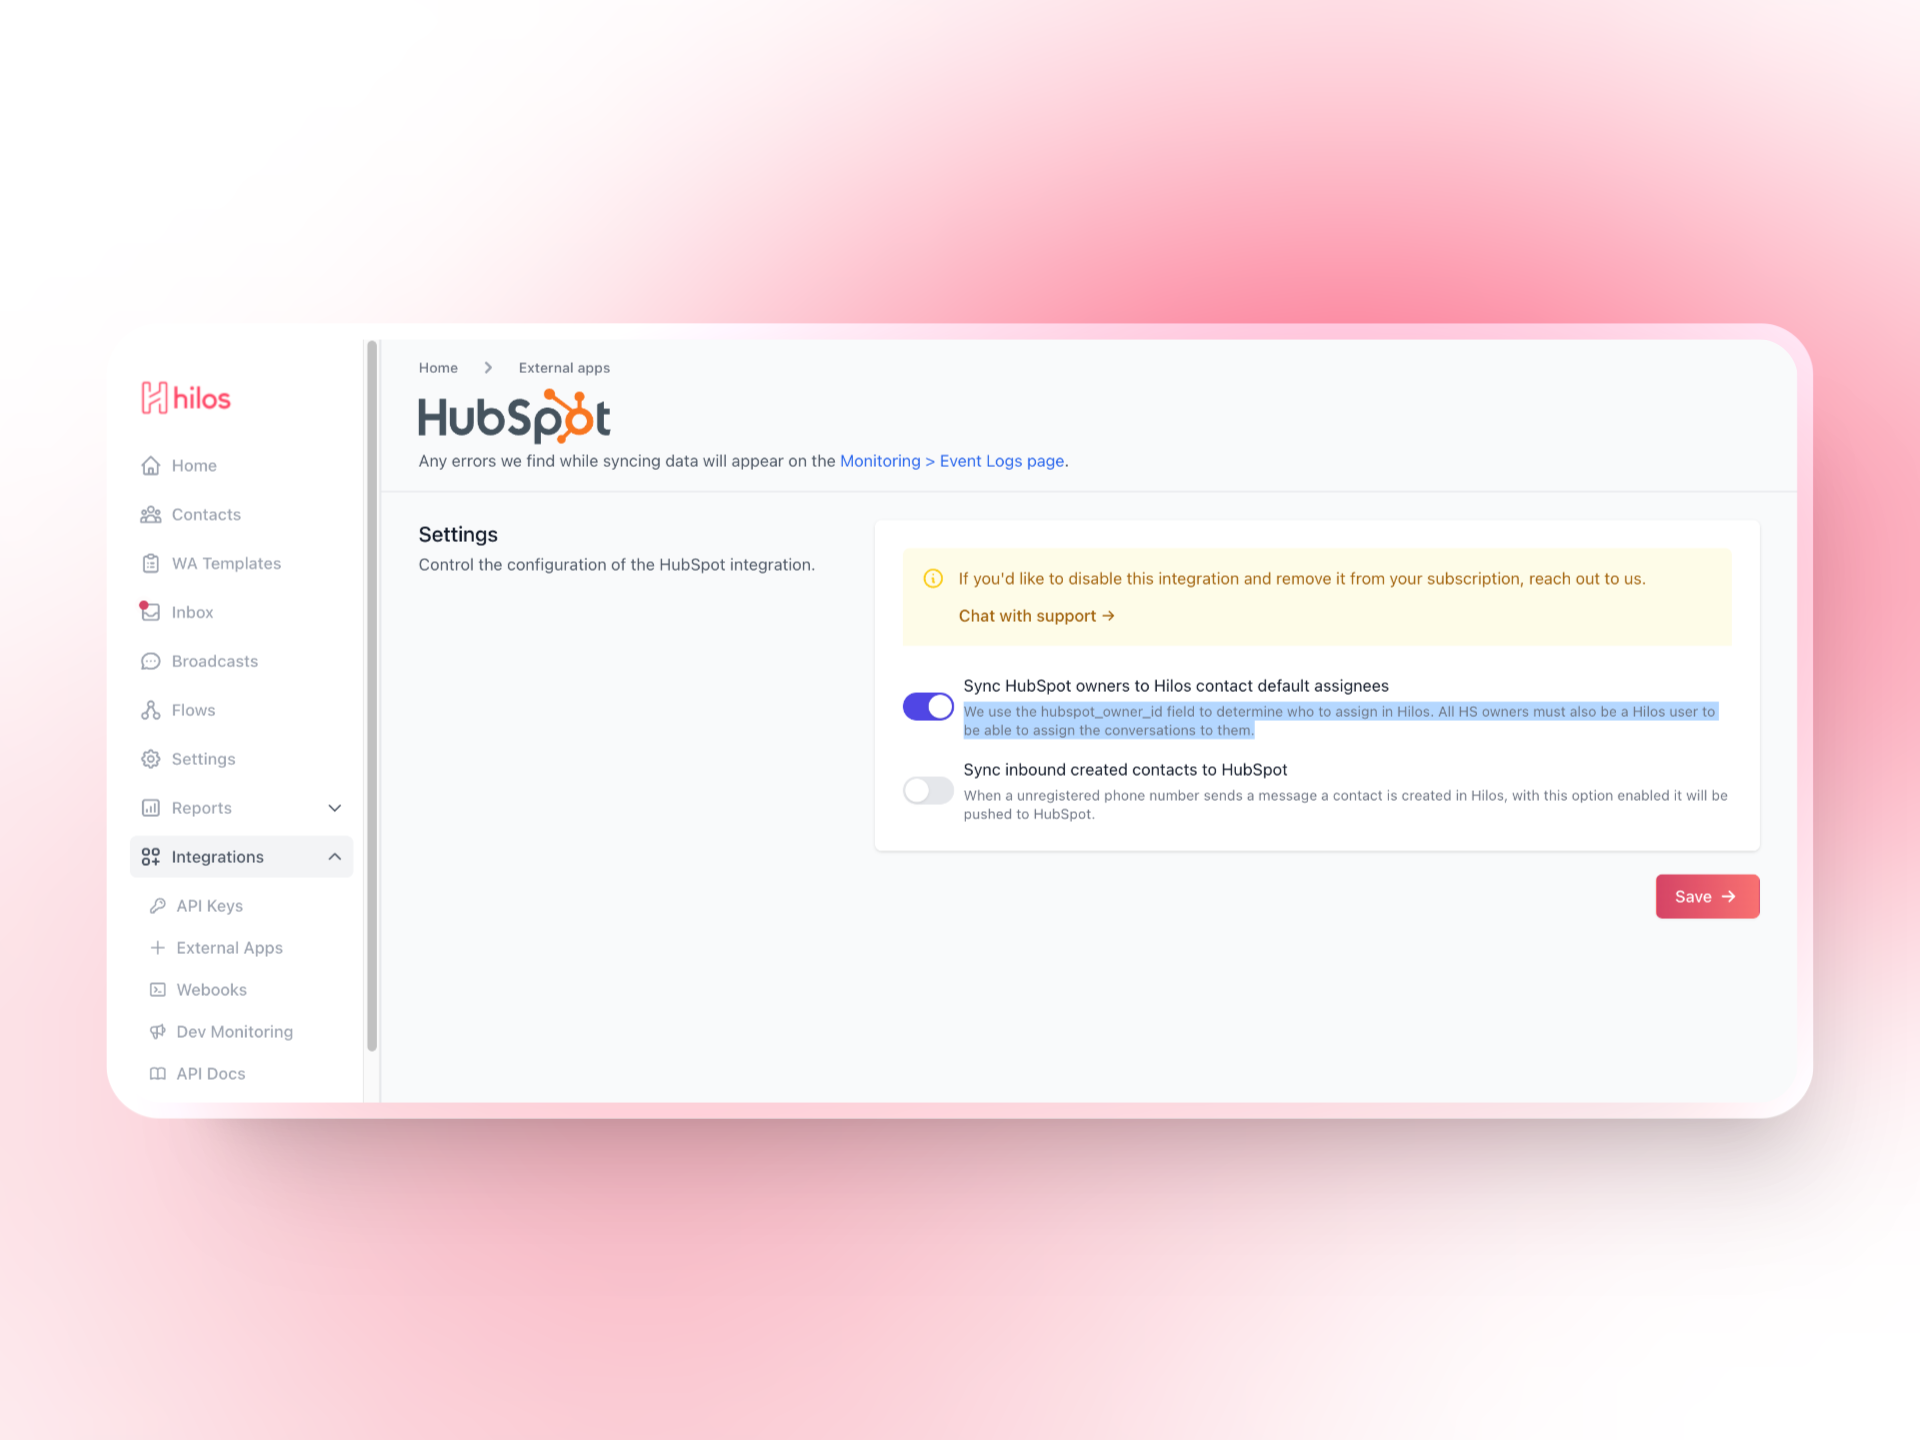
Using HubSpot Workflows for Advanced Automation
HubSpot Workflows allow you to manage different automations based on the lifecycle stages of the lead. Here’s how to set it up:1. Create a HubSpot Workflow
- Log in to your HubSpot account and navigate to Workflows.
- Click on Create workflow and select a template or start from scratch.
- Define if your worflow is based on contact, deal or company.
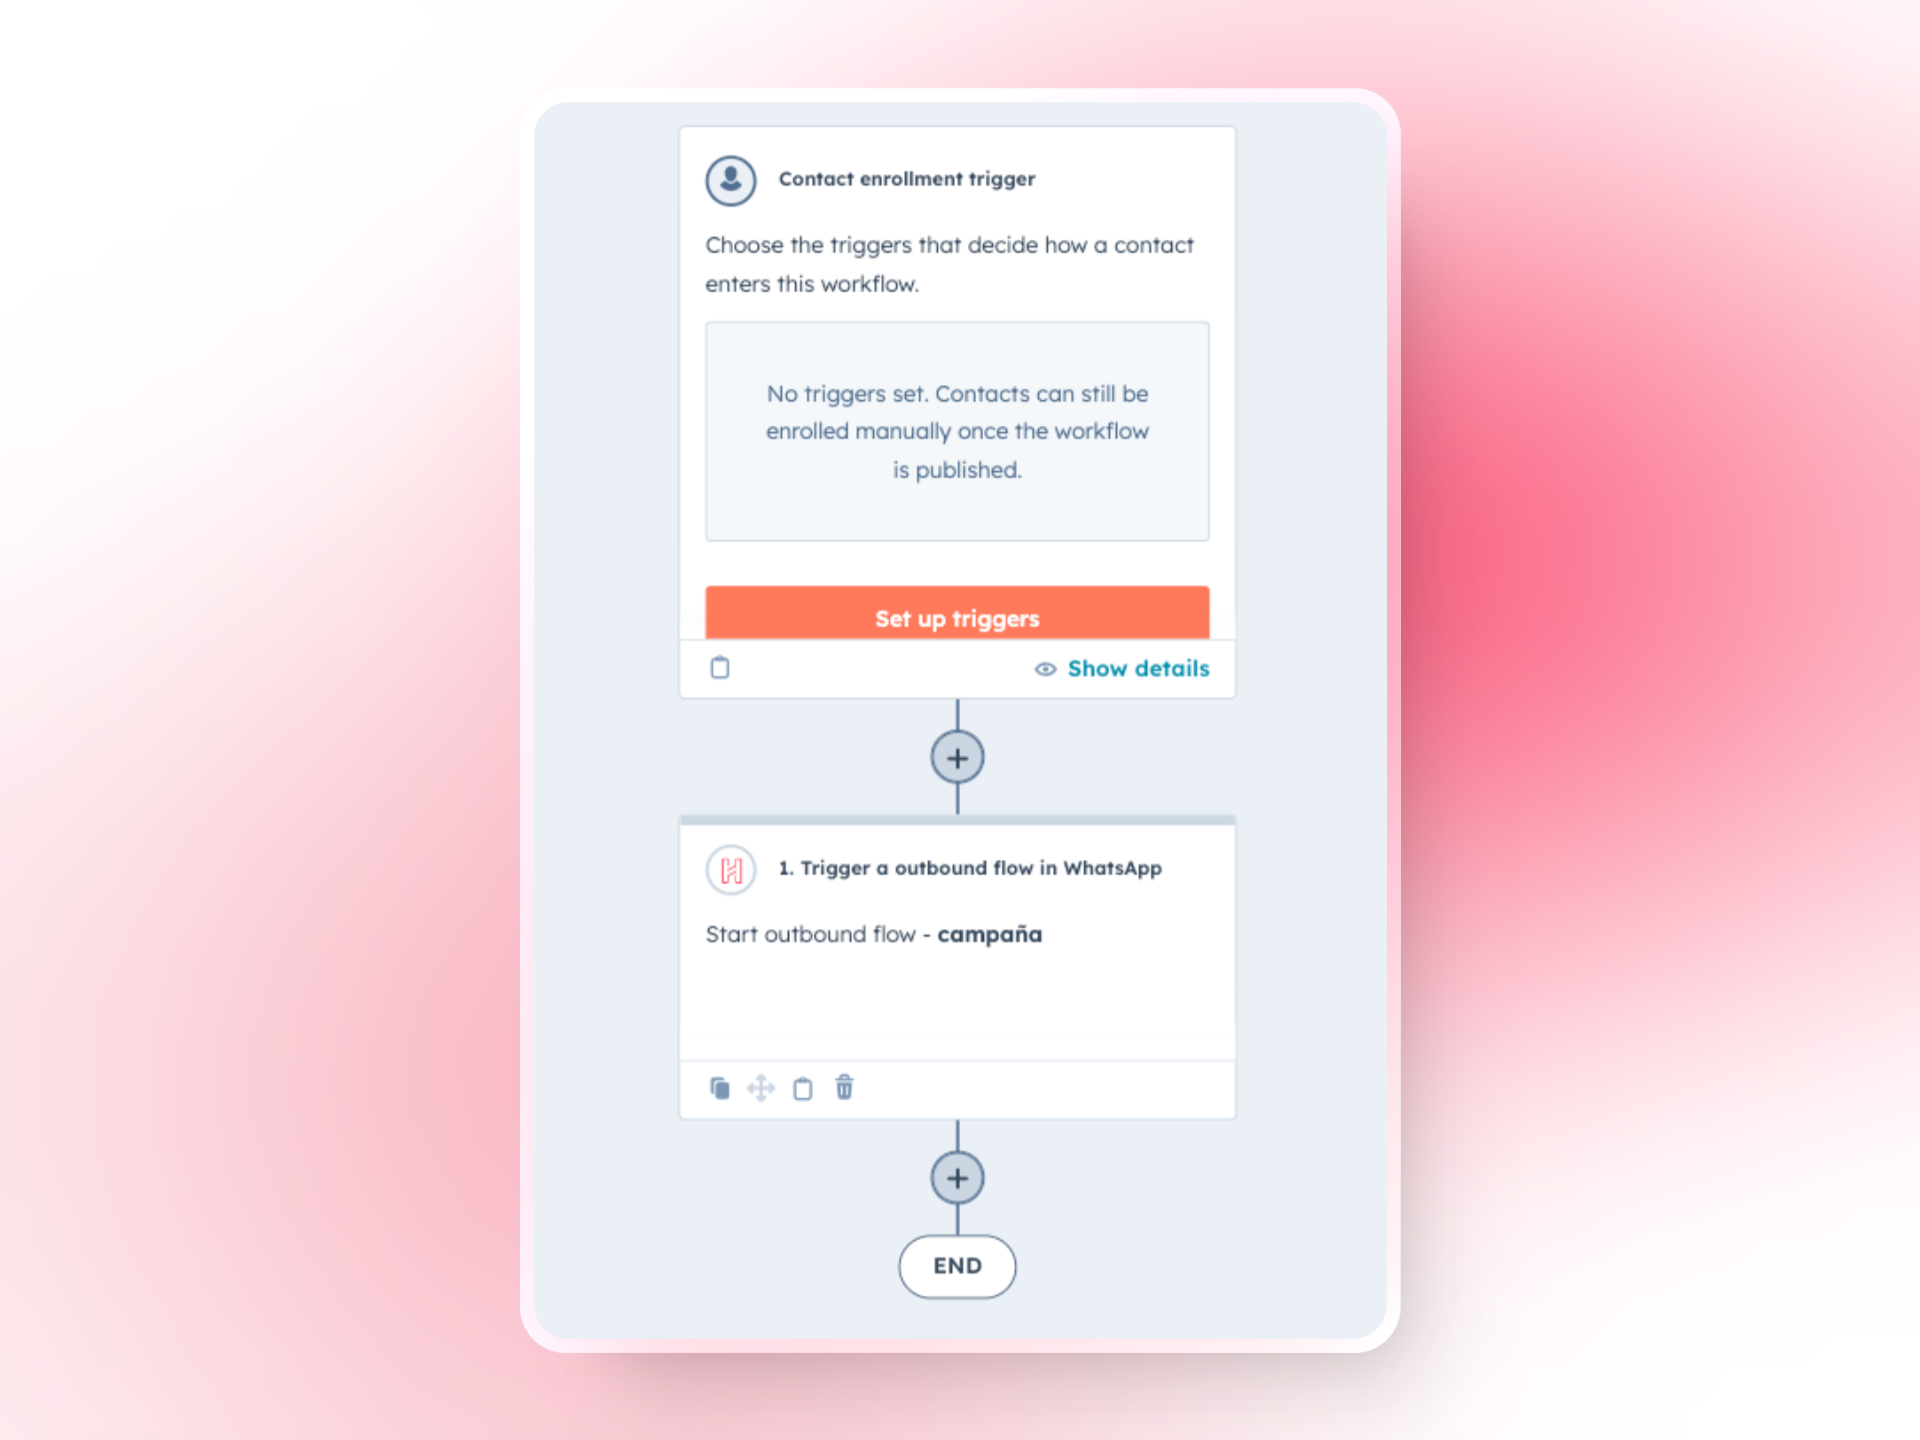
- Define the enrollment triggers based on the lifecycle stages of the lead (e.g., new lead, MQL, SQL).
2. Design the Workflow
Use HubSpot’s workflow editor to design your automation. You can add various actions to manage leads at different stages:- Update Contact Property: Update contact information in Hilos based on their HubSpot properties.
- Assign Task: Create tasks for your sales team to follow up with leads.
- Trigger Hilos Flow: Trigger a outbound flow in WhatsApp: Trigger campaigns in WhatsApp that allows to your users take actions like “make a payment” or “book a call”.