What are Teams?
Teams in Hilos allow you to group agents together based on their roles or departments, such as support, sales, or technical assistance. By organizing agents into teams, you can streamline the assignment of conversations and ensure that queries are directed to the right people.Creating a Team
1
Navigate to Teams
- Go to Settings > Teams in your Hilos account.
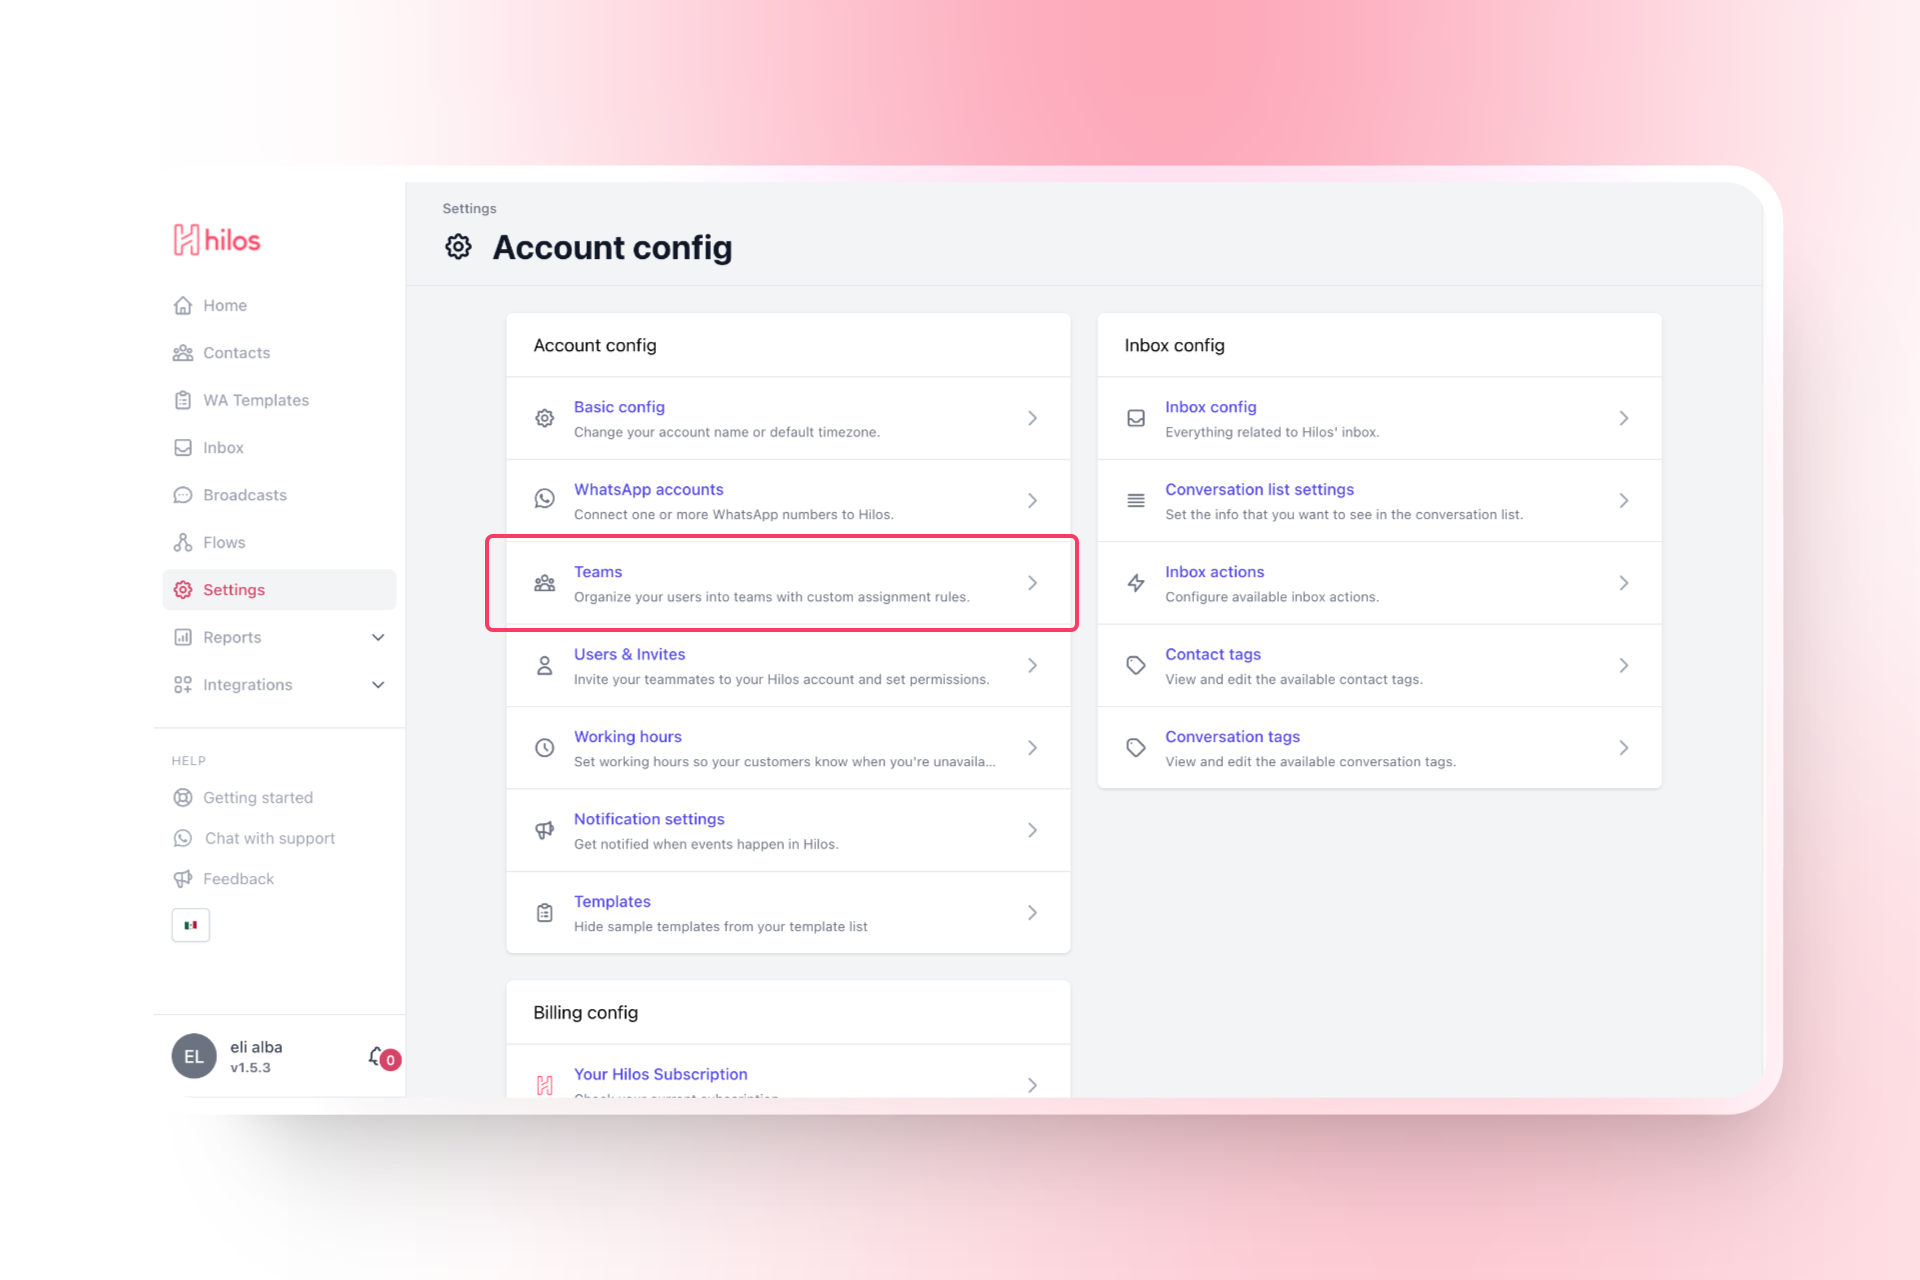
- Click on
+ New Teamto create a new team.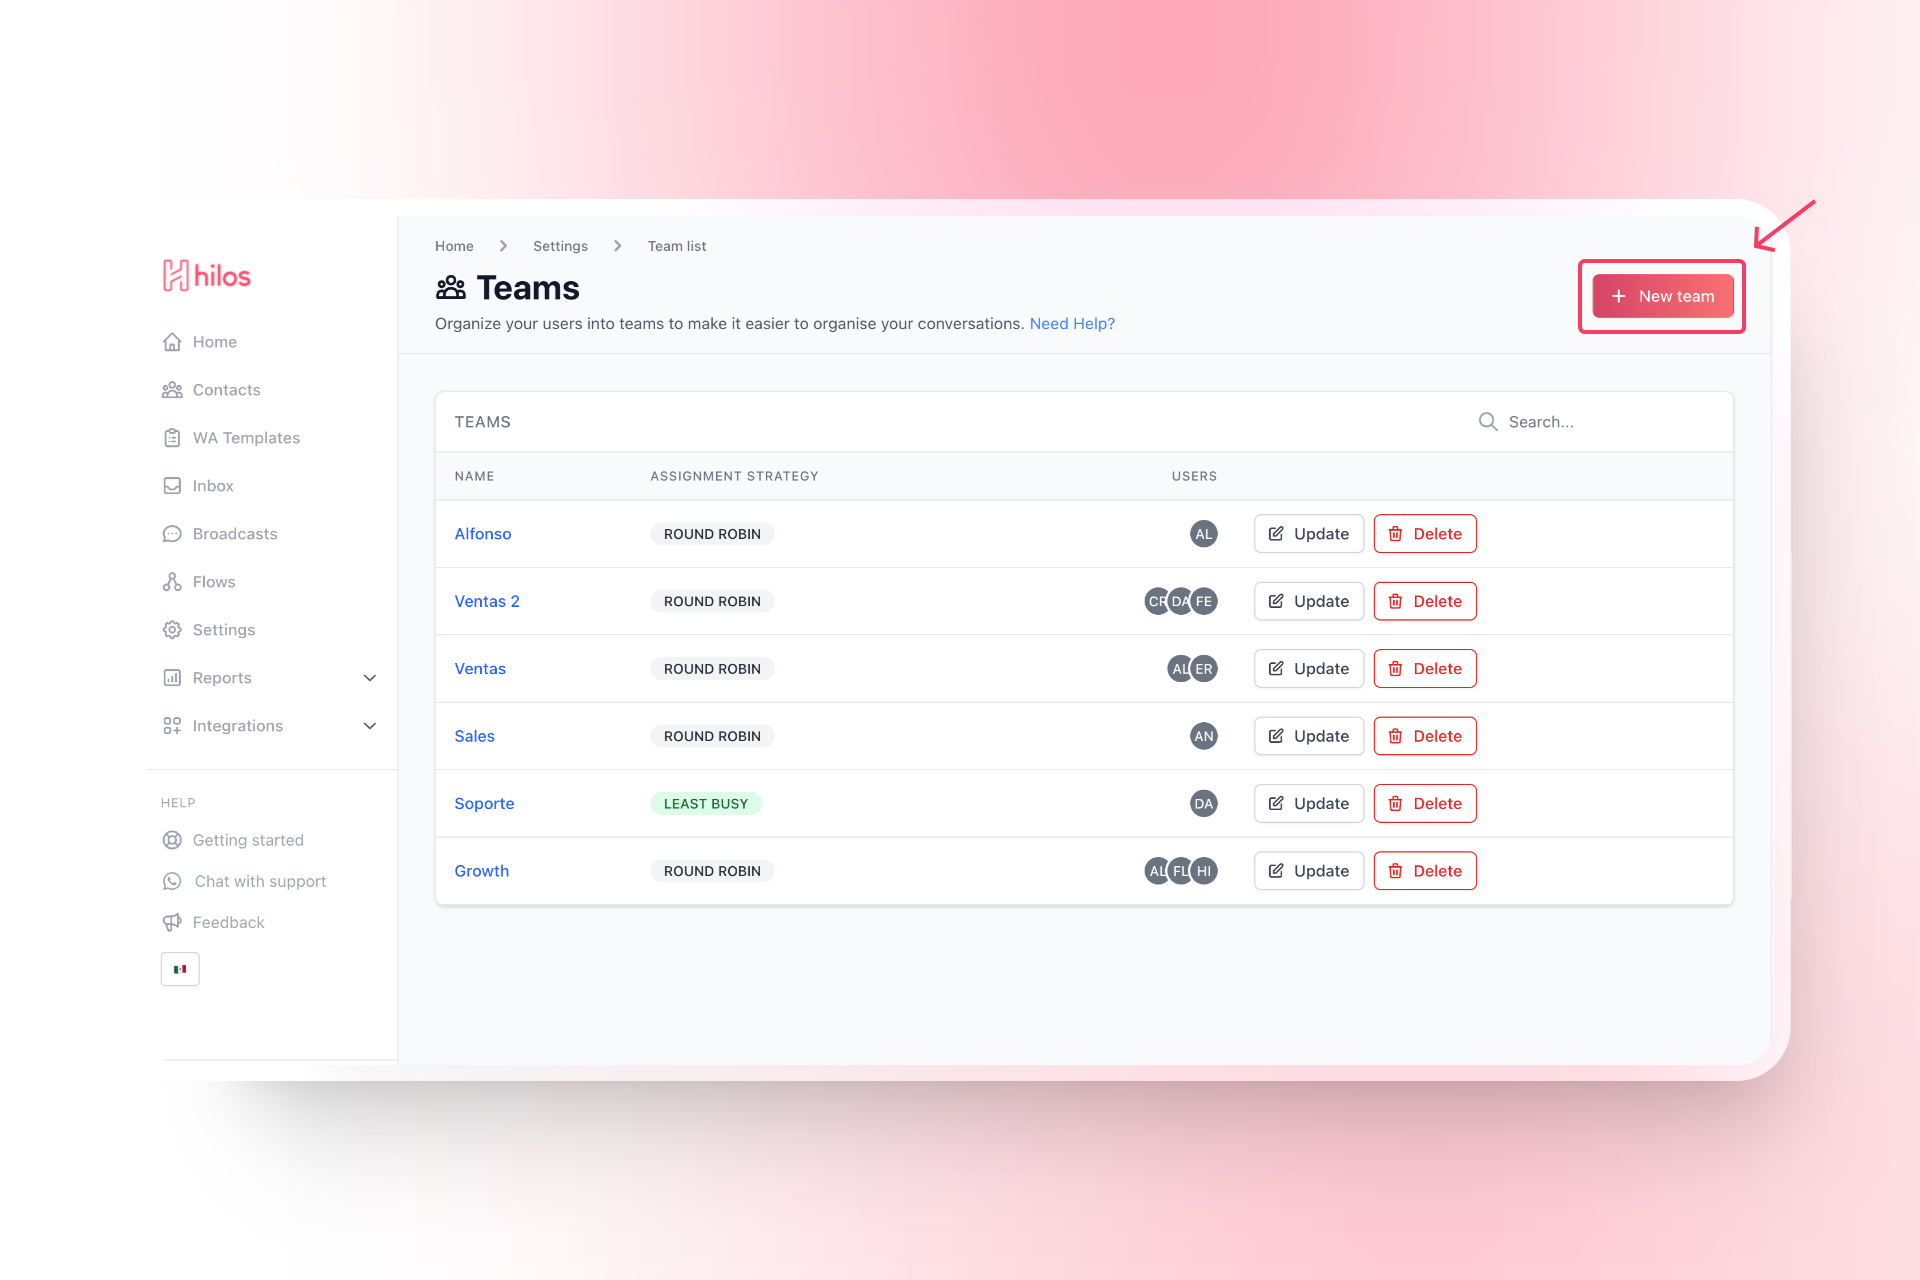
2
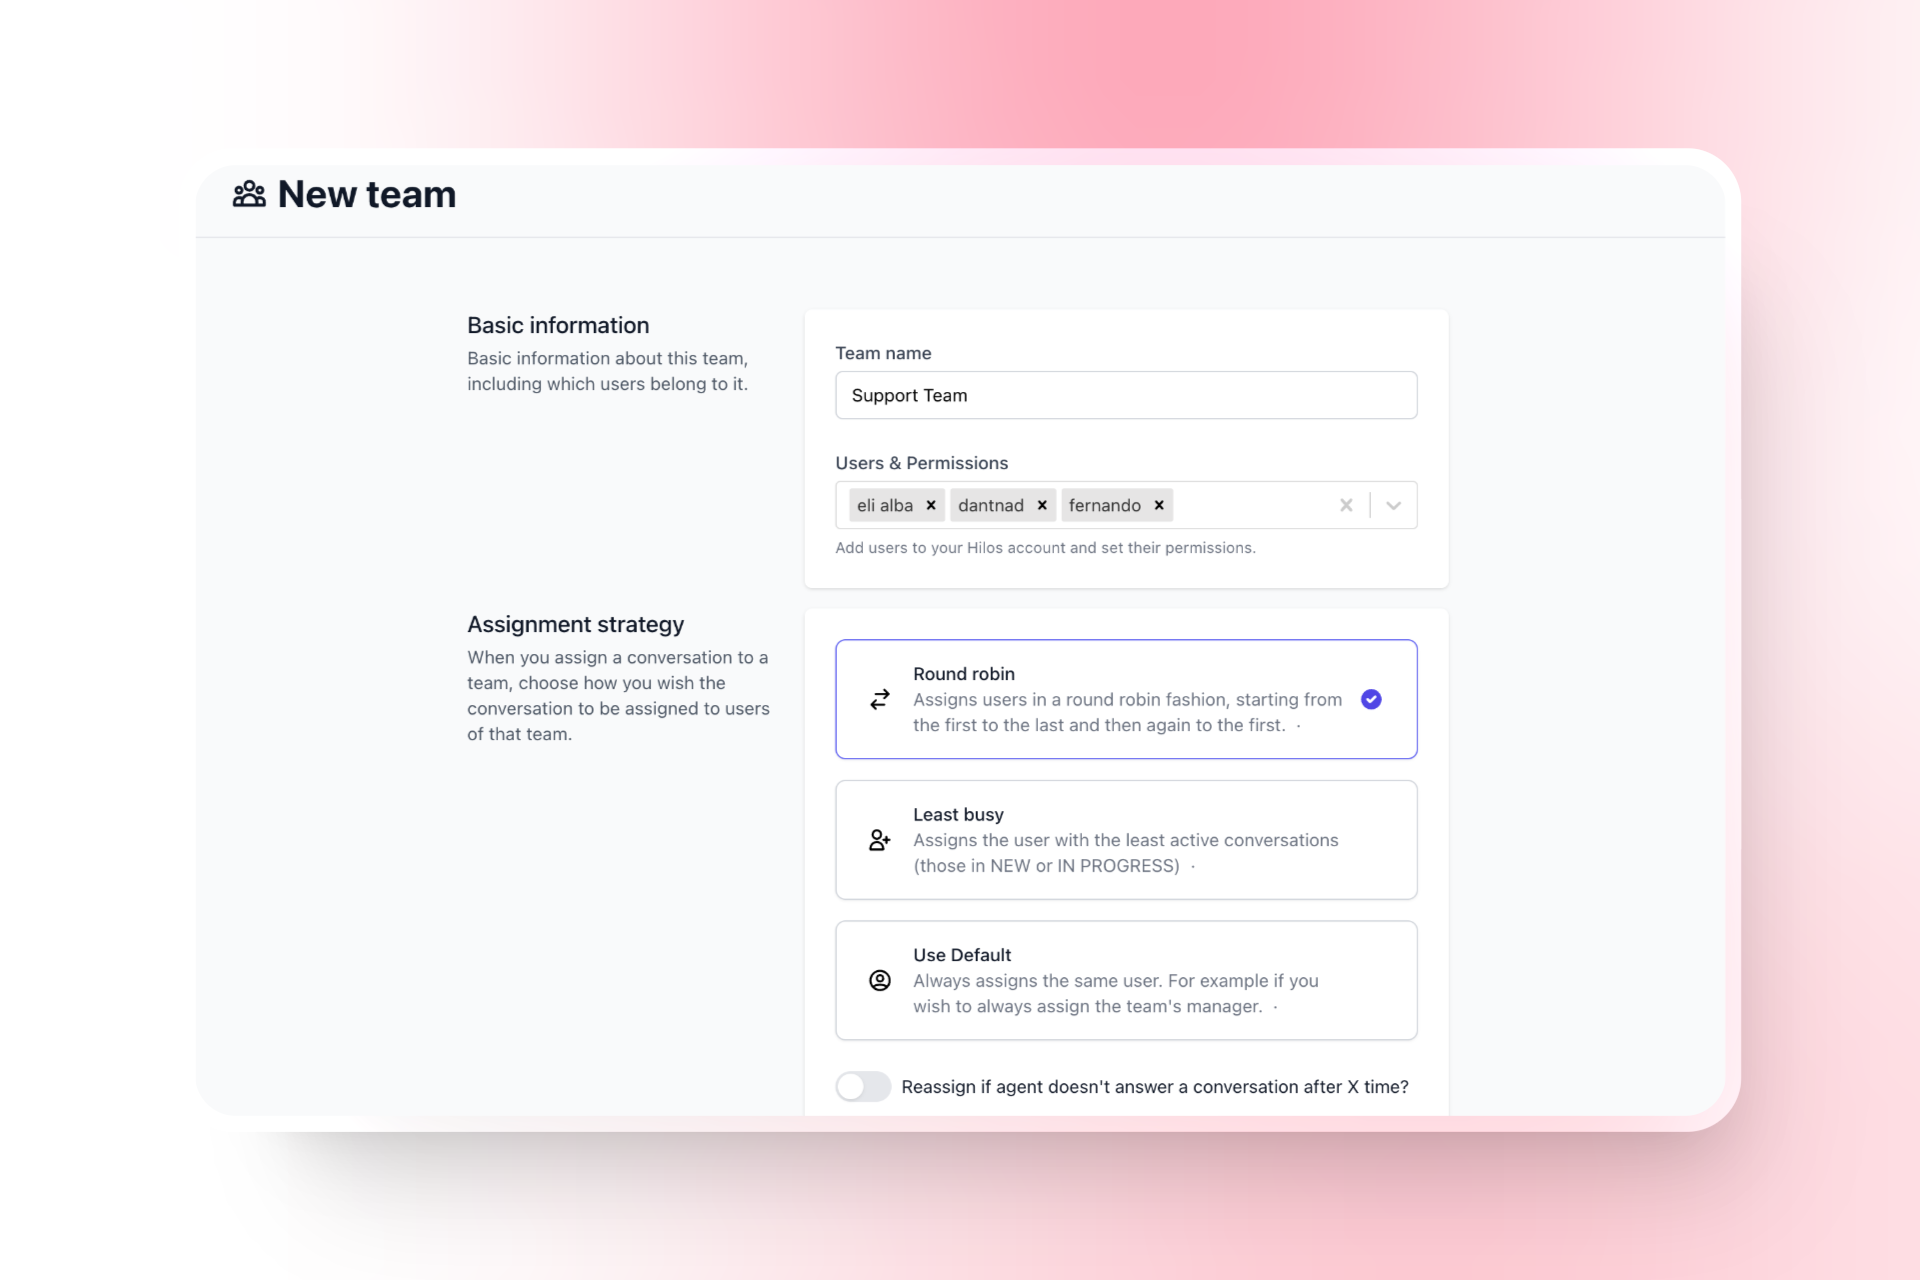
Name Your Team
- Give your team a name that reflects its purpose, such as “Support Team” or “Sales Team.”
3
Add Team Members
- Add agents to the team by selecting them from the list of available users.
4
Set Assignment Rules
- Choose the assignment strategy that best fits your needs (more on this below).
Assignment Strategies
Hilos offers several assignment strategies to ensure that conversations are distributed efficiently among your agents. Here are the available strategies:1. Round Robin
The Round Robin strategy assigns conversations to agents in a sequential order. This ensures an even distribution of workload among all team members.2. Least Busy
The Least Busy strategy assigns conversations to the agent with the fewest active conversations. This helps balance the workload and ensures that no single agent is overwhelmed.3. Default Agent
The Default Agent strategy always assigns conversations to a specific agent. This can be useful for specialized queries that require a particular agent’s expertise, for example a support manager that can define who should take each conversation.Using the Assign Team Step in a Flow
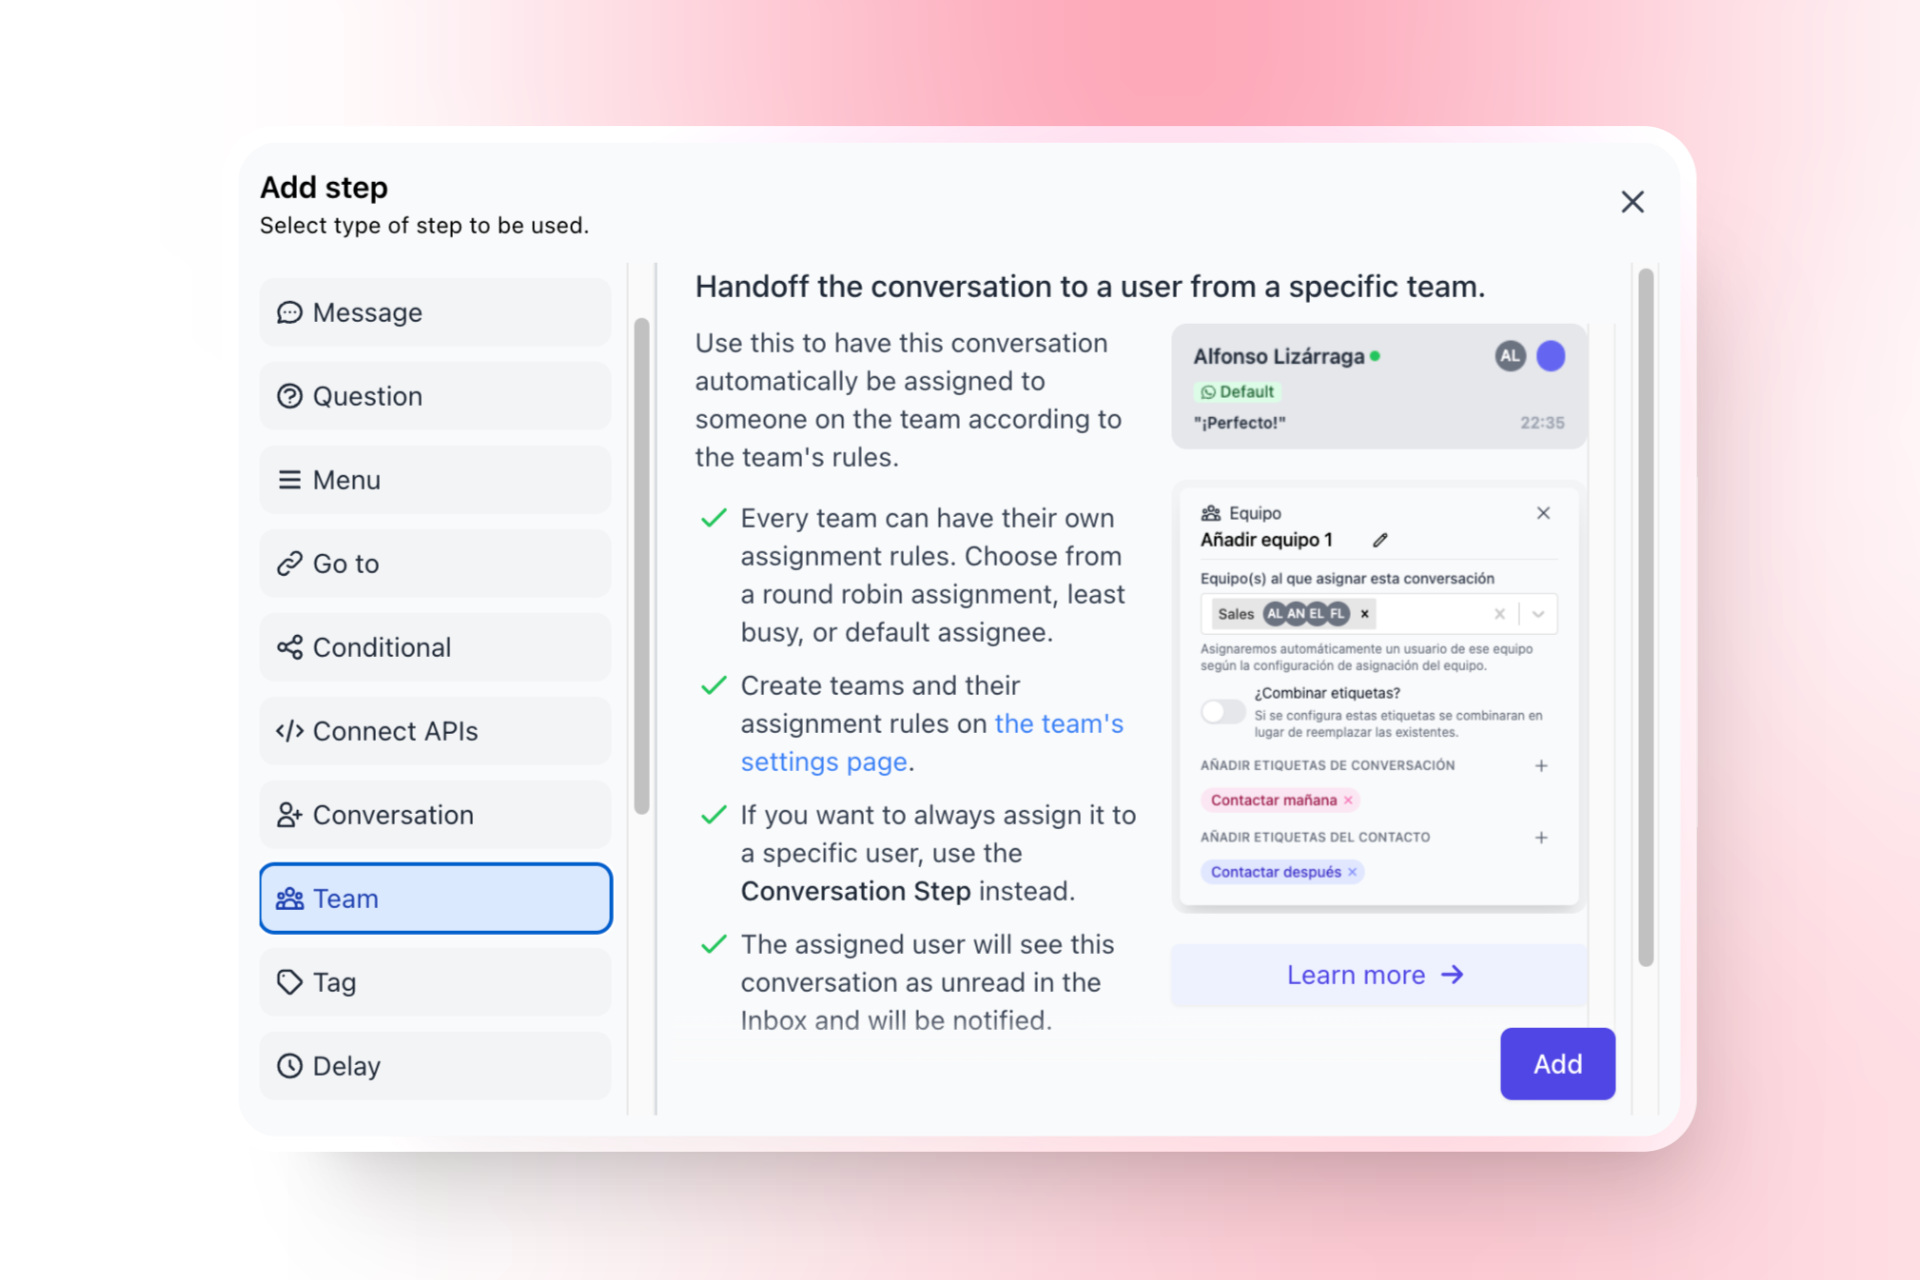
The Assign Team Step allows you to automatically assign conversations to a team based on the chosen assignment strategy. Here’s how to set it up:Step-by-Step Guide to Using the Assign Team Step
Step 1: Create a New Flow
-
Navigate to Flows:
- Go to Flows in your Hilos account.
- Click on
+ Flow Editorto create a new flow.
-
Name Your Flow:
- Give your flow a name that reflects its purpose, such as “Support Assignment Flow.”
-
Select the Channel and Type:
- Choose the appropriate channel (e.g., WhatsApp).
- Select “Inbound” or “Outbound” as the flow type, depending on your use case.
Step 2: Add the Assign Team Step
-
Add an Assign Team Step:
- Click on the
+button to add a new step. - Select “Team” from the list of step types.
- Click on the
-
Configure the Assign Team Step:
- Choose the team to which you want to assign the conversation.
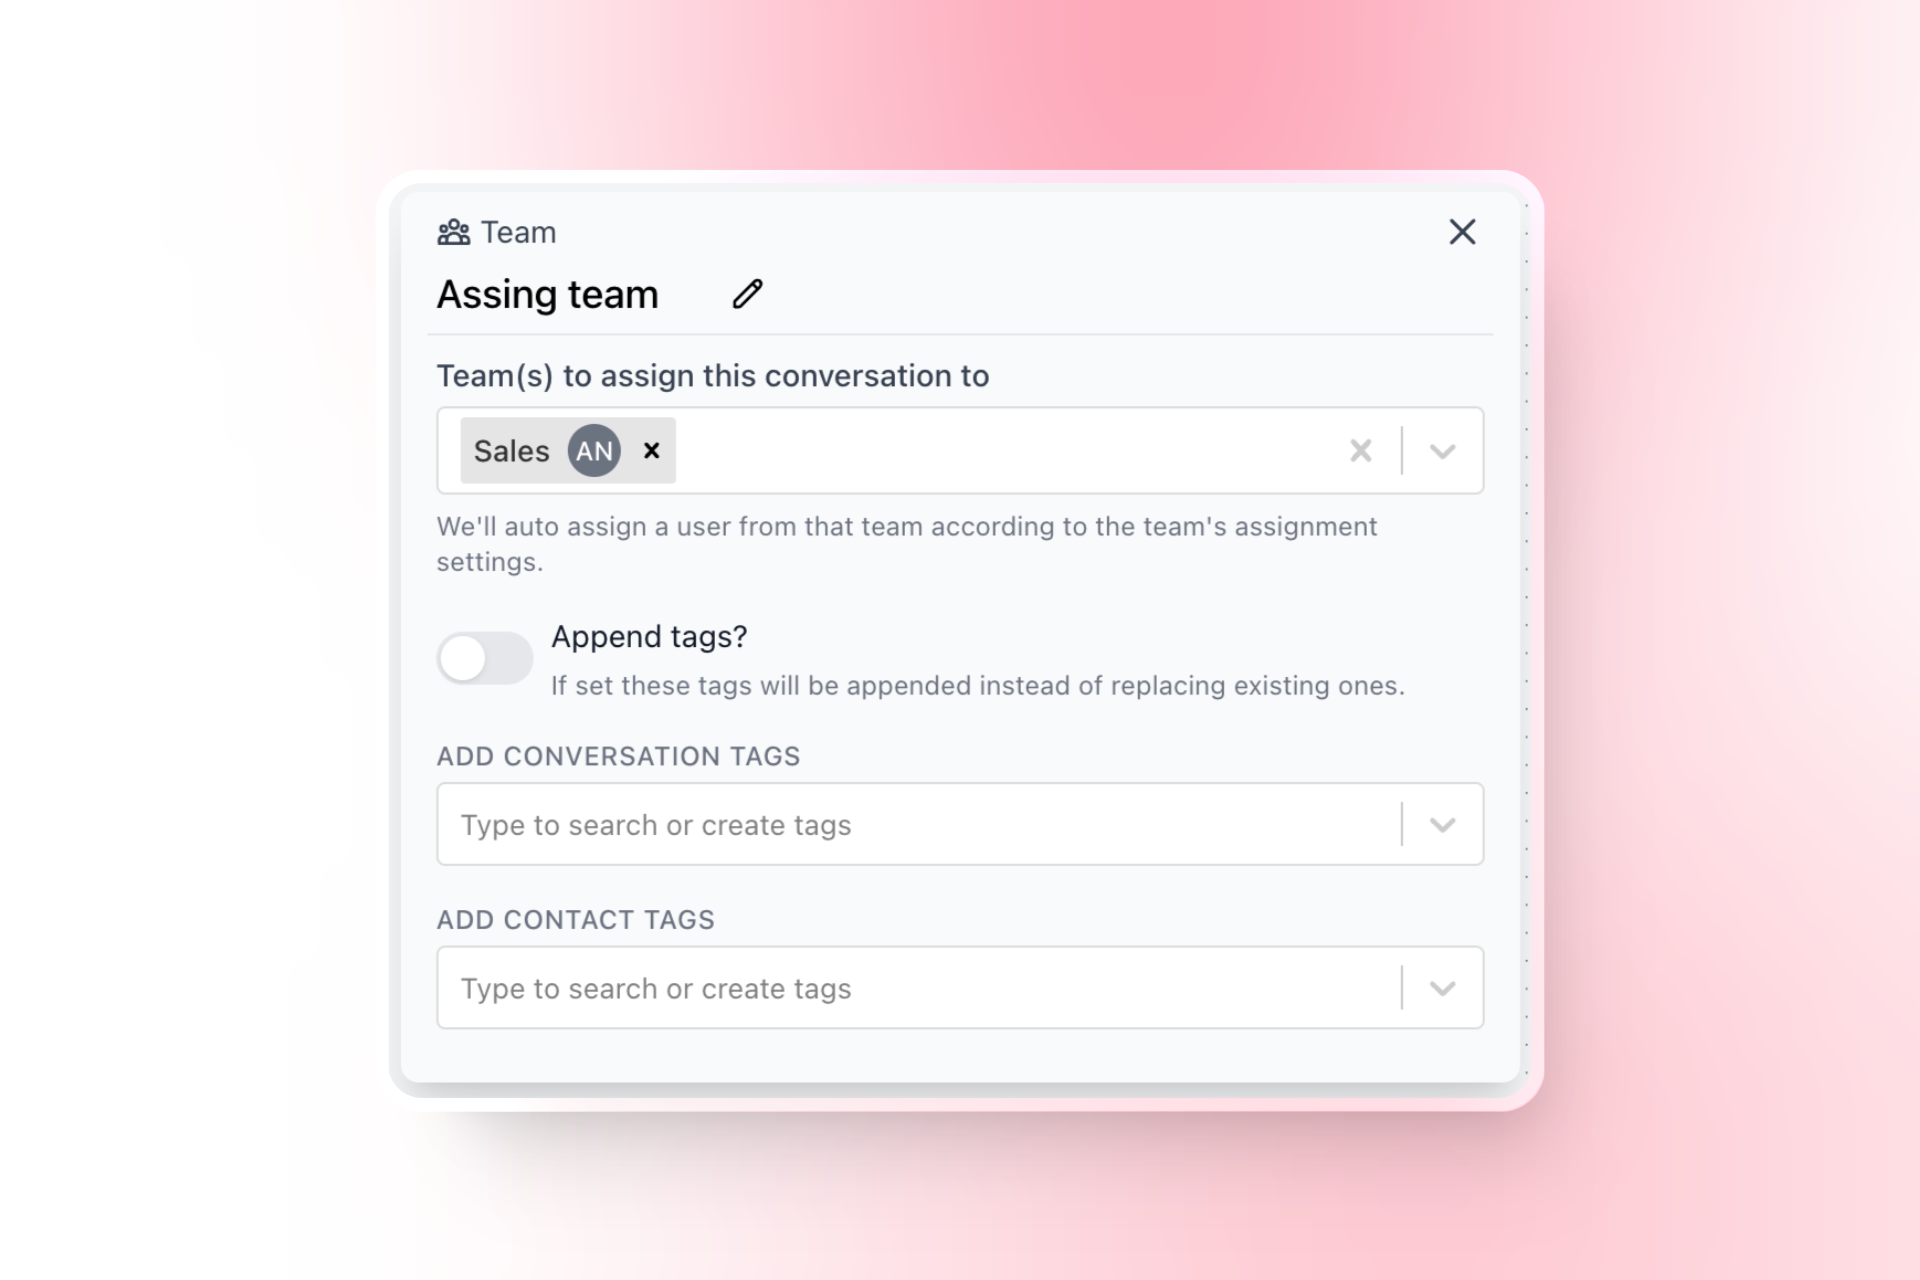
- Choose the team to which you want to assign the conversation.
Step 3: Define the Assignment Logic
-
Add Conditional Steps (Optional):
- If you want to assign conversations based on specific conditions, add conditional steps before the assign team step.
- Configure the conditions to check for specific criteria, such as the content of the conversation or the properties of the contact.

-
Add Additional Steps:
- You can add other steps before or after the assign team step to create a more complex flow. For example, you can add message steps to send responses or update contact steps to save additional information.
- You can add other steps before or after the assign team step to create a more complex flow. For example, you can add message steps to send responses or update contact steps to save additional information.
Step 4: Publish the Flow
Publish the Flow:- Click on the “Publish” button to make the flow active.
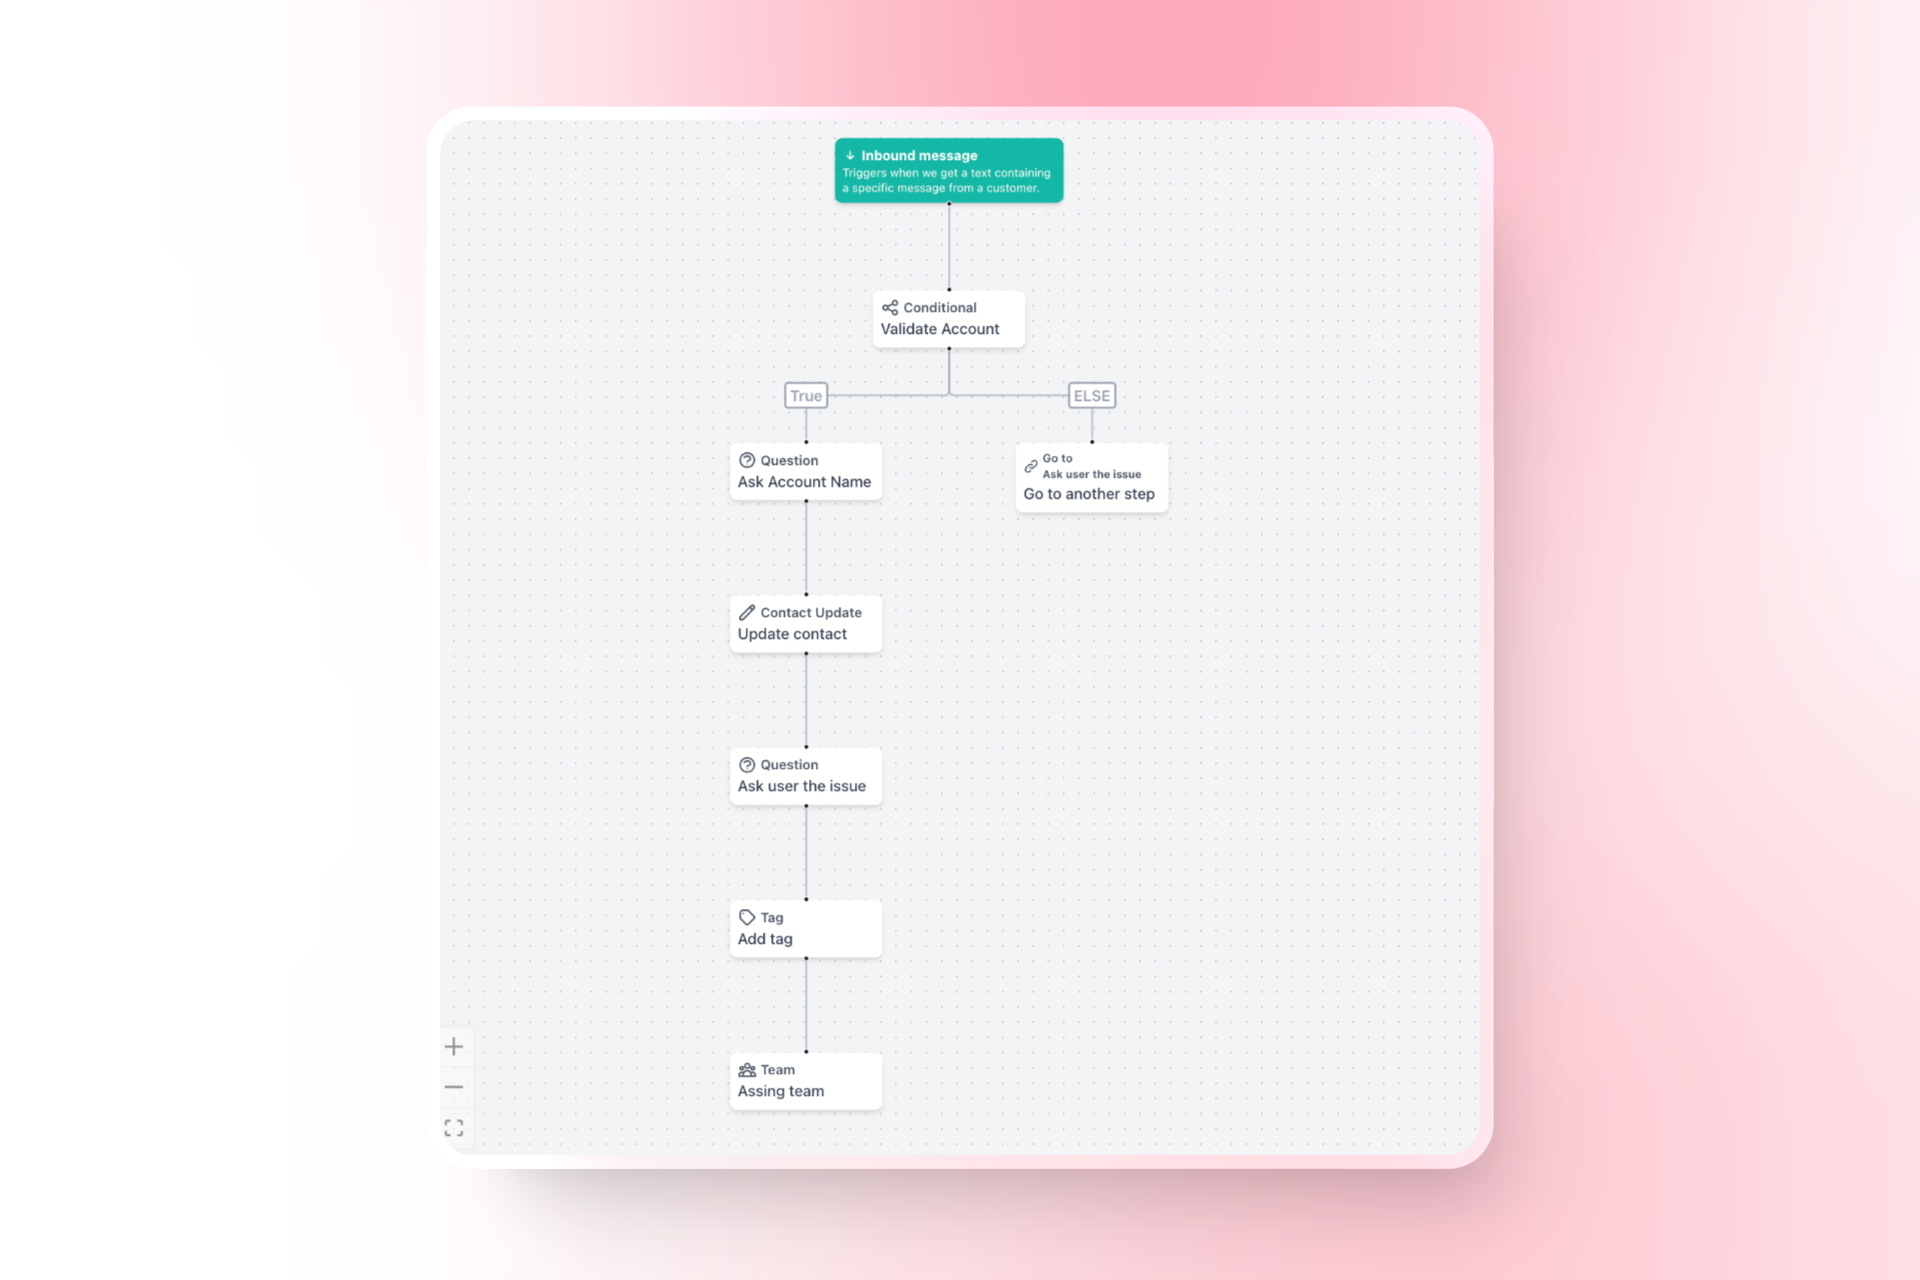
Example Flow Structure
Your flow might look something like this:- Trigger: Any incoming message.
- Conditional Step (Optional): Check for specific criteria.
- Message Step (Optional): Send a response to the user.
- Update Contact Step (Optional): Save additional information to the contact.
- Assign Team Step: Assign the conversation to the appropriate team.