Step-by-Step Guide to Creating Your First Support Chatbot
1
Create a New Flow
Create a new flow
1
Navigate to Flows
- Go to Flows in your Hilos account.
- Click on
+ Flow Editorto create a new flow.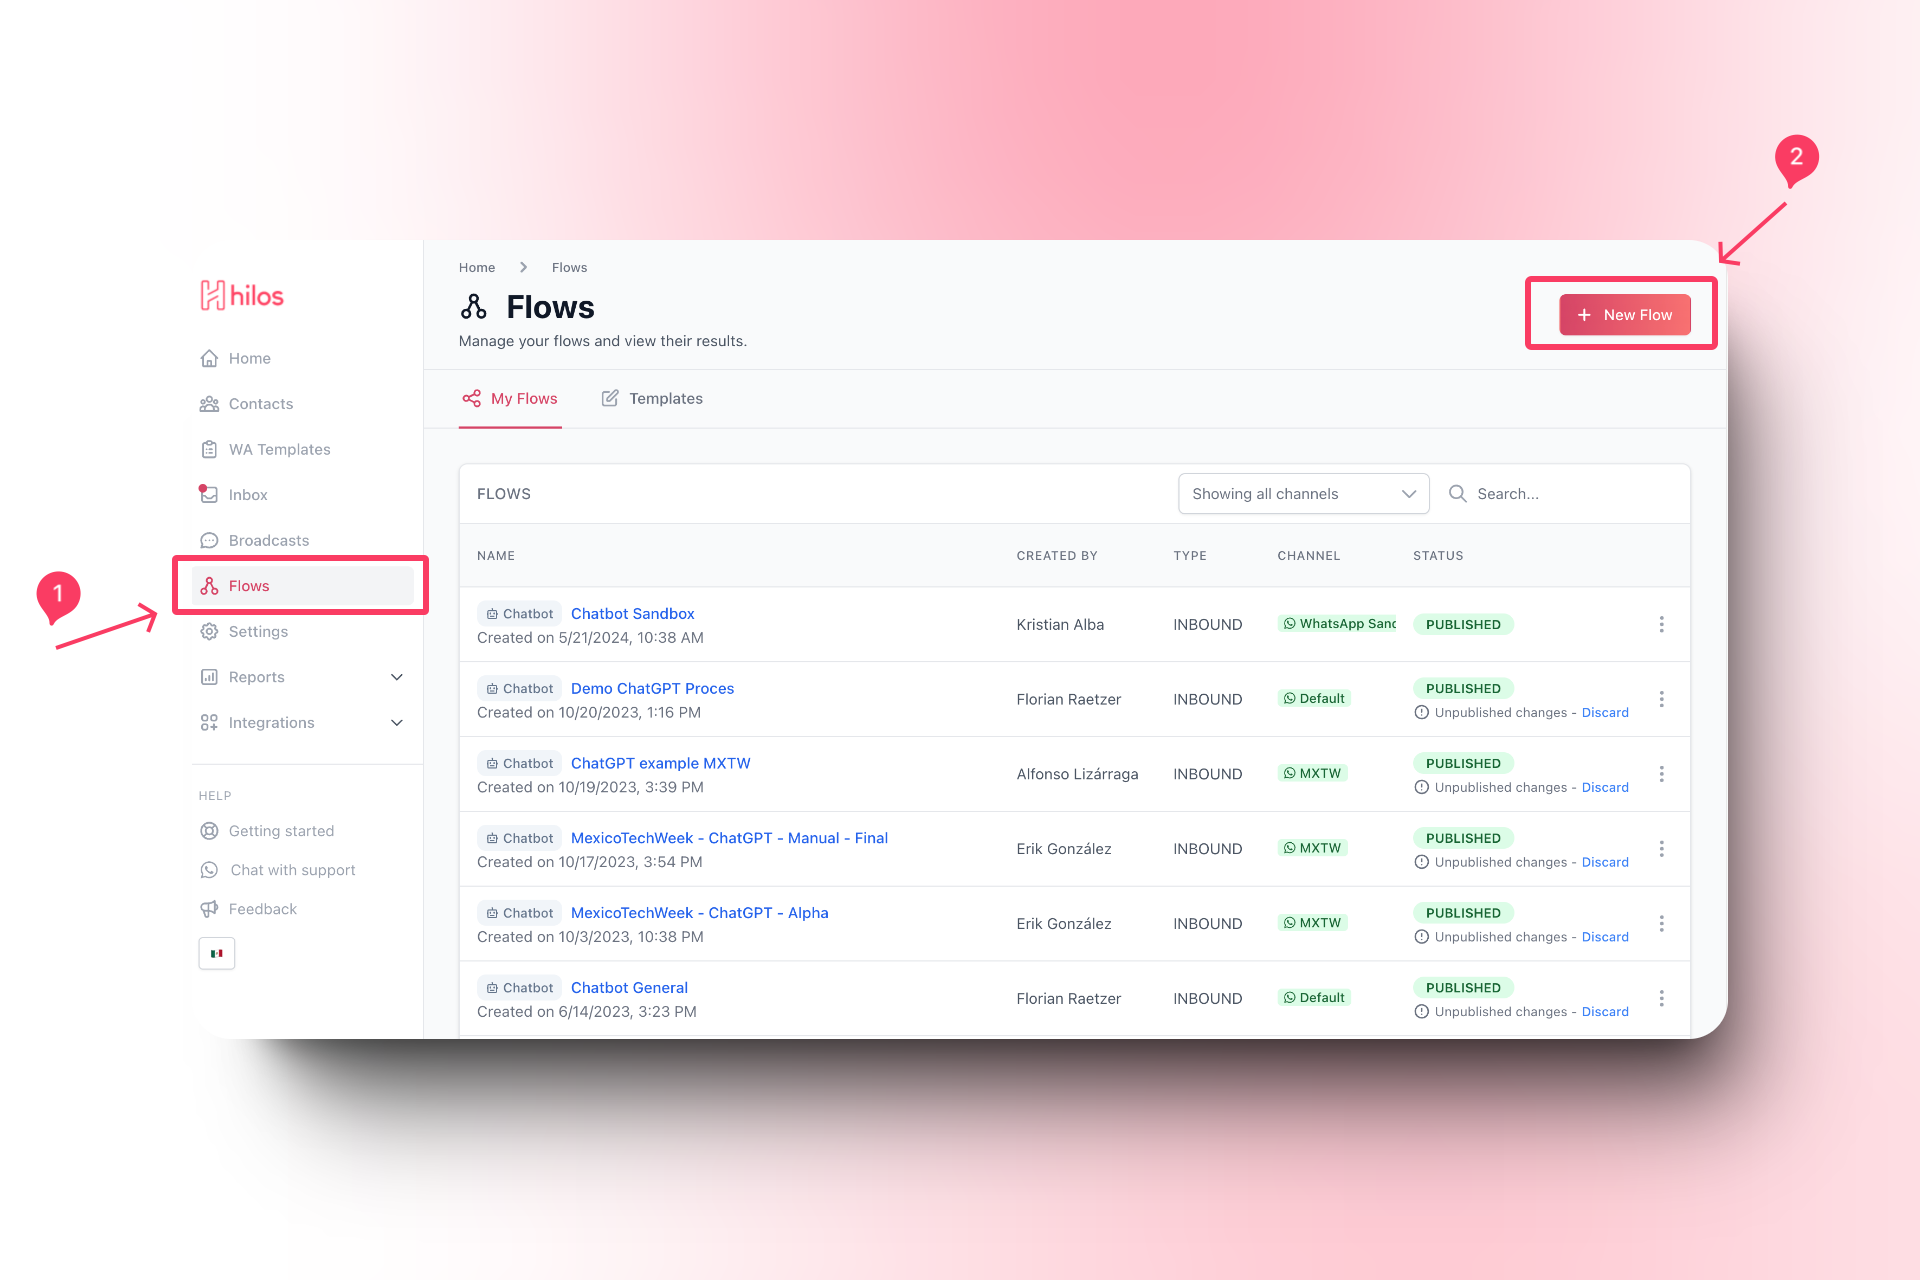
2
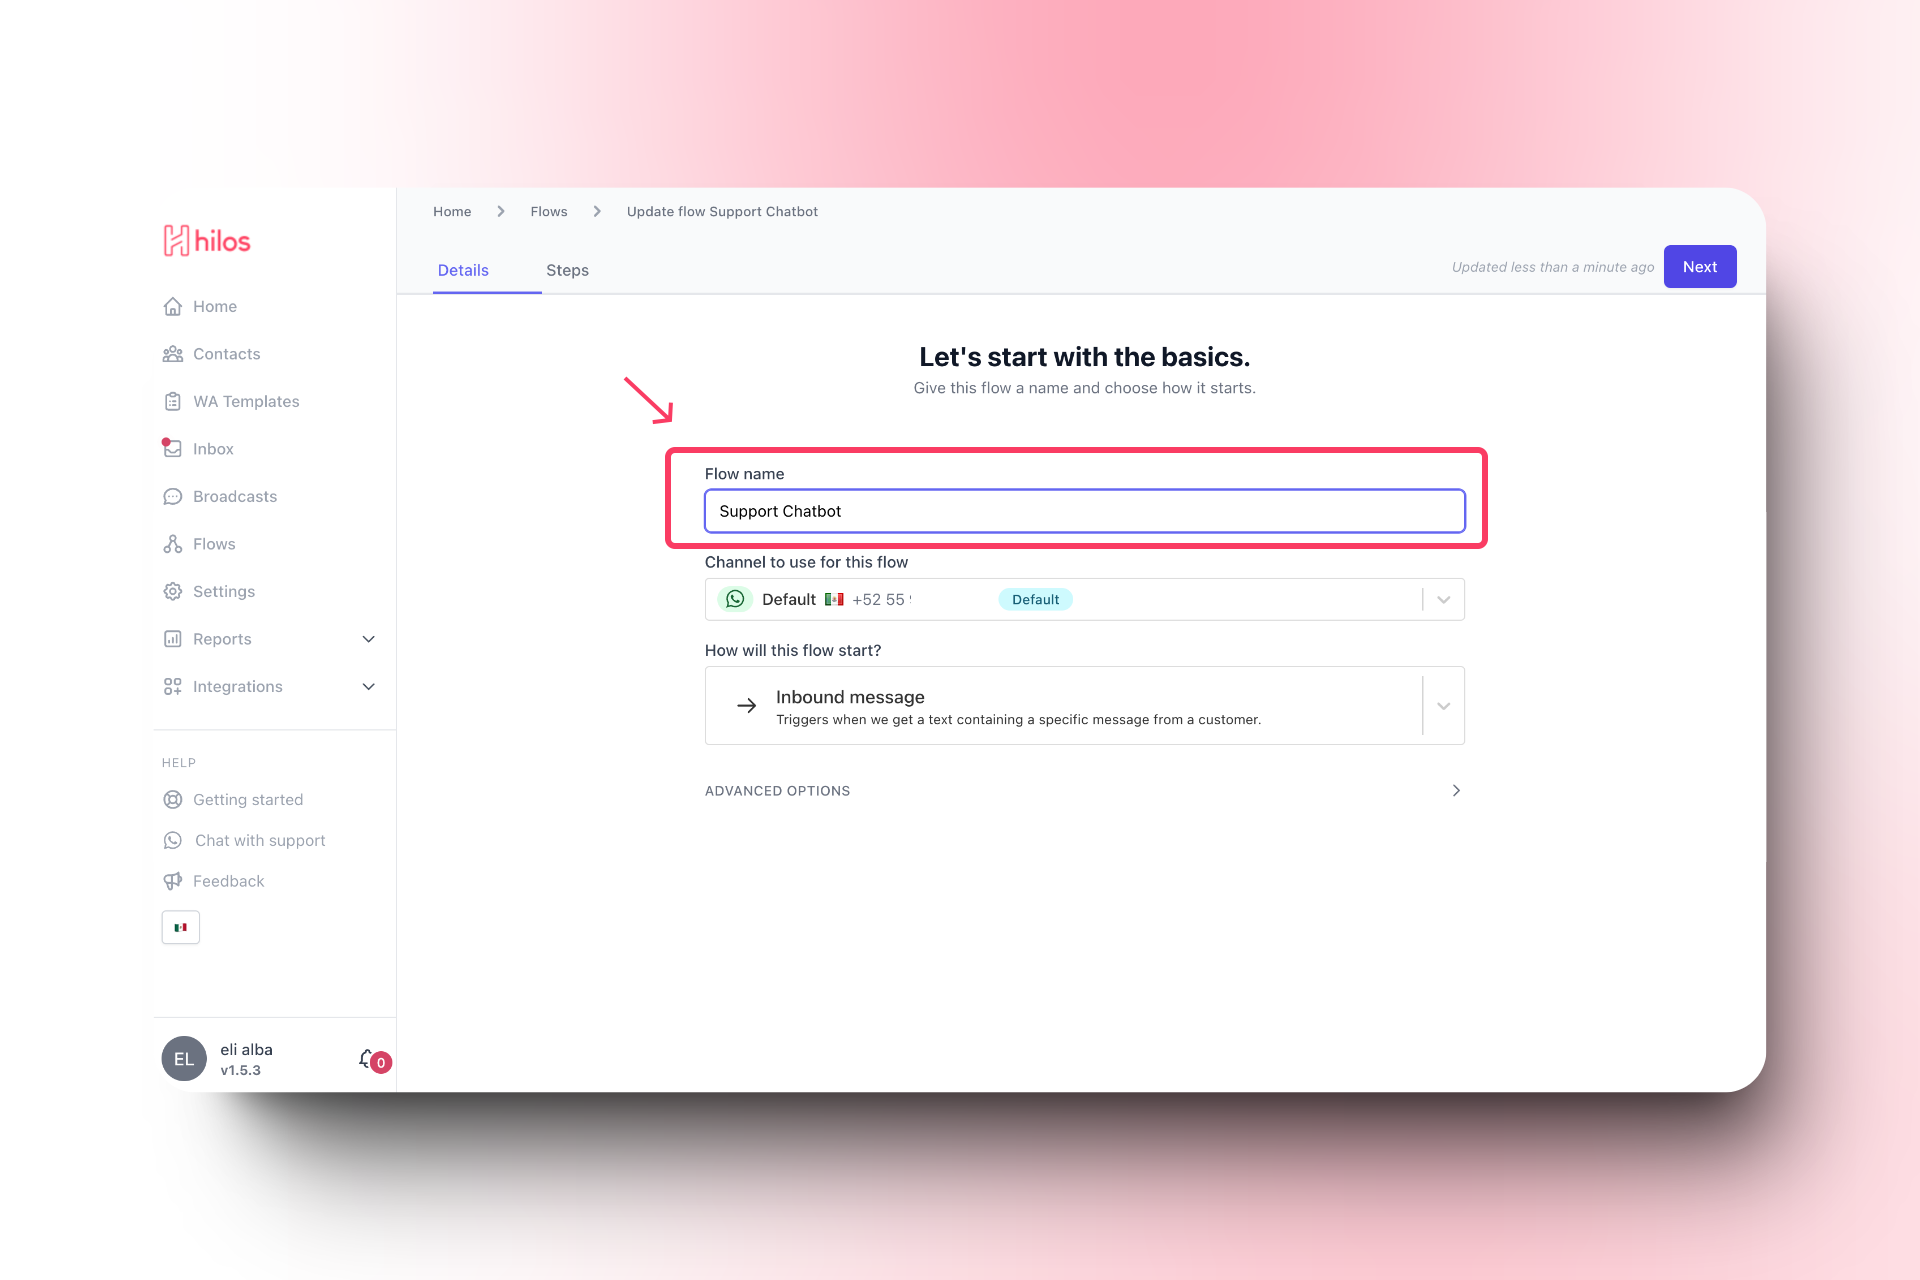
Name Your Flow
- Give your flow a name that reflects its purpose, such as “Support Chatbot”.
3
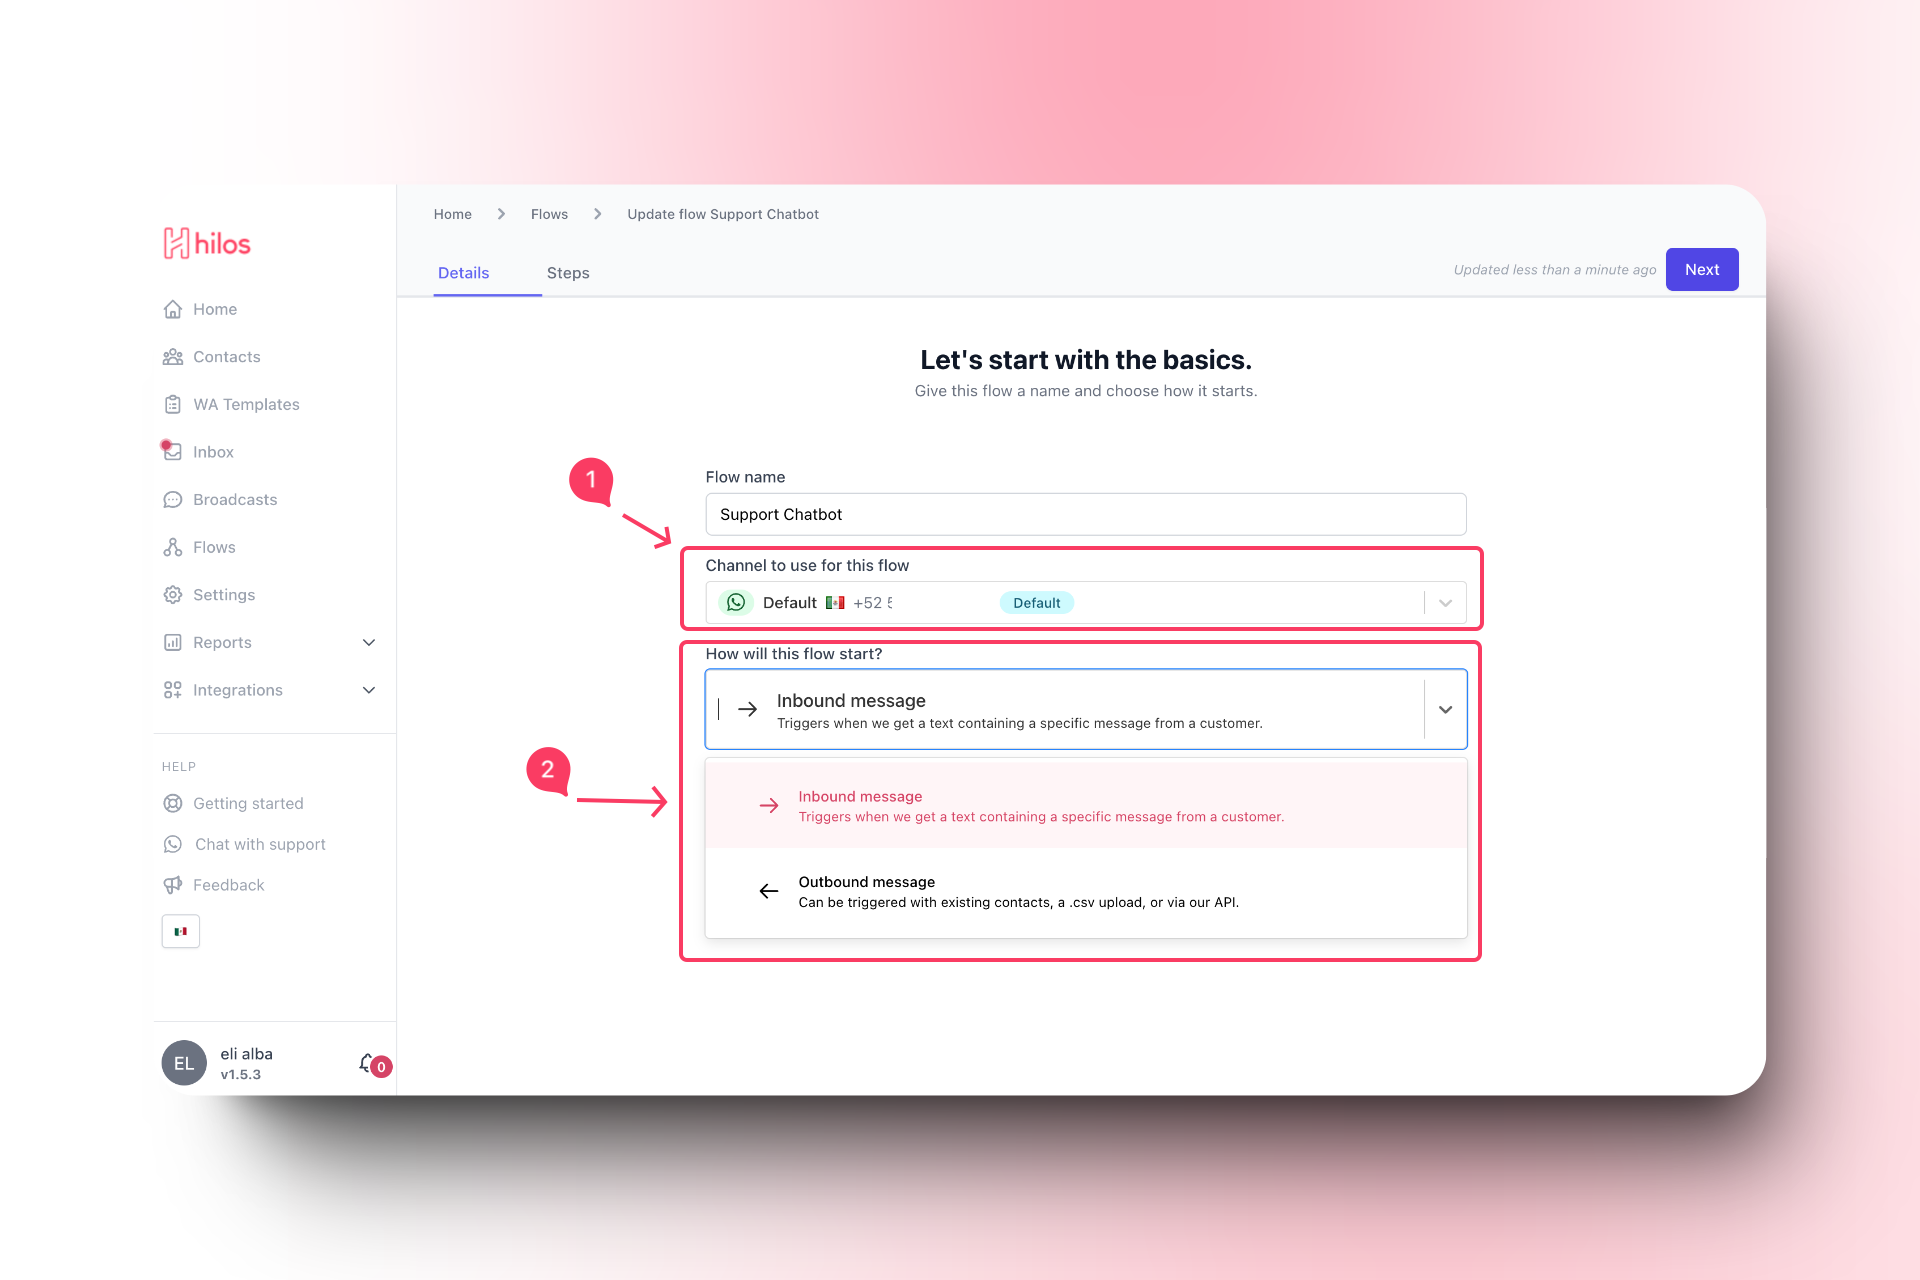
Select the Channel and Type
- Choose the appropriate channel if you have more than one channel.
- Select “Inbound” as the flow type.
2
Add a Message Step
To add a message step: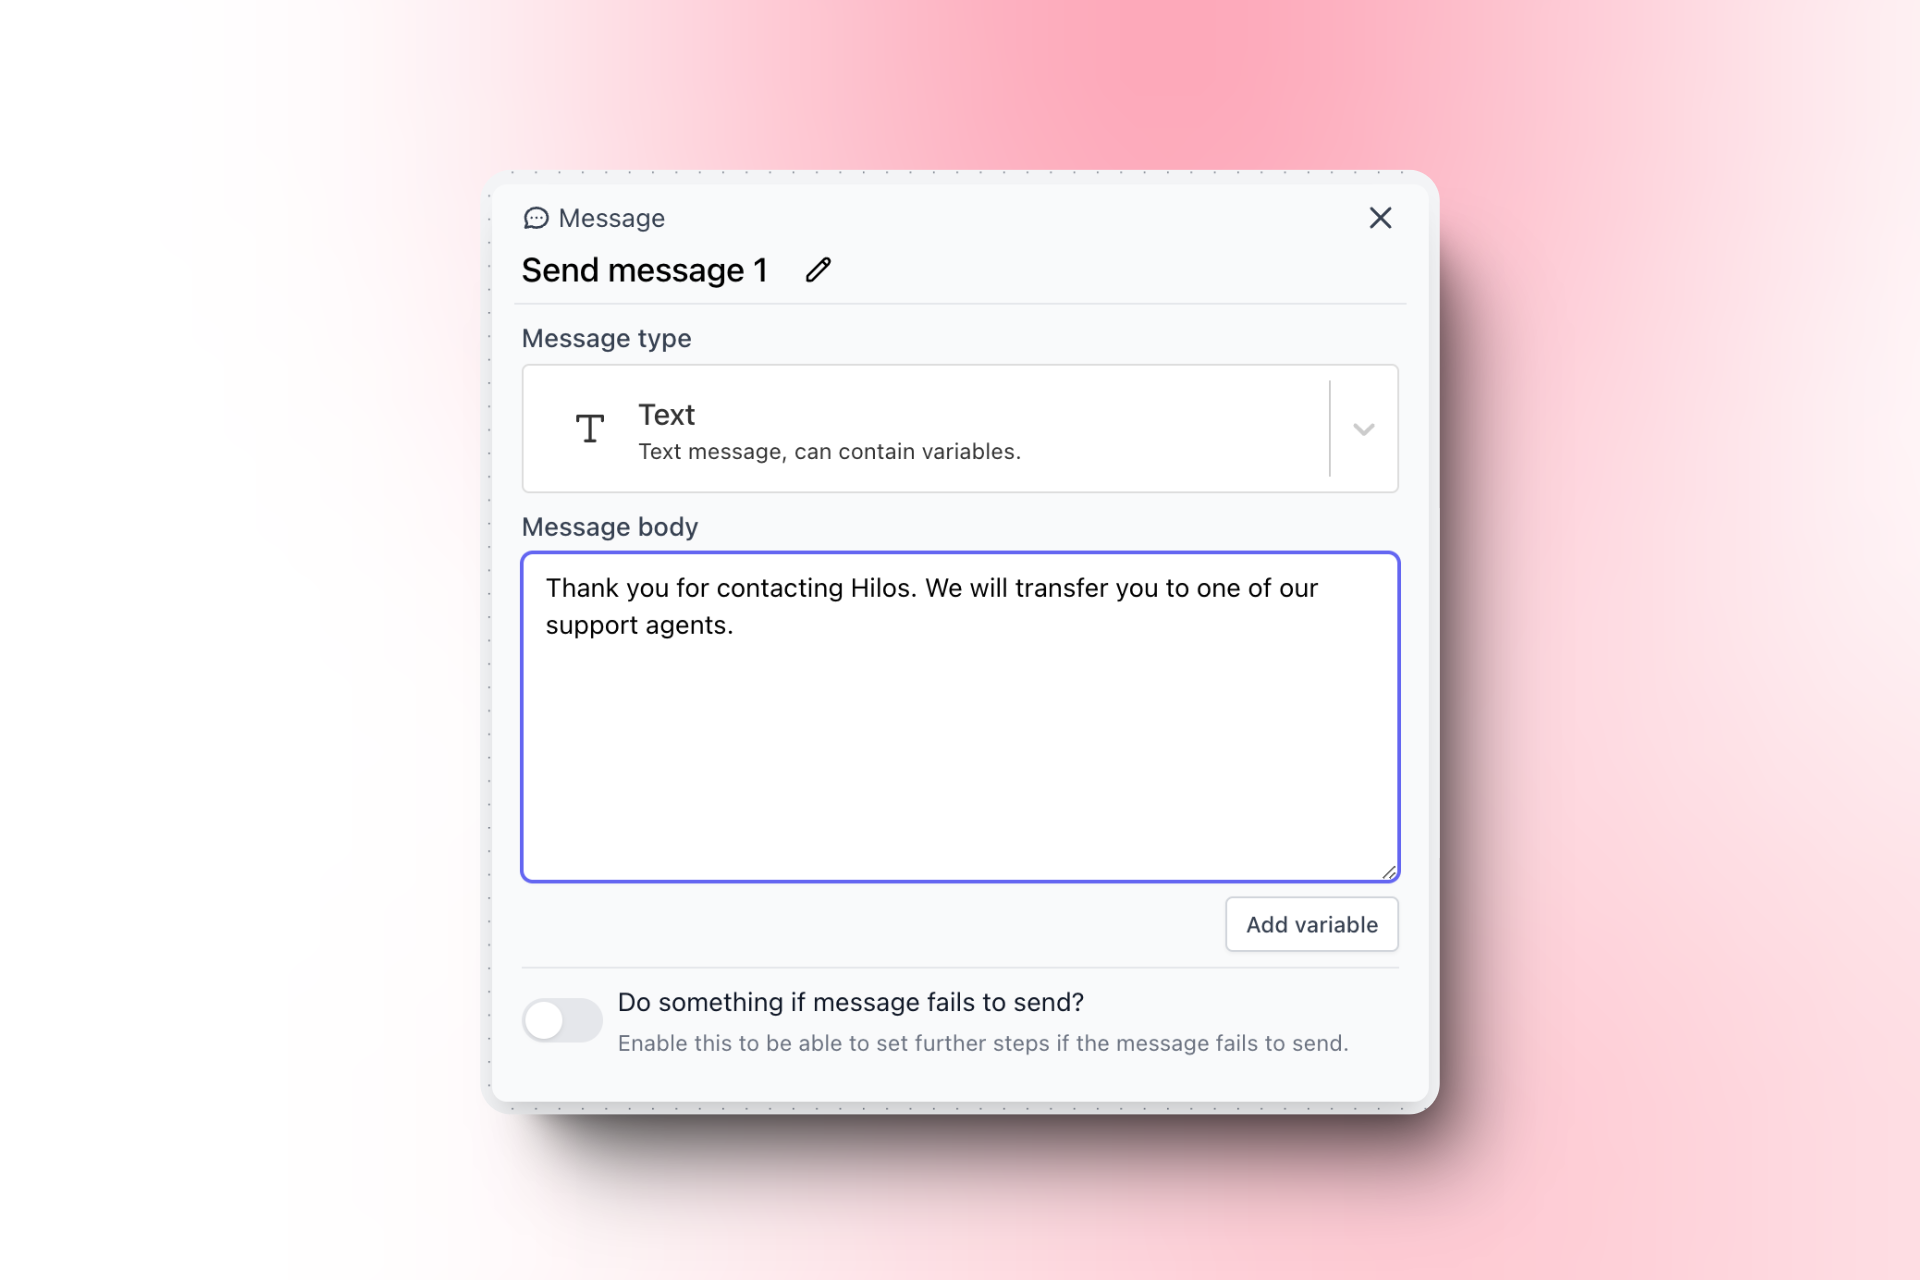
1
Add a Message Step
- Click on the
+button to add a new step. - Select “Message” from the list of step types.

2
Configure the Message
- In the message configuration, enter the text you want to send to the user. For example:
3
Add an Assign Team Step
To automatically assign your chats:
1
Add an Assign Team Step
- Click on the
+button to add another step. - Select “Assign Team” from the list of step types.
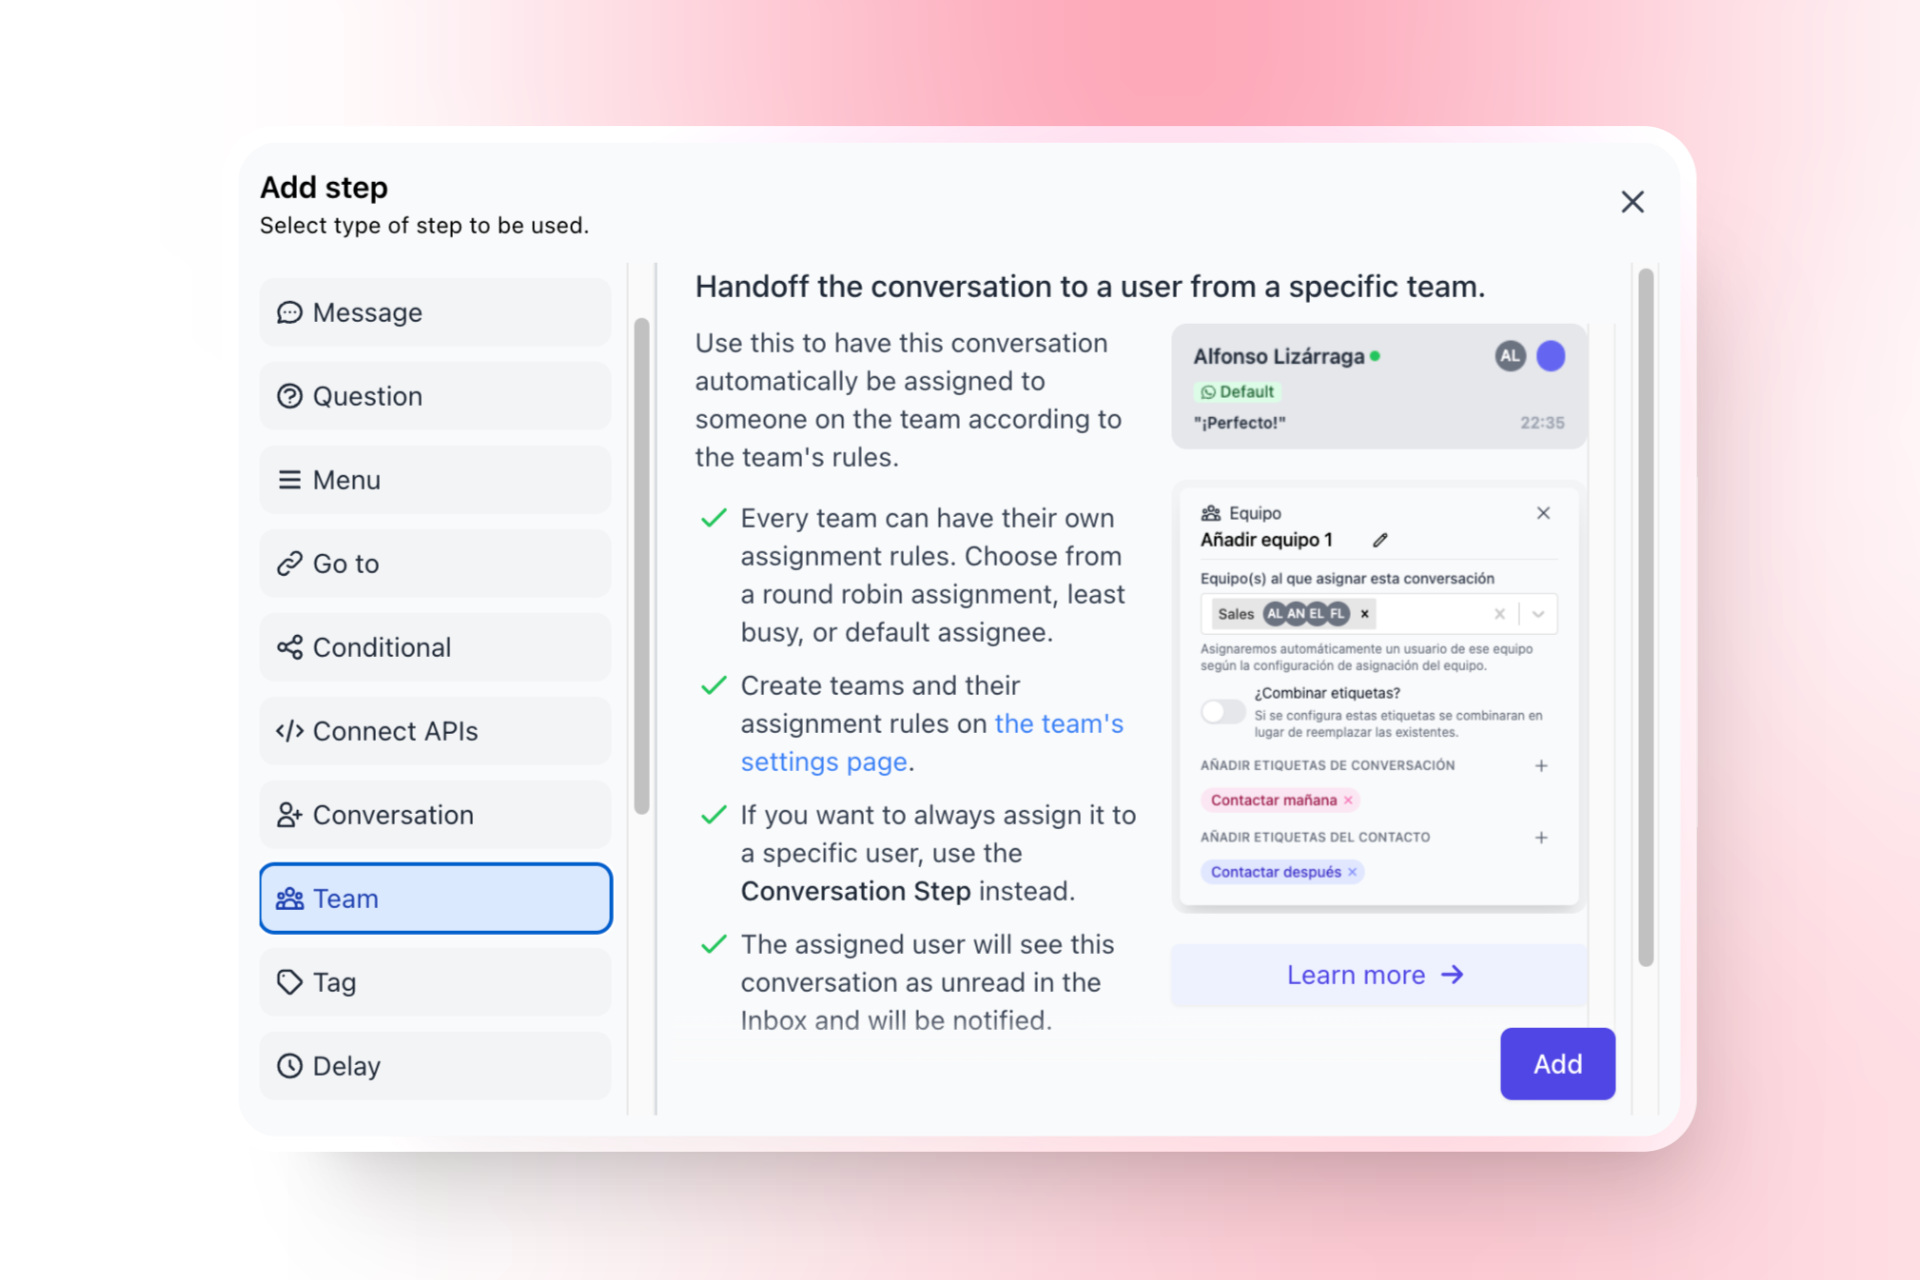
2
Configure the Assign Step
- Choose the support agent to which you want to assign the conversation.
- In the next guide “How to Create a Chatbot that Automatically Recognizes Your Clients” you learn about creating teams.
4
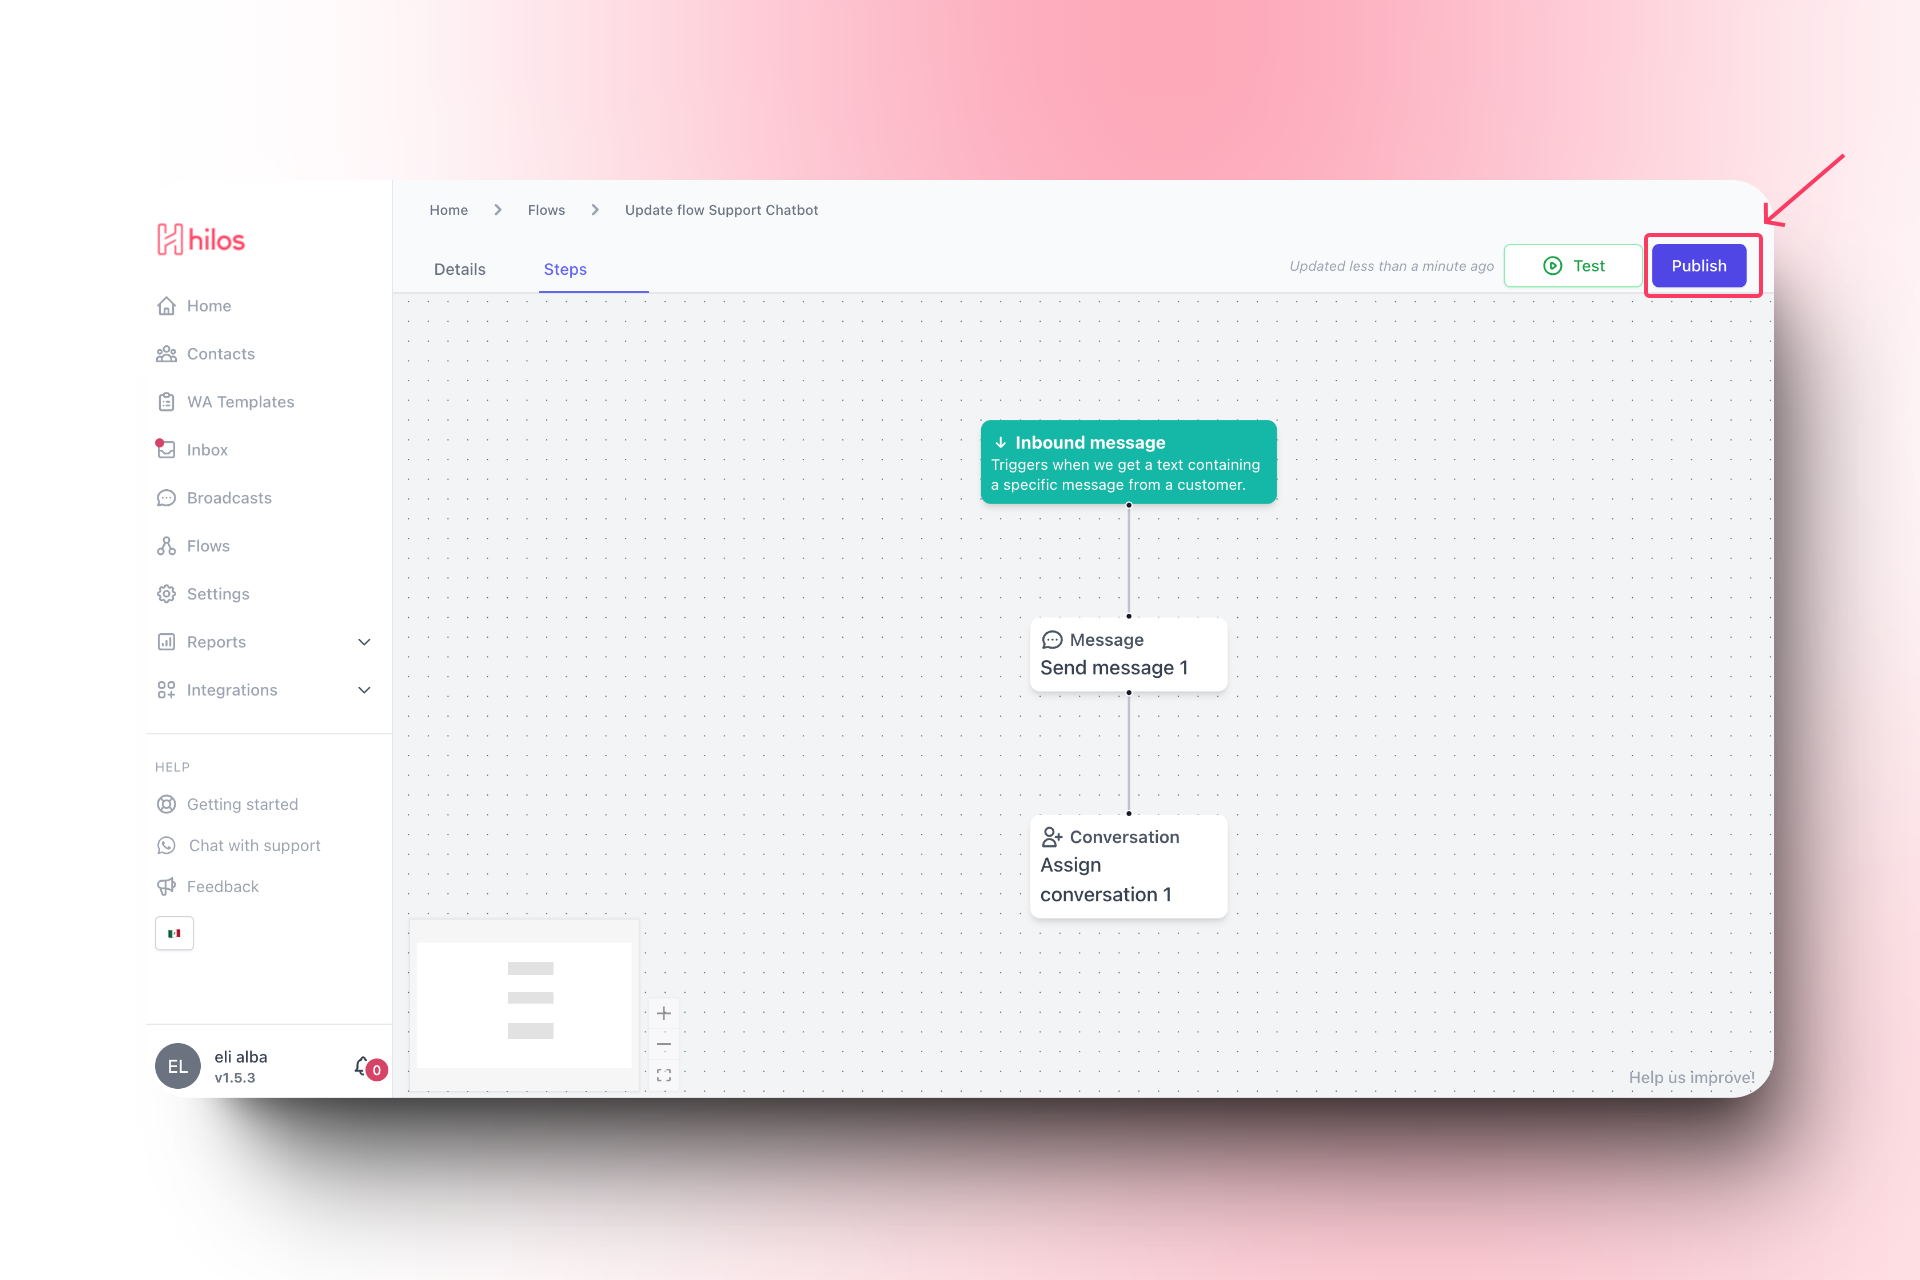
Save and Publish the Flow
- Click on the “Publish” button to make the flow active.
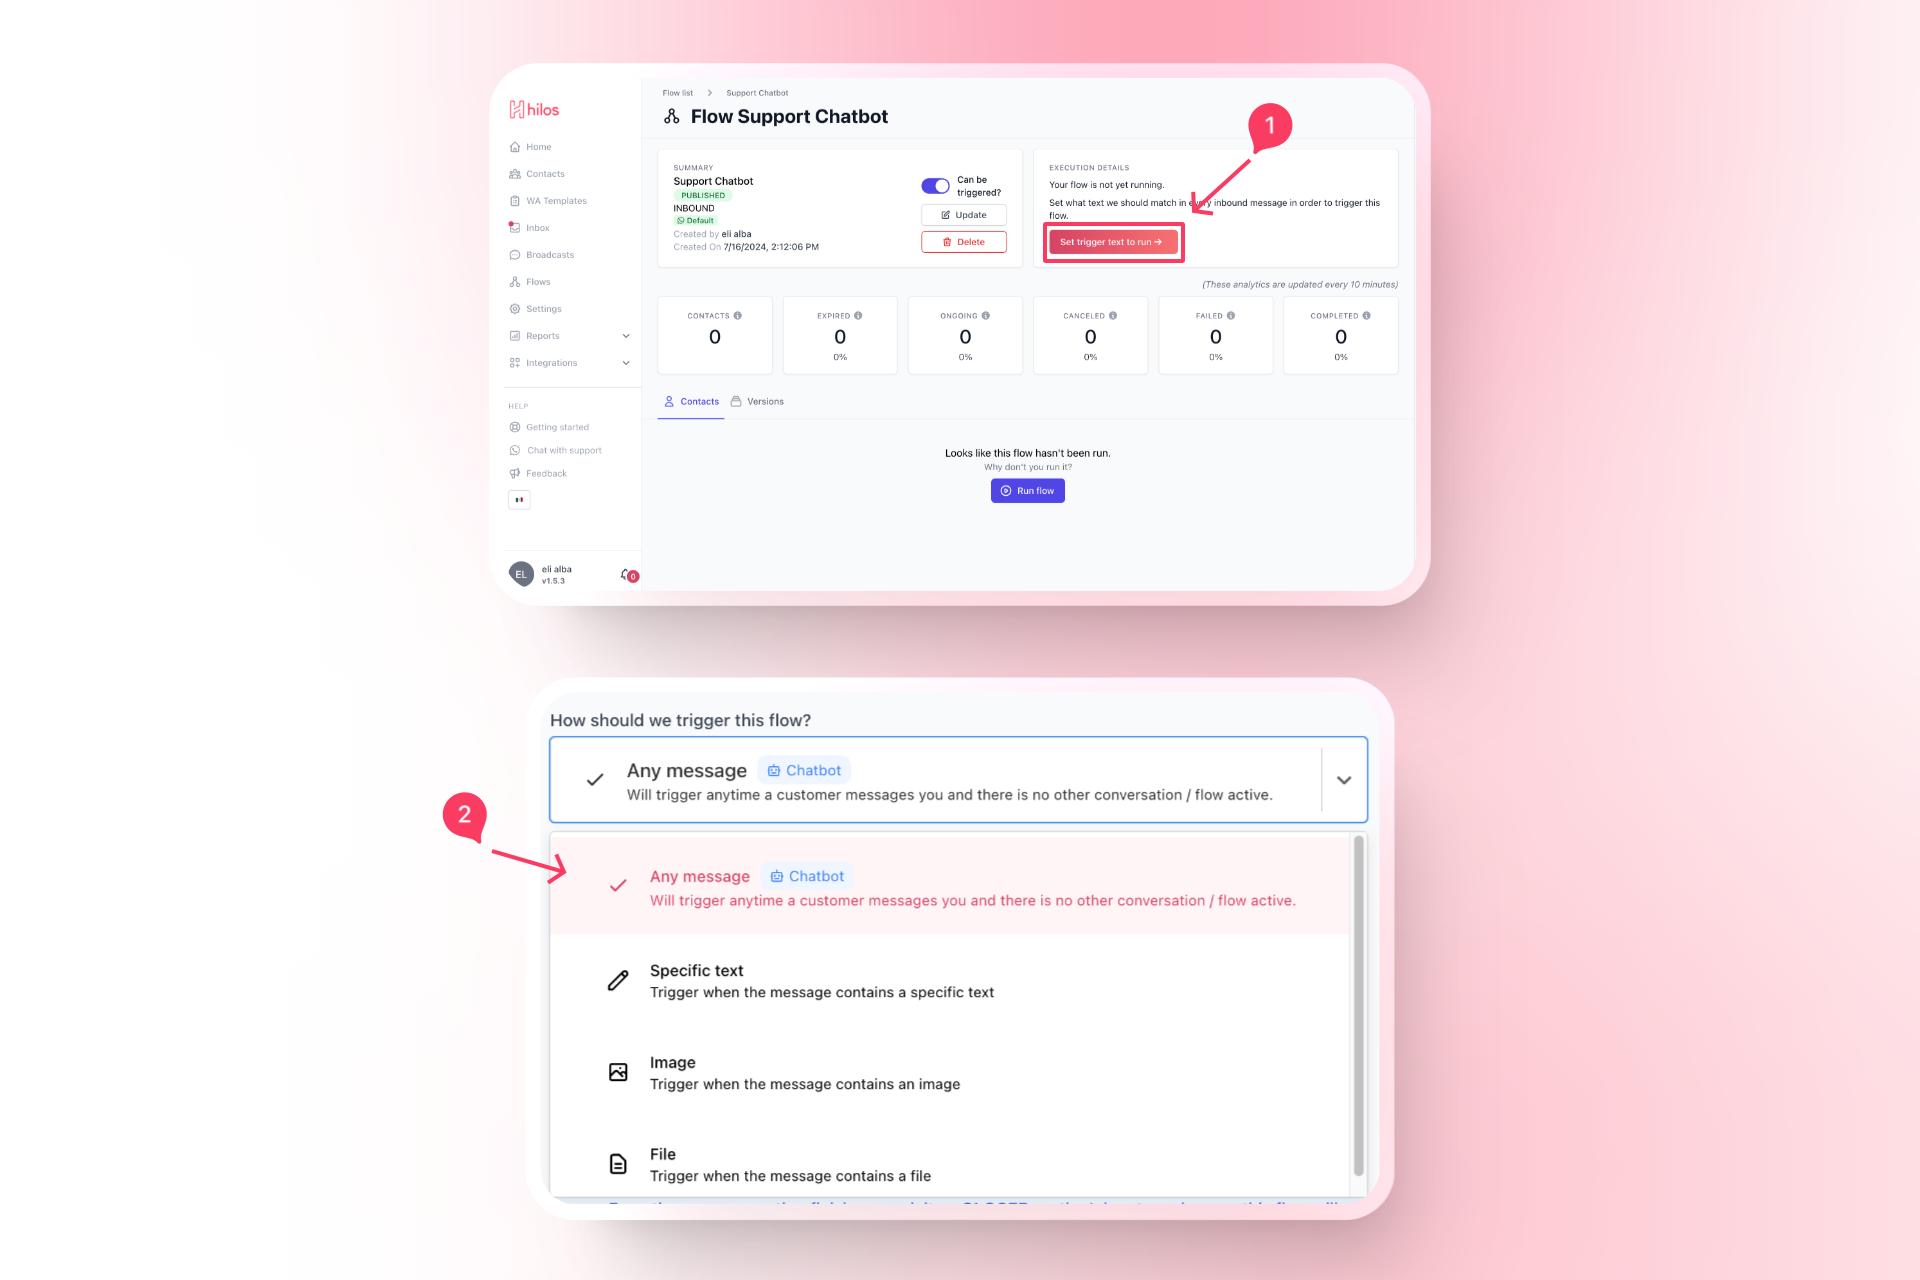
5
Set Up the Trigger
- In the flow editor, after publishing the flow you’ll be asked to select a trigger. Choose “Any incoming message” as the trigger.
Example Flow Structure
Your flow should now have the following structure:1
Trigger
Any incoming message.
2
Message Step
Sends a message to the user:Thank you for contacting Hilos. We will transfer you to one of our support agents.
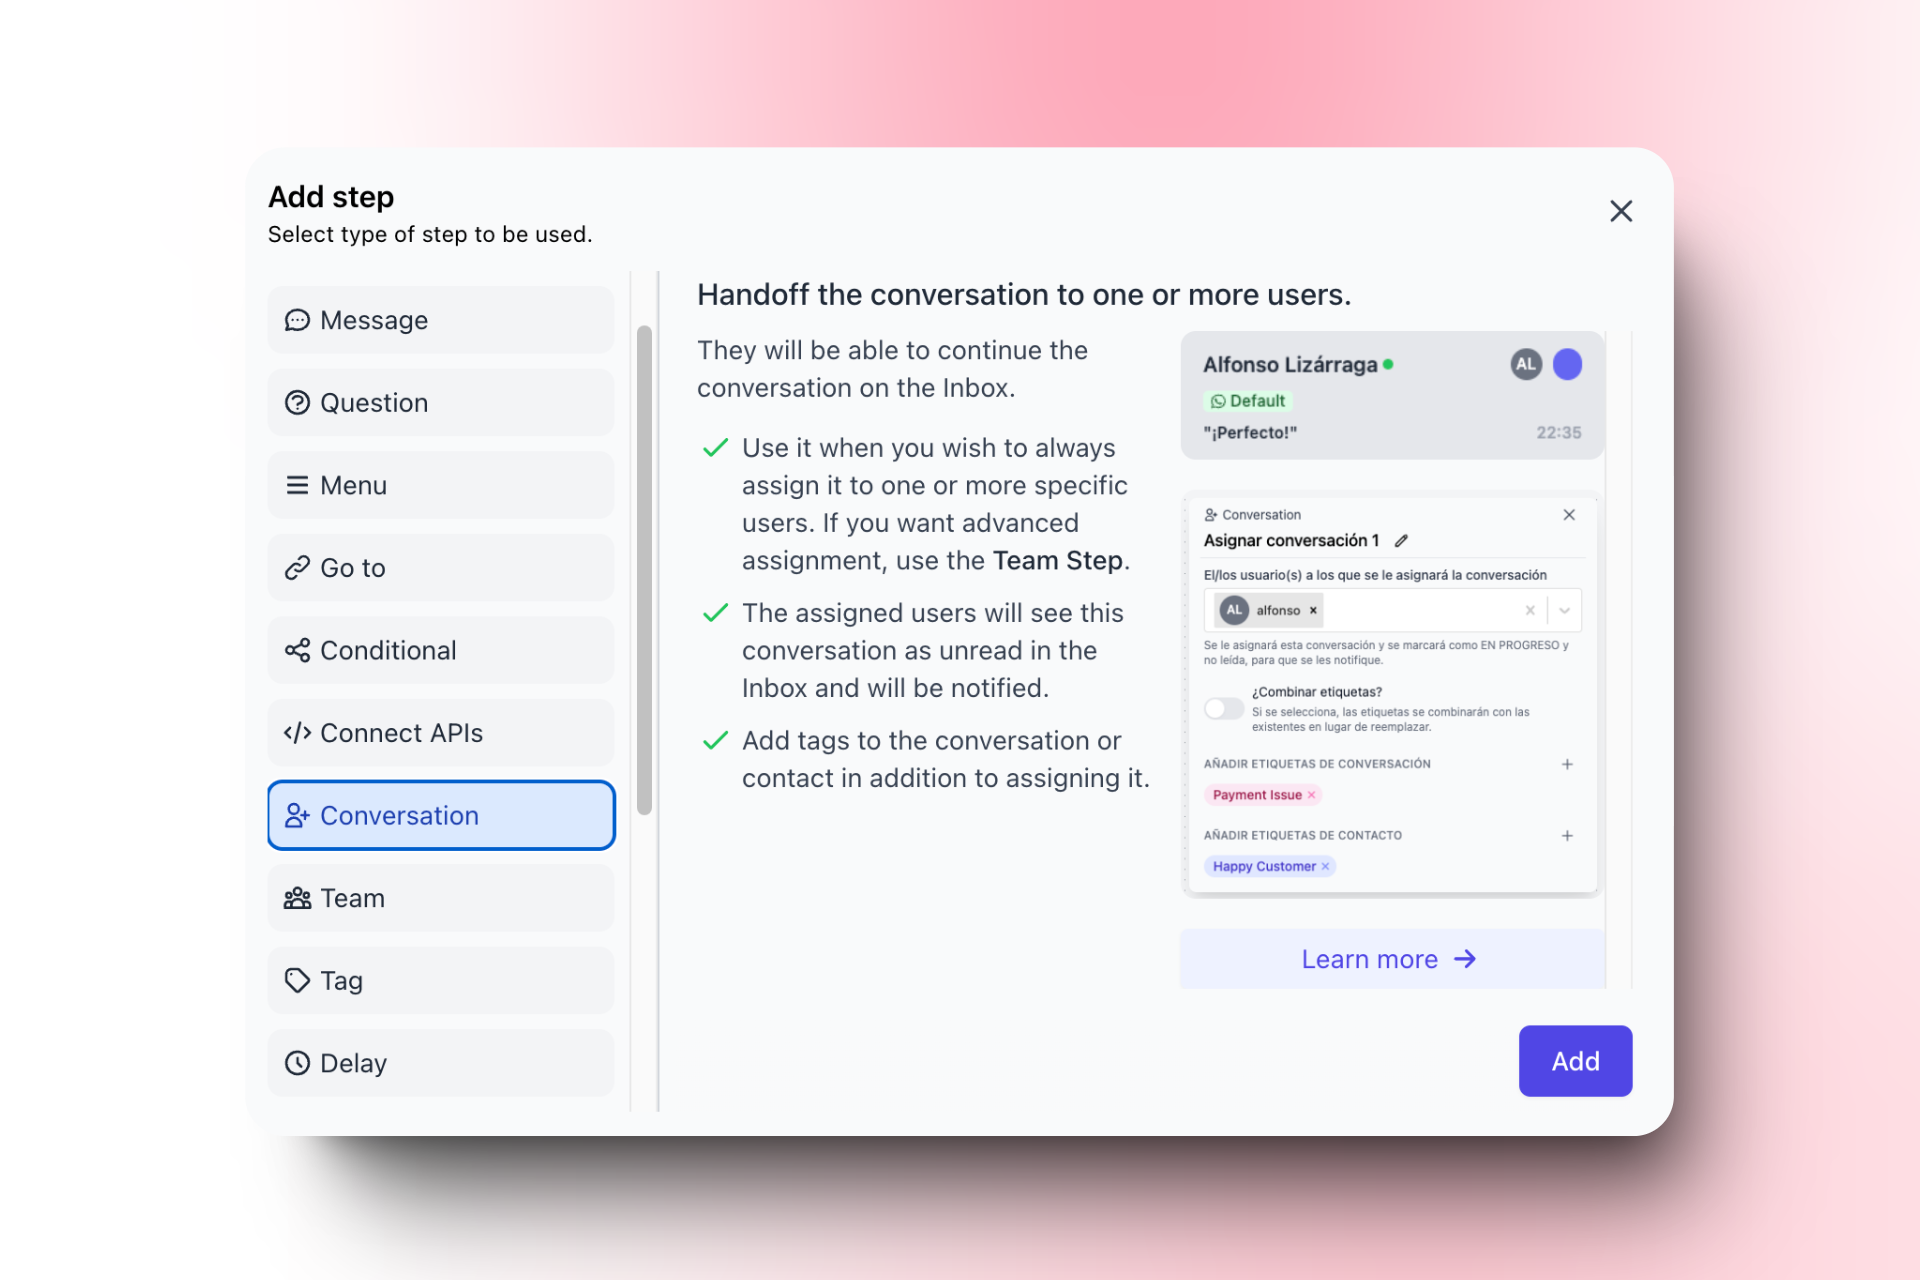
3
Conversation Step
Assigns the conversation to a support agent.
Final Steps
1
Test the Flow
- Send a test message to your support number to ensure the flow triggers correctly and the message is sent.
2
Monitor and Optimize
- Monitor the performance of your support chatbot and make adjustments as needed to improve response times and customer satisfaction.