Step-by-Step Guide to Creating a Client-Recognizing Chatbot
1
Navigate to flows
- Go to Flows in your Hilos account.
- Click on
+ Flow Editorto create a new flow.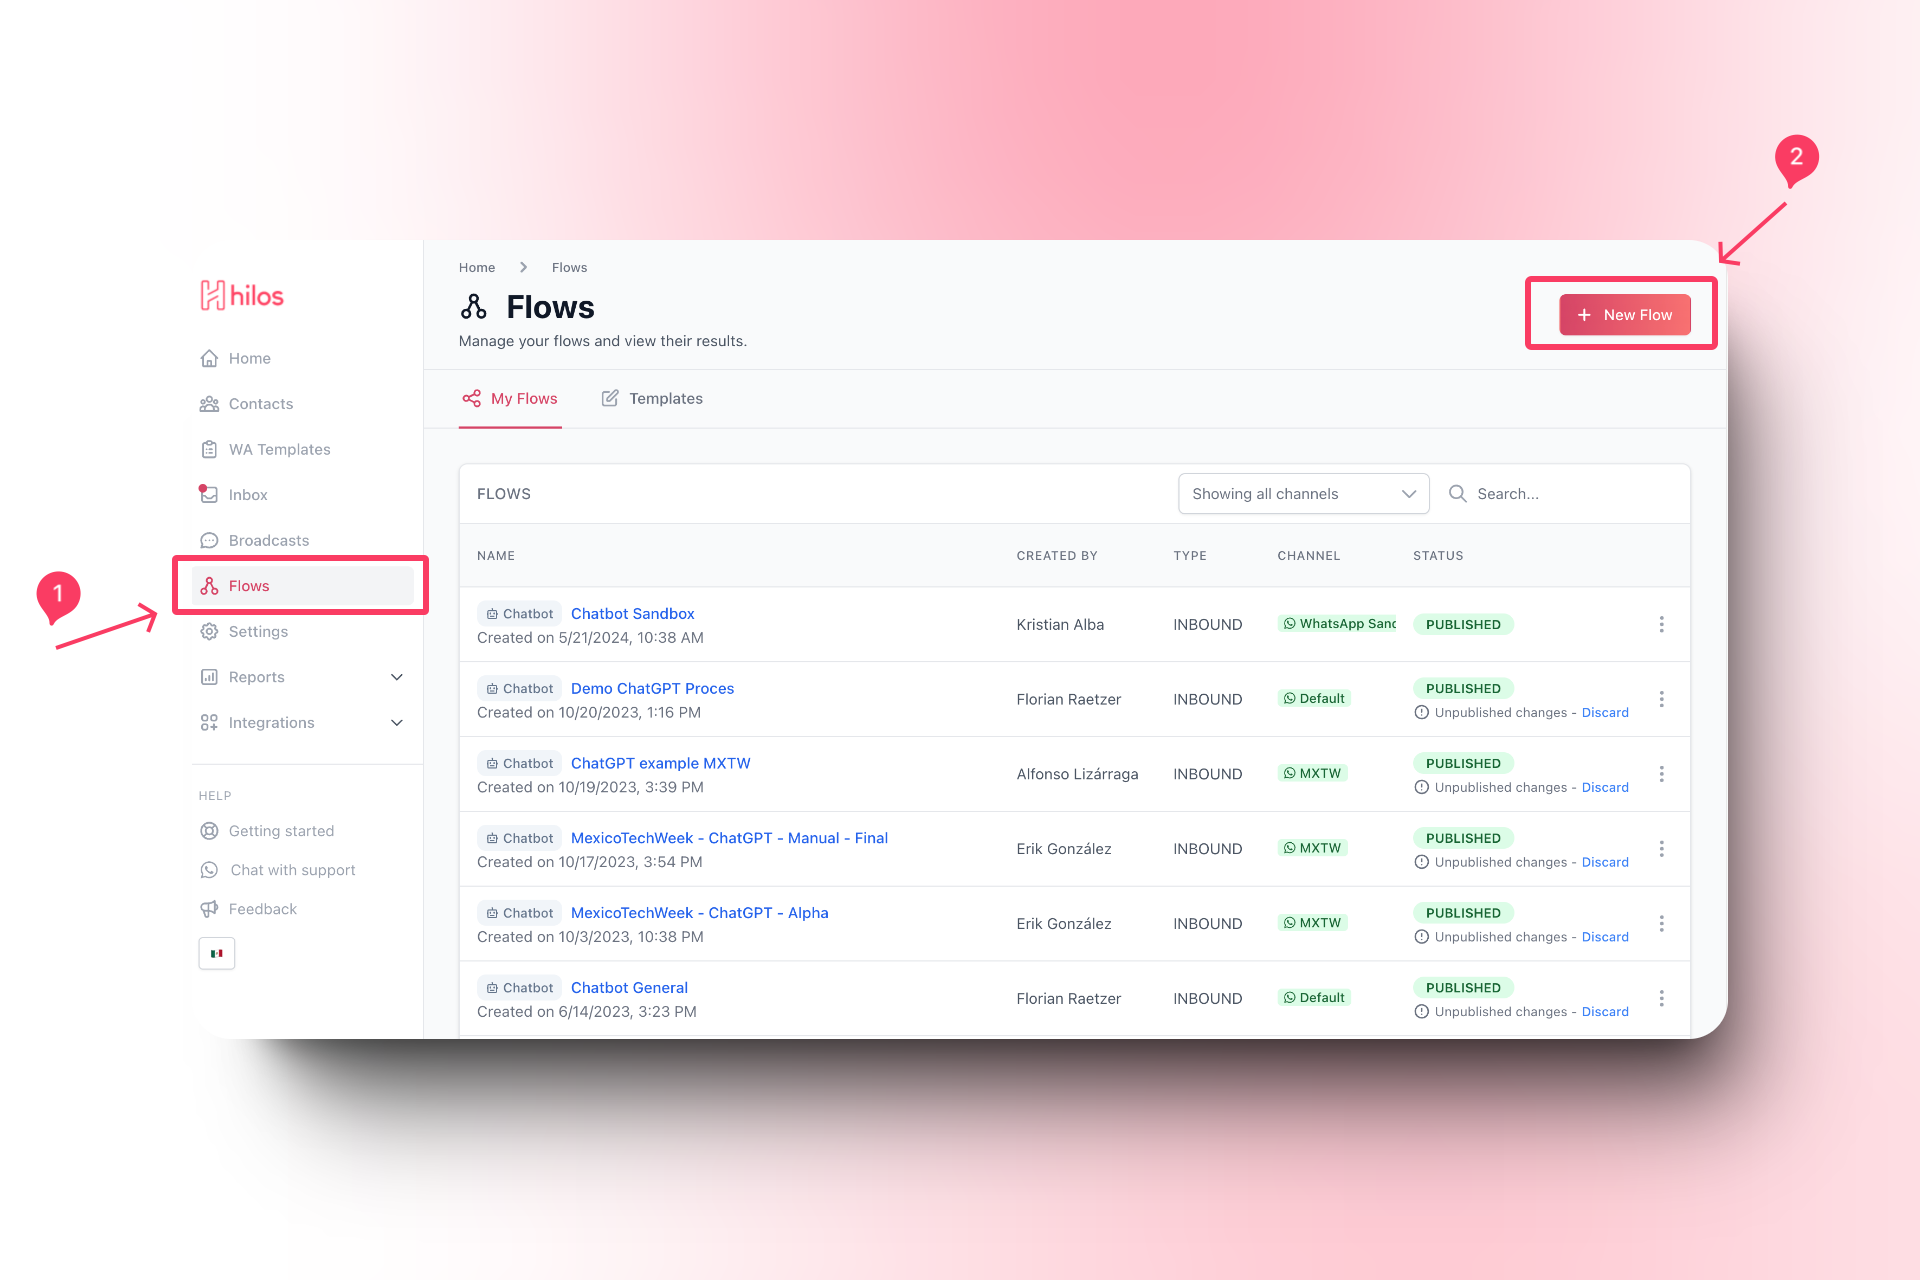
2
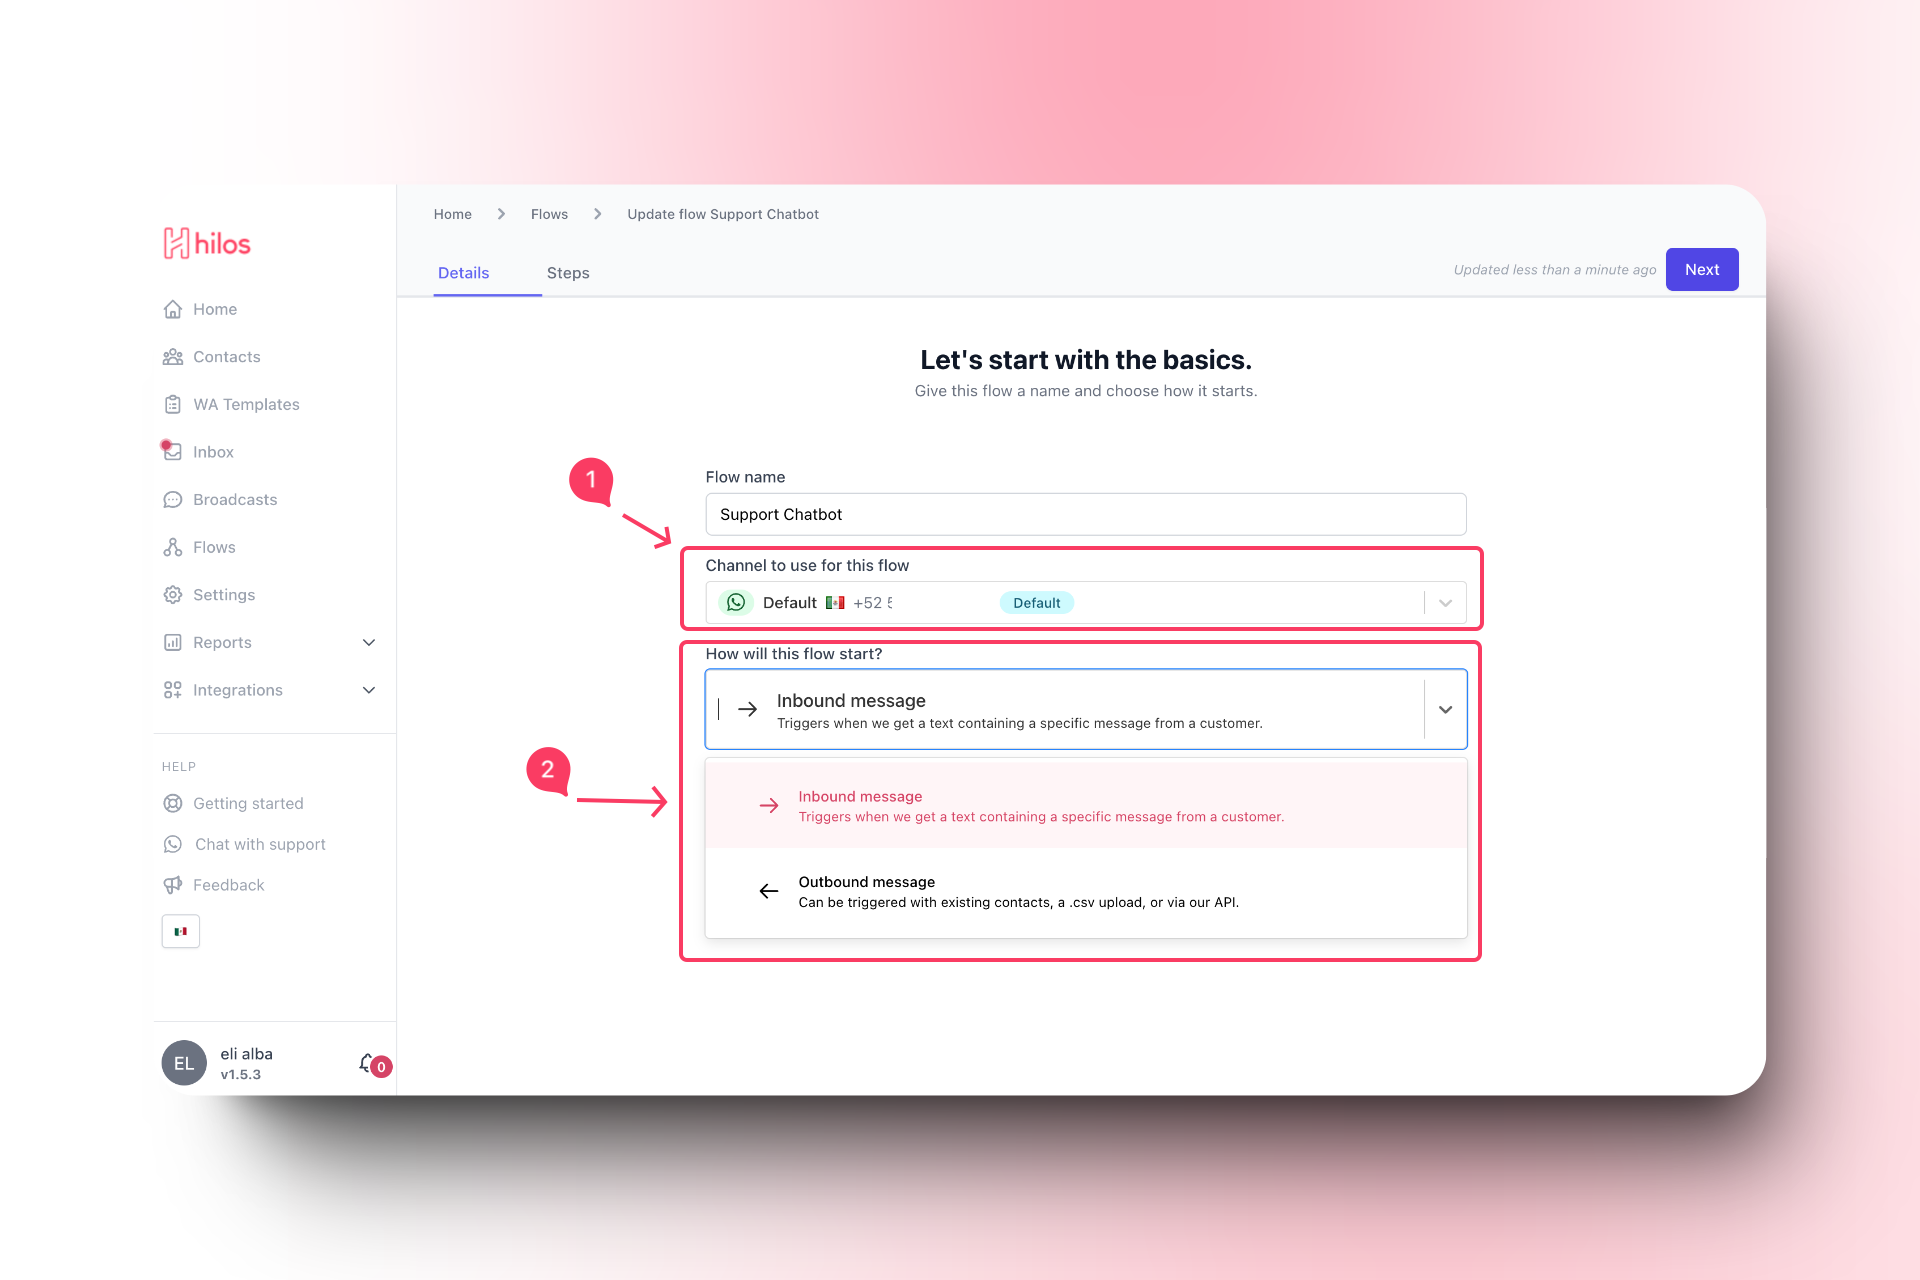
Edit your flow details
- Give your flow a name that reflects its purpose, such as “Client Recognition Chatbot”.
- Choose the appropriate channel (if you have more than one channel).
- Select “Inbound” as the flow type.
3
Set up your flow
1
Add your conditional step at the start
- Click on the
+button to add a new step. - Select “Conditional” from the list of step types.

- Set the condition to check if
contact.accountis empty. - This will create two branches:
Path 1(if the account property is empty) andElse(if the account property is not empty).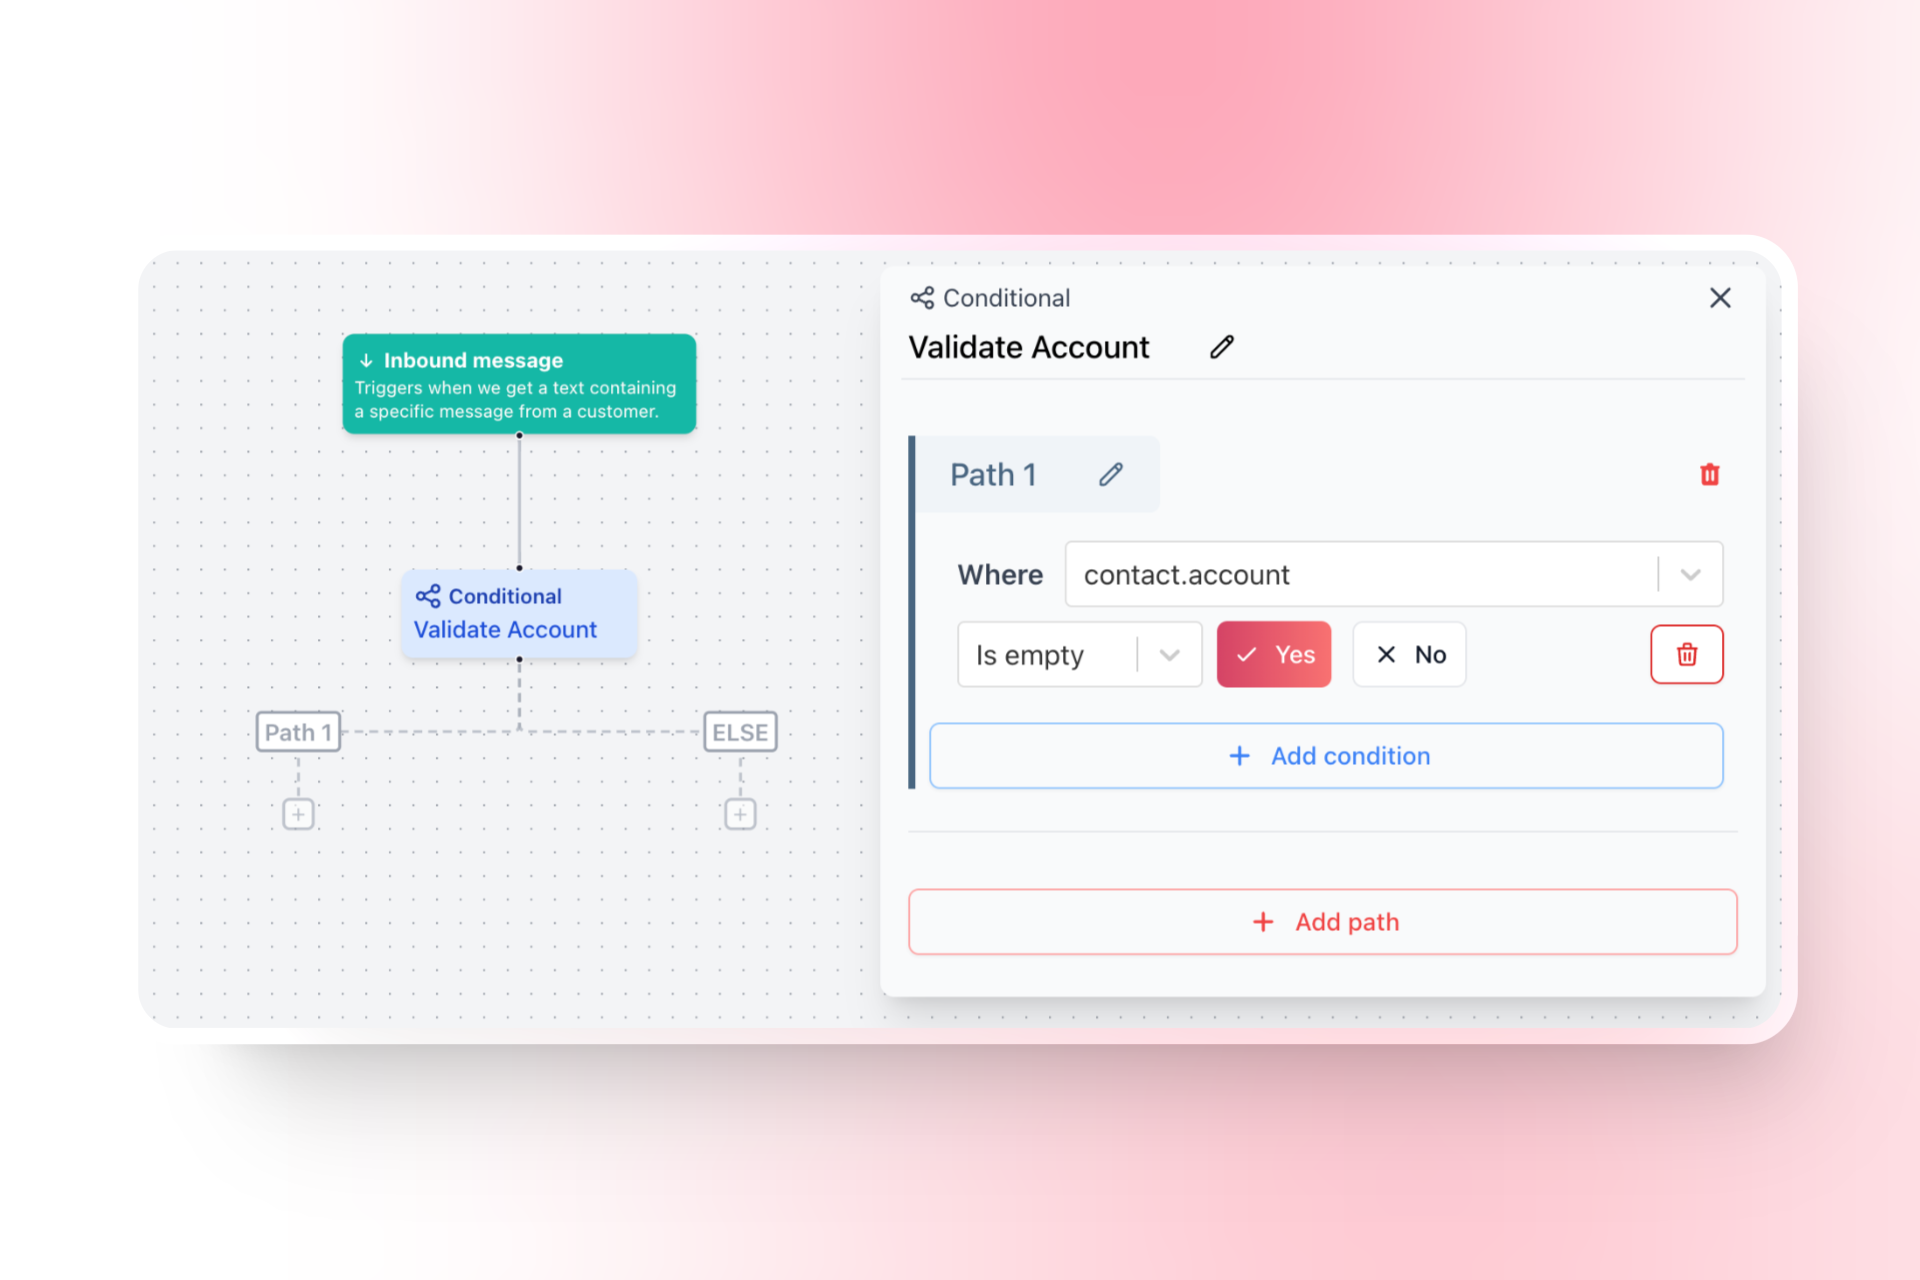
2
Setting up your Path 1 (true) branch
3
Setting up your False branch
- Add a Go To Step to the False Branch:
- Click on the
+button on theFalsebranch. - Select “Go To” from the list of step types.
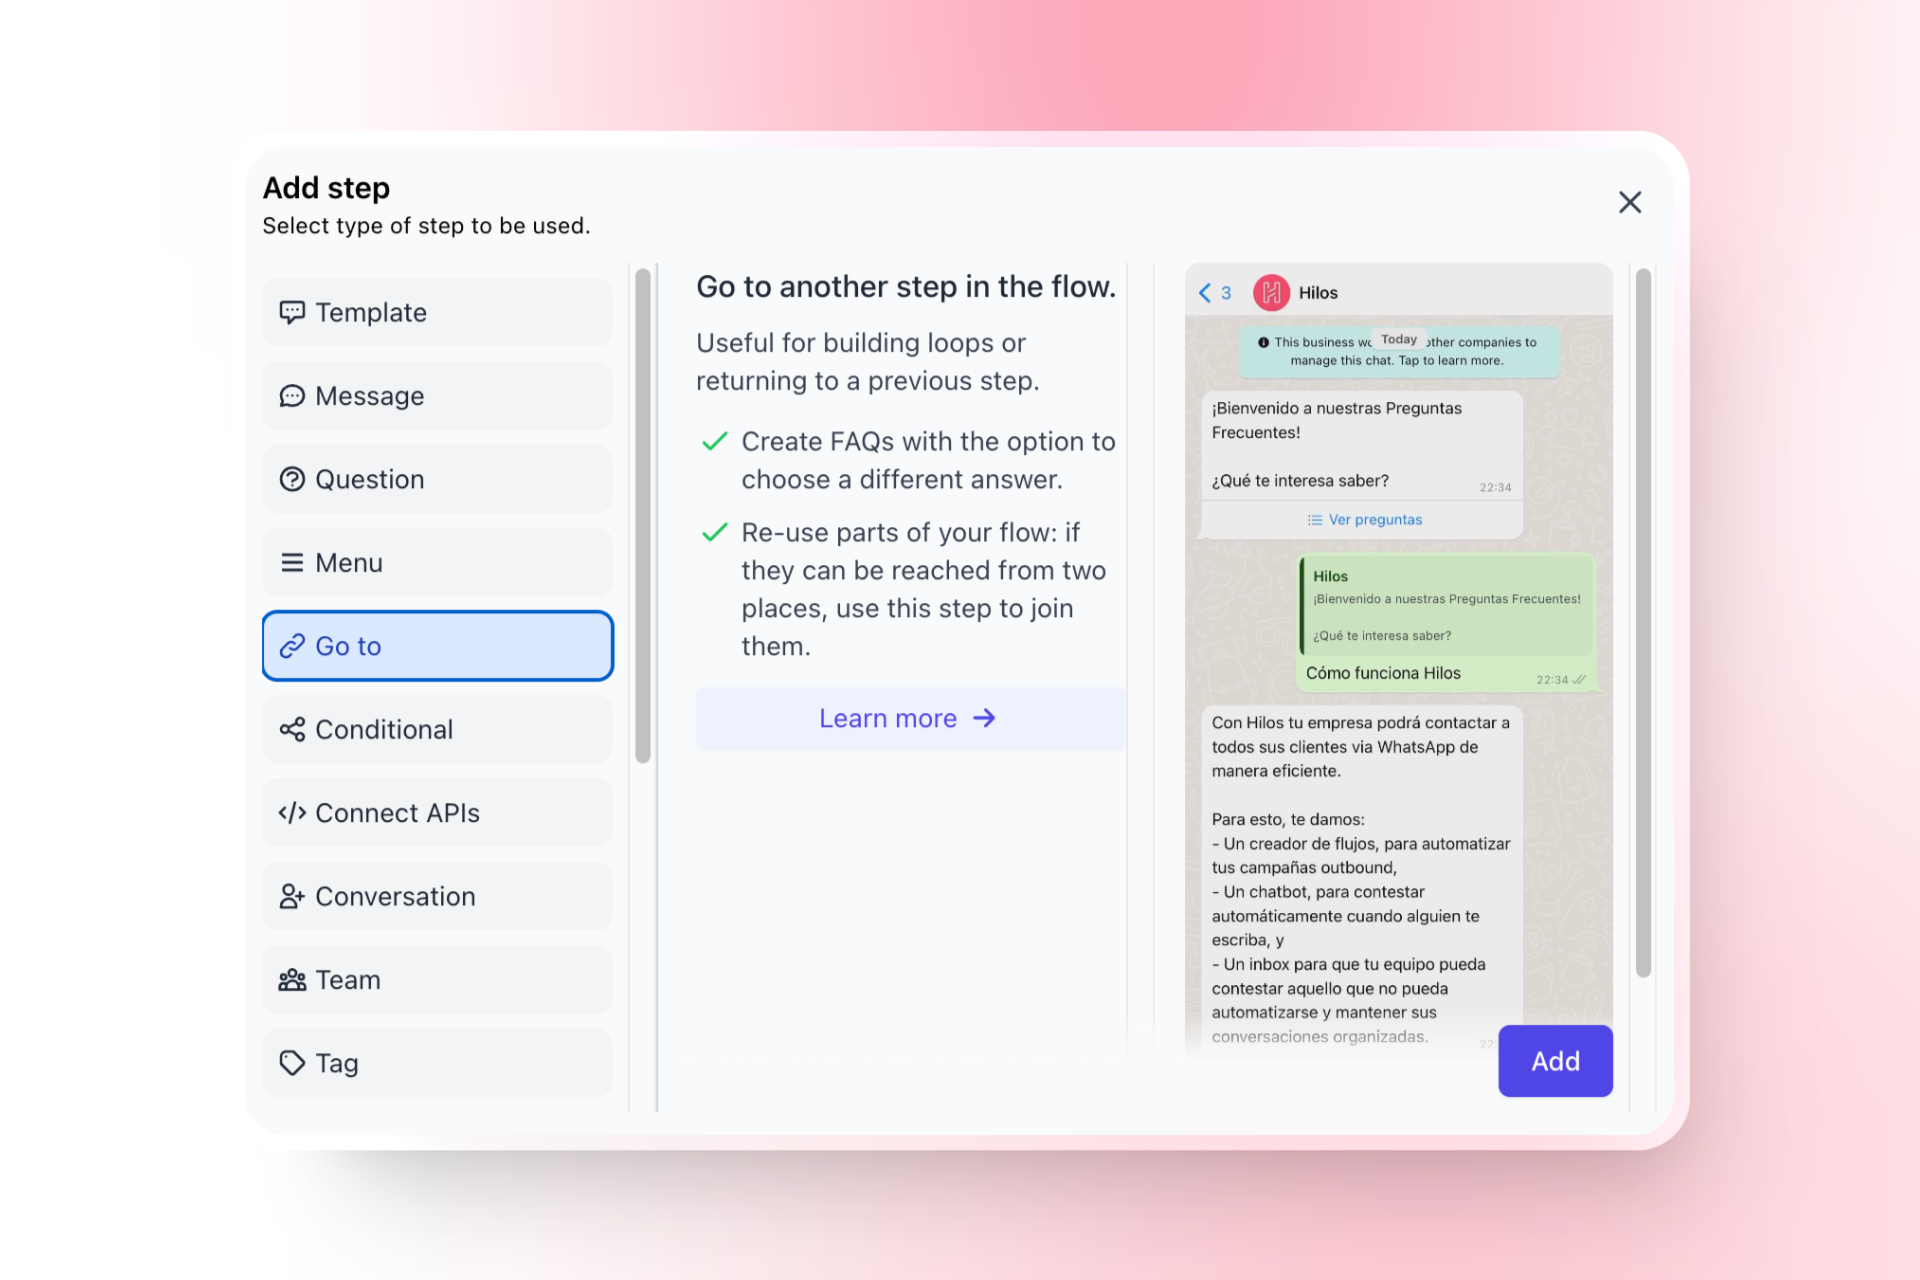
- Configure the Go To Step:
- Set the step to go directly to the question that asks how you may help the user today.

4
Publish your flow
- Click on the “Publish” button to make the flow active and set up a trigger for it.
Example Flow Structure
Your flow should now have the following structure:- Conditional Step:
- Check if
contact.accountis empty. - True Branch:
- Question Step: Ask for the account name.
- Update Contact Step: Save the account name to a custom property.
- Question Step: Ask how you may help the user today.
- False Branch:
- Go To Step: Jump to the question that asks how you may help the user today.
- Check if
Final Steps
-
Test the Flow:
- Send a test message to your support number to ensure the flow triggers correctly and the account name is saved.
-
Monitor and Optimize:
- Monitor the performance of your chatbot and make adjustments as needed to improve response times and customer satisfaction.